Azure AD SSO
You can operate a single sign on (SSO) set-up between your Corda services and Azure Active Directory. This means that any authorised users who need to access your Corda network services can use their Azure AD credentials to stay logged in.
To set up SSO with Azure AD, you need to:
- Configure your Azure AD using the Azure online console.
- Configure your Auth Service.
- If you use the CENM Command-line Interface Tool, you also need to configure Azure AD to enable commands.
Azure console set up guide

You must use the Azure AD console to complete the Auth Service configuration. To add and configure your Corda services on the Azure console:
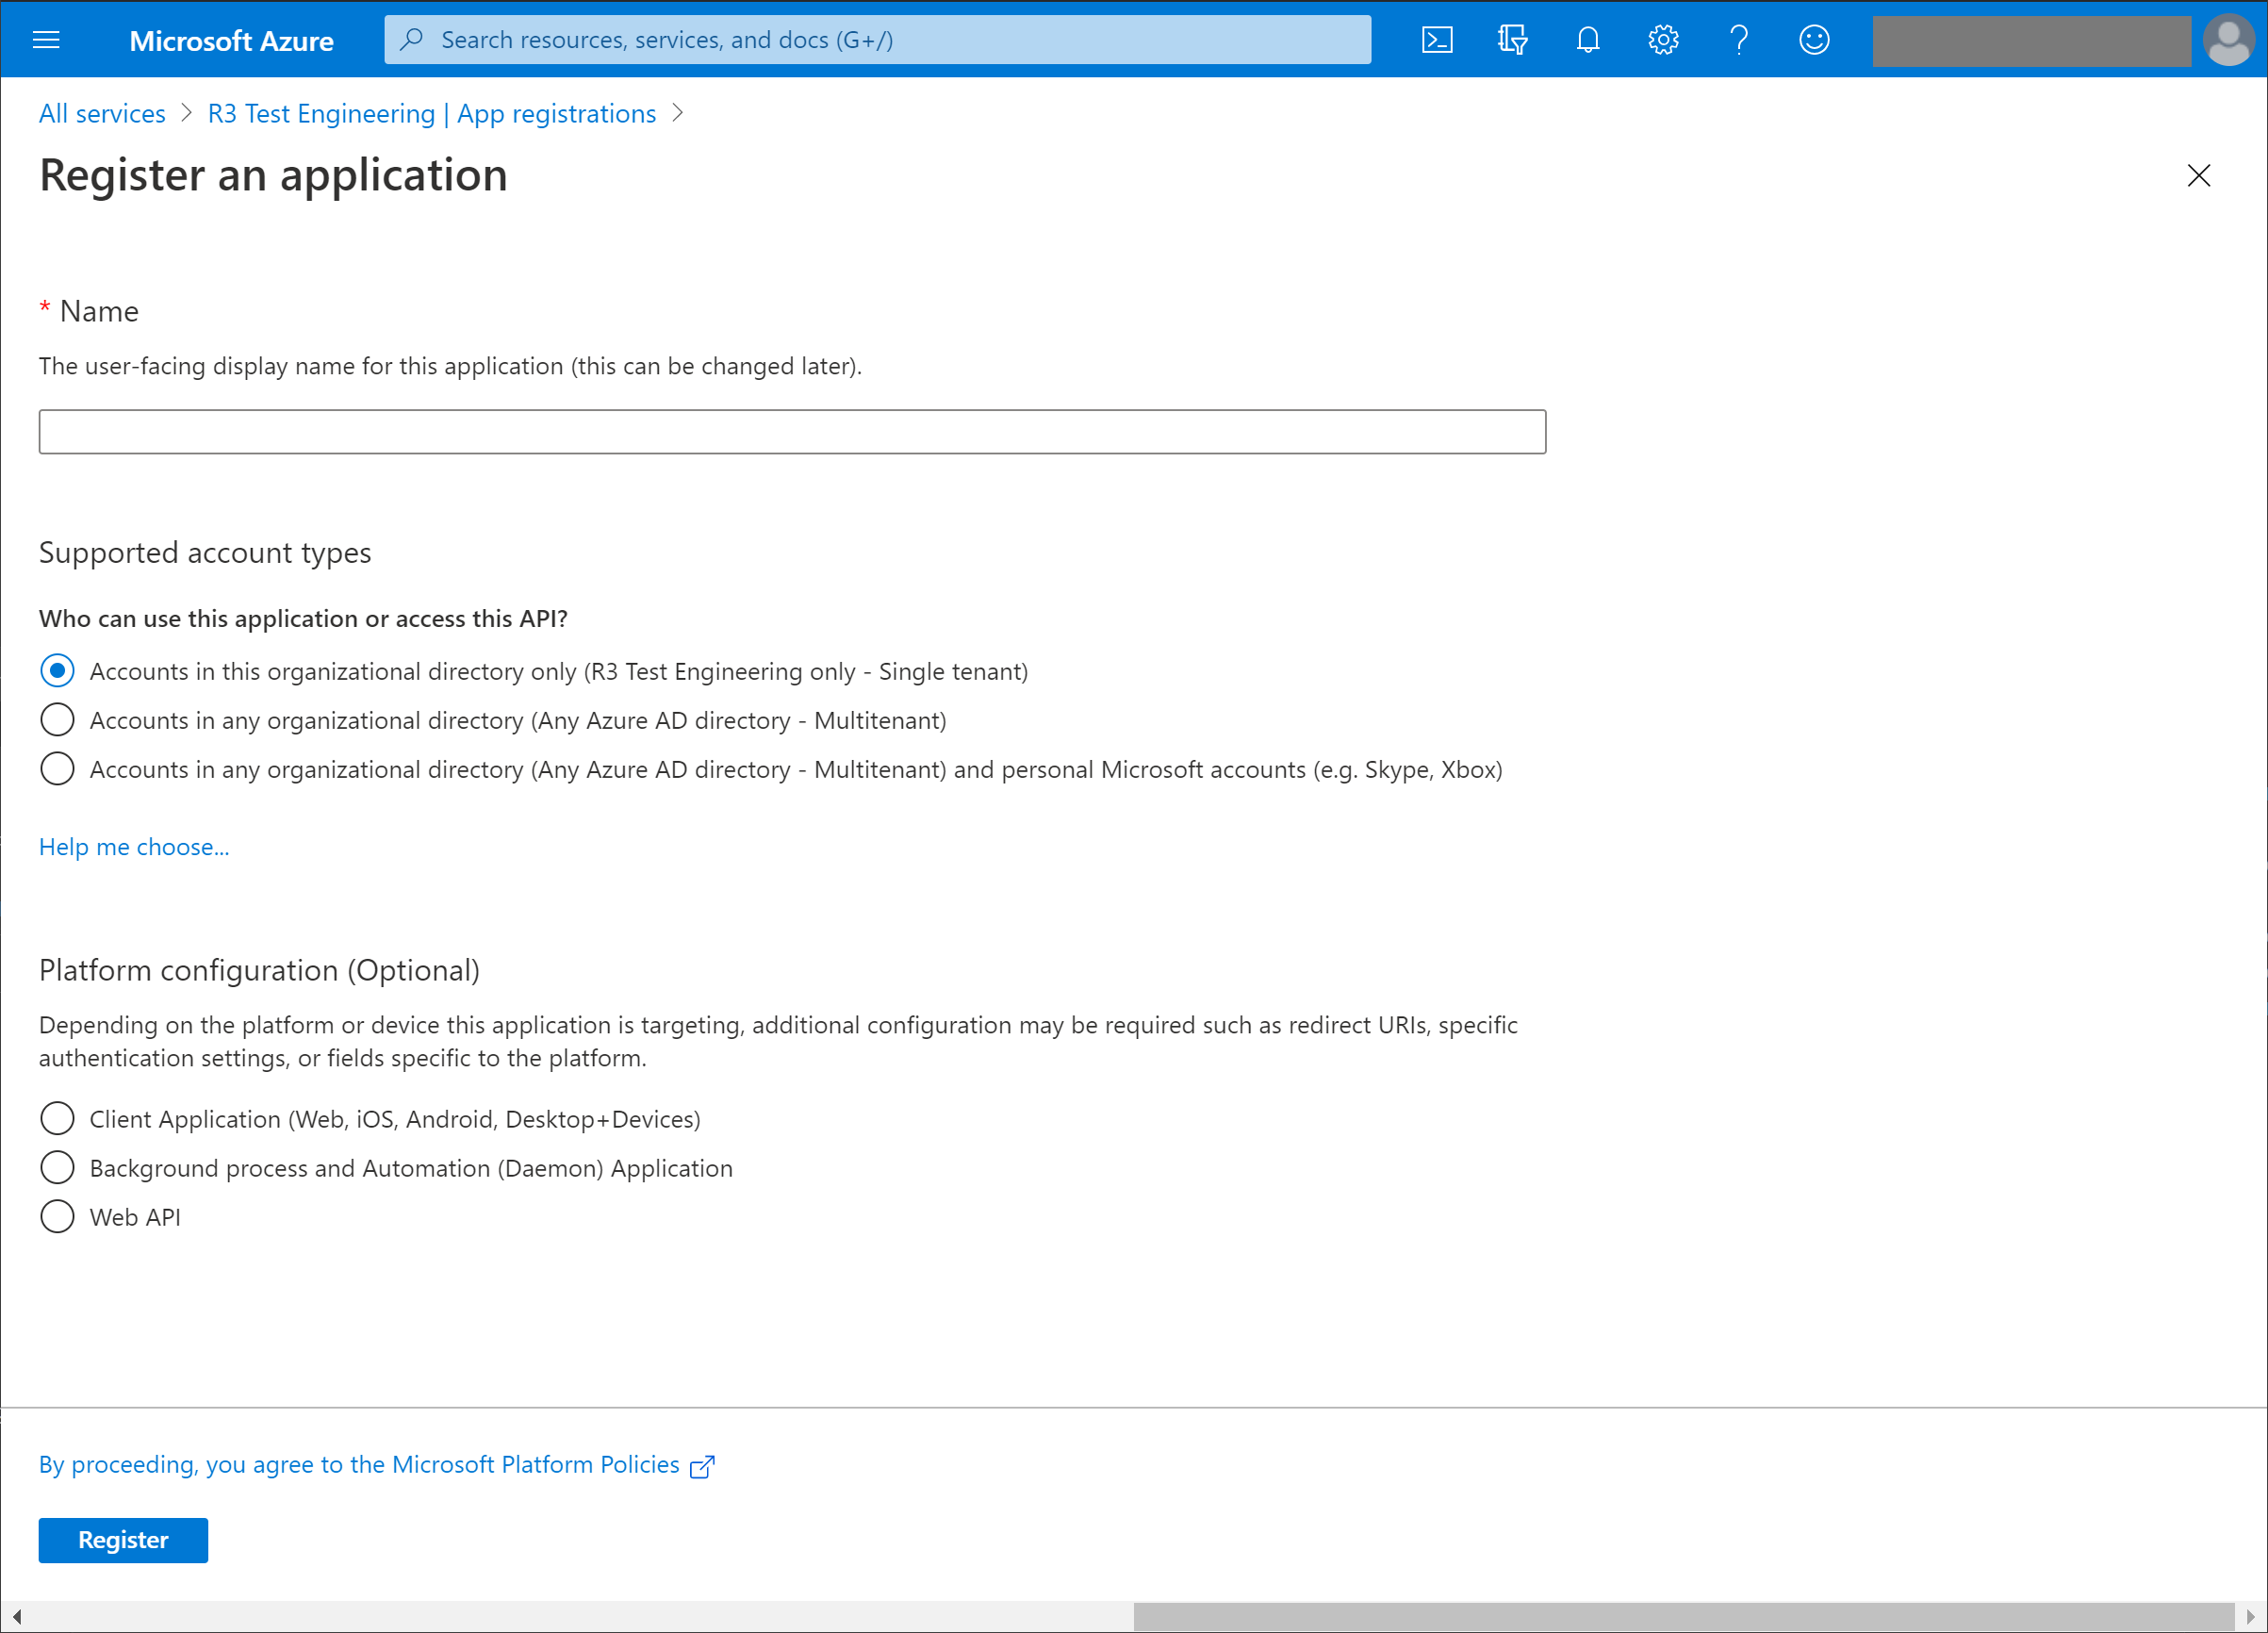
Navigate to the App registration screen in the Azure AD console.
Add a new app registration to represent your Corda service.
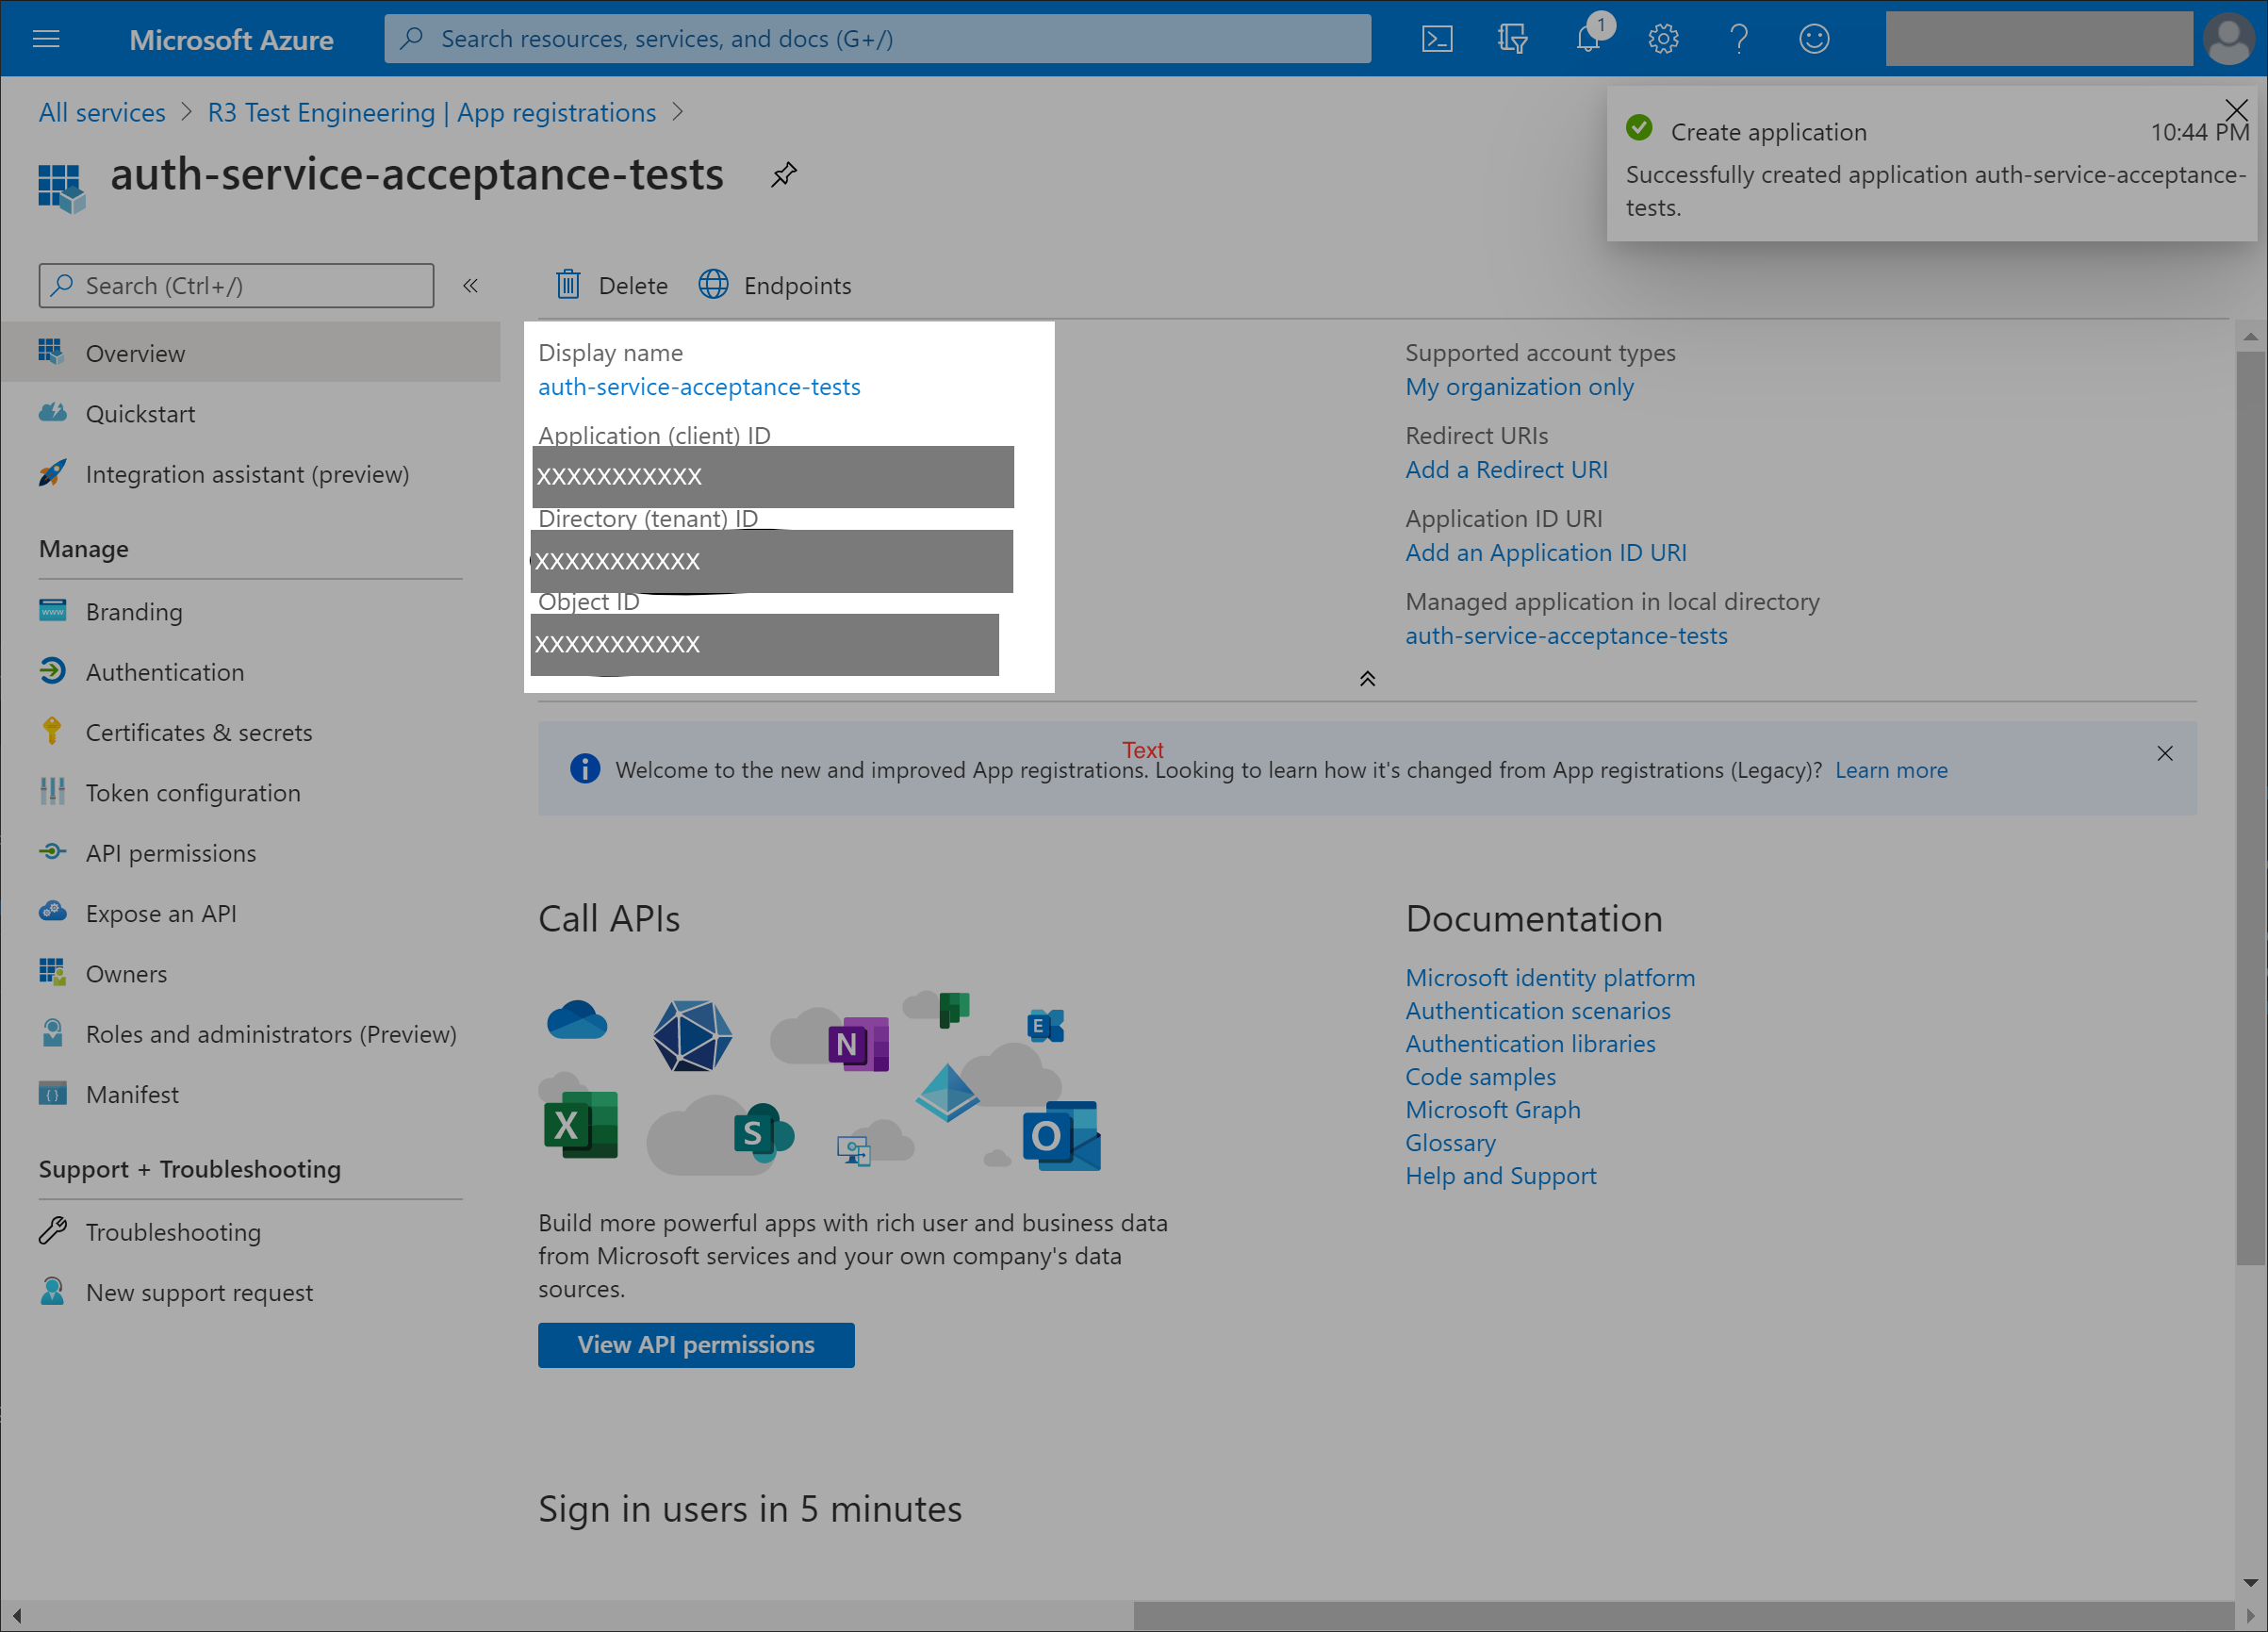
- Record the Application (client) ID, Directory (tenant) ID, and Object ID. You will need these when you configure the Auth Service.
Set authentication to ensure only accounts in this directory can use the app.
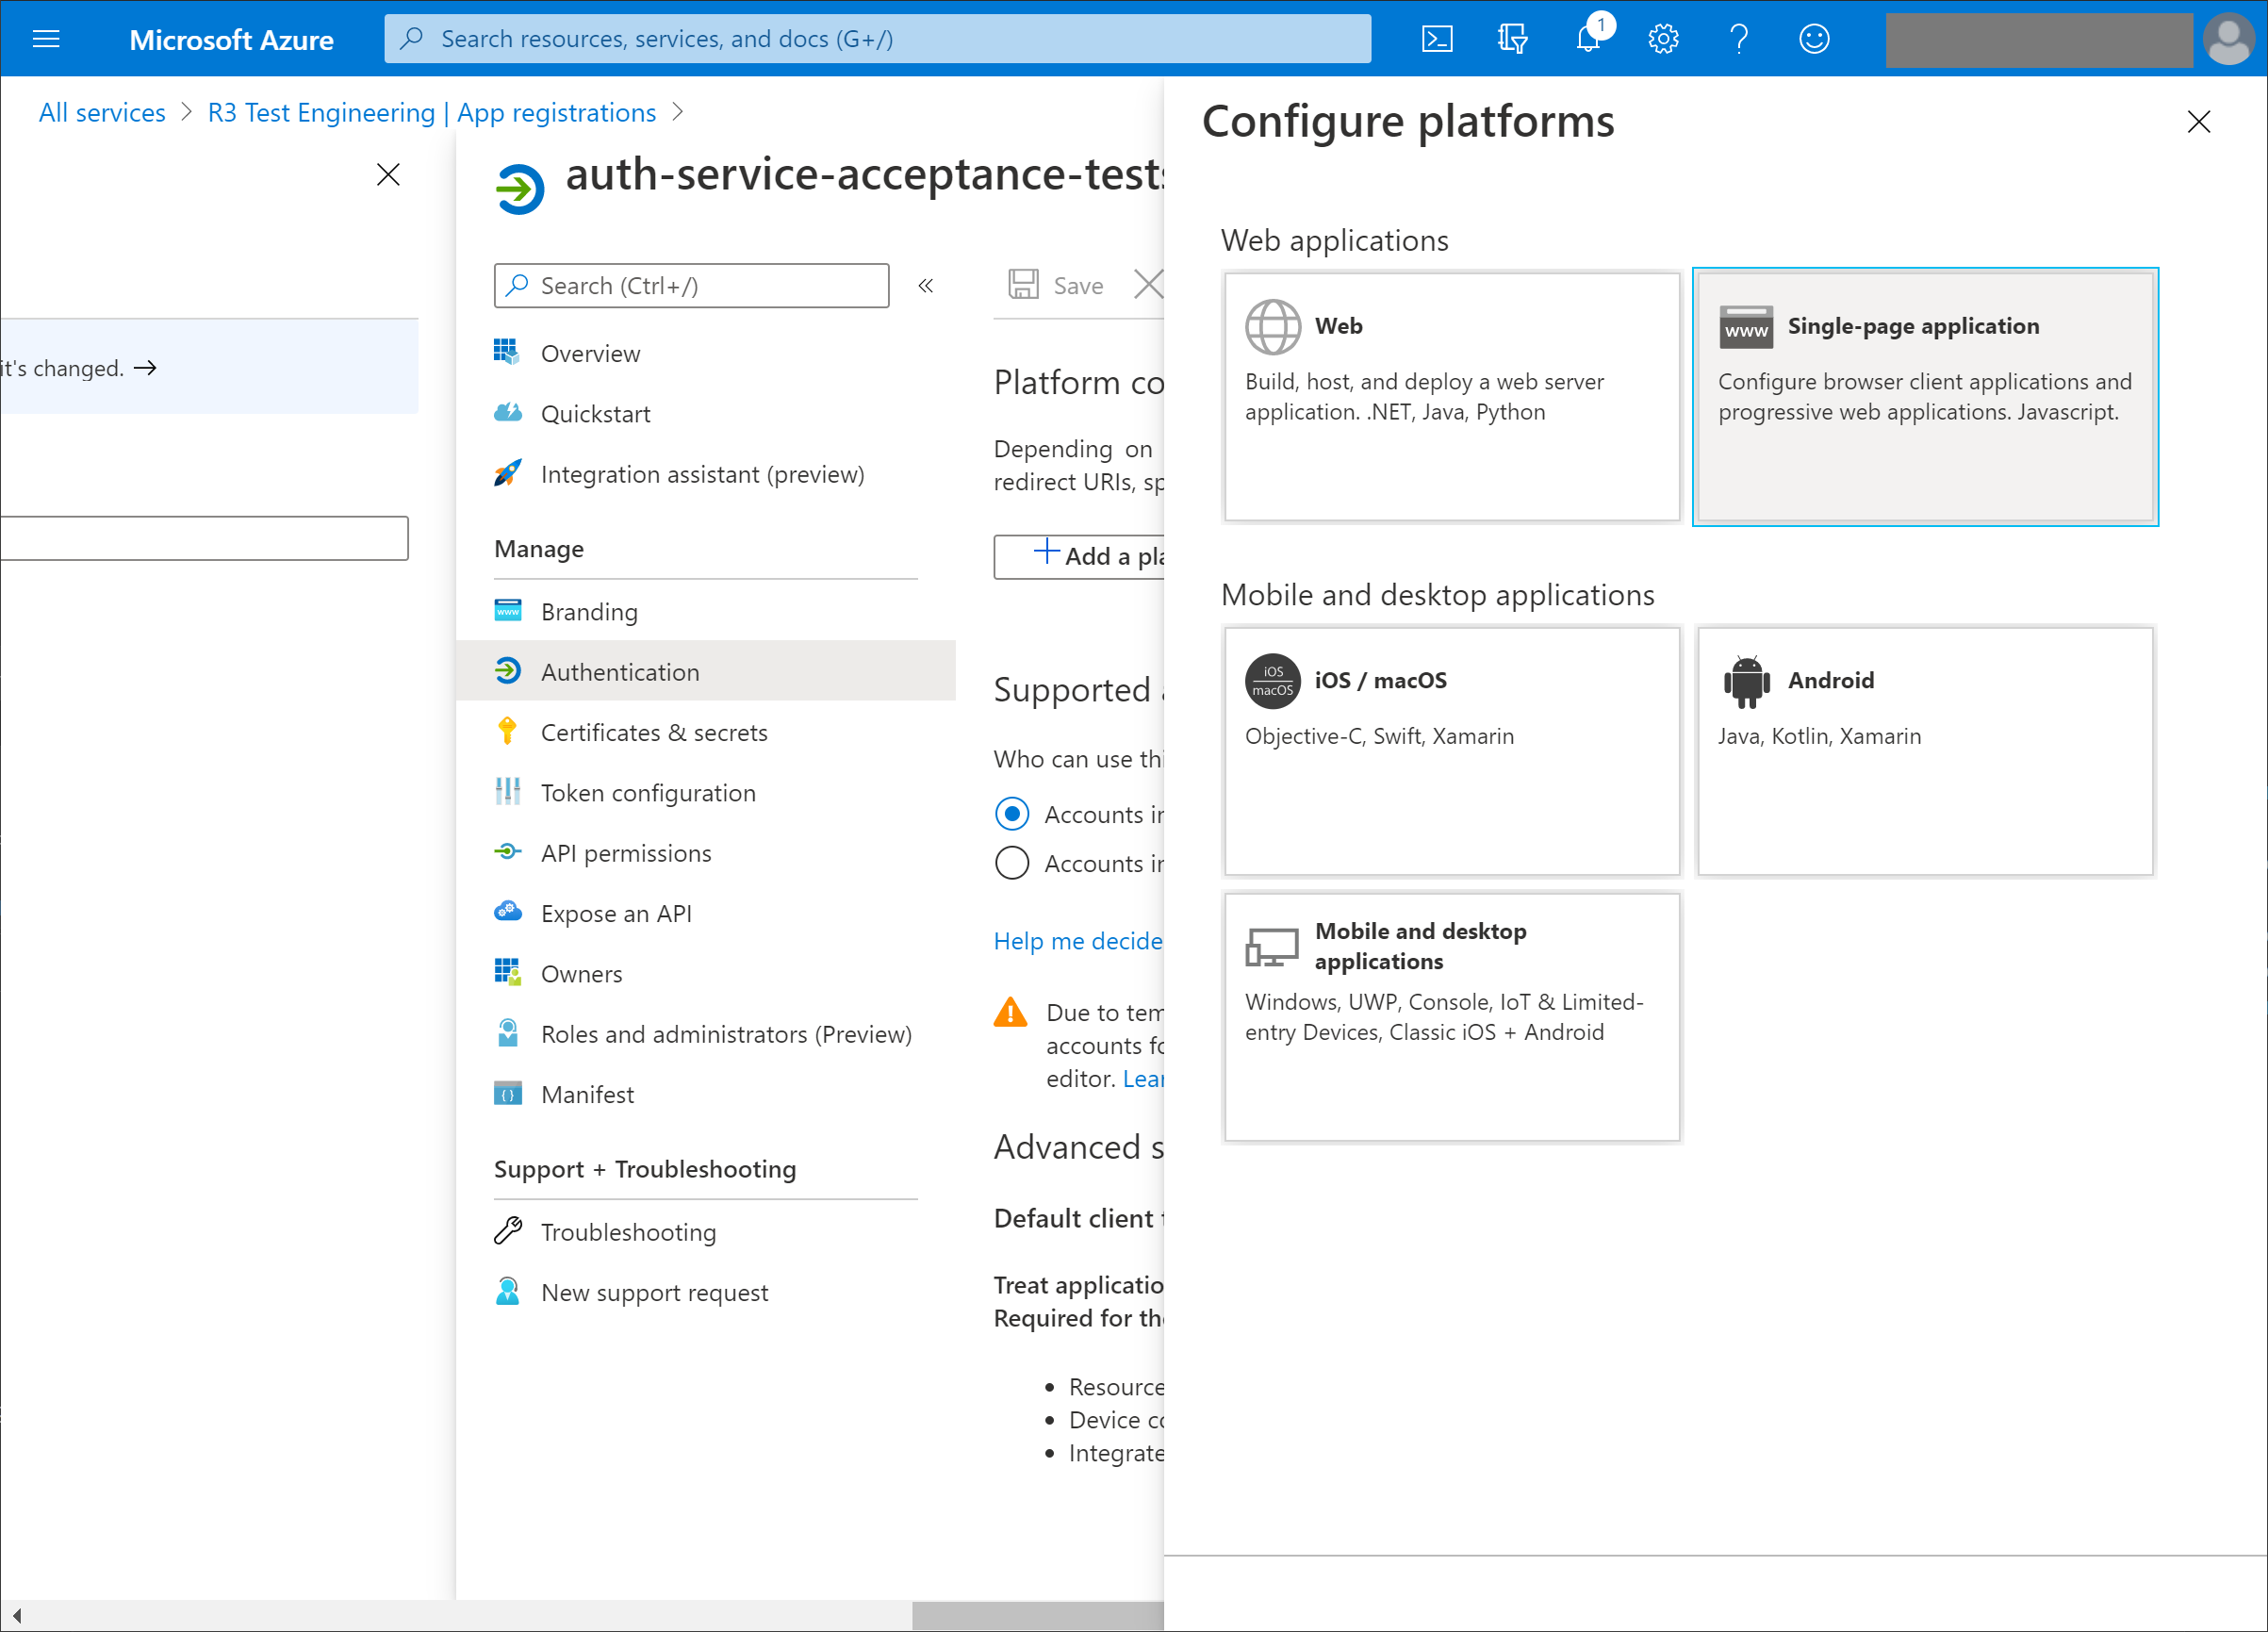
Select Configure Platforms, and choose Single-page application.
Enter redirect address for login, and select implicit grant as ID tokens.
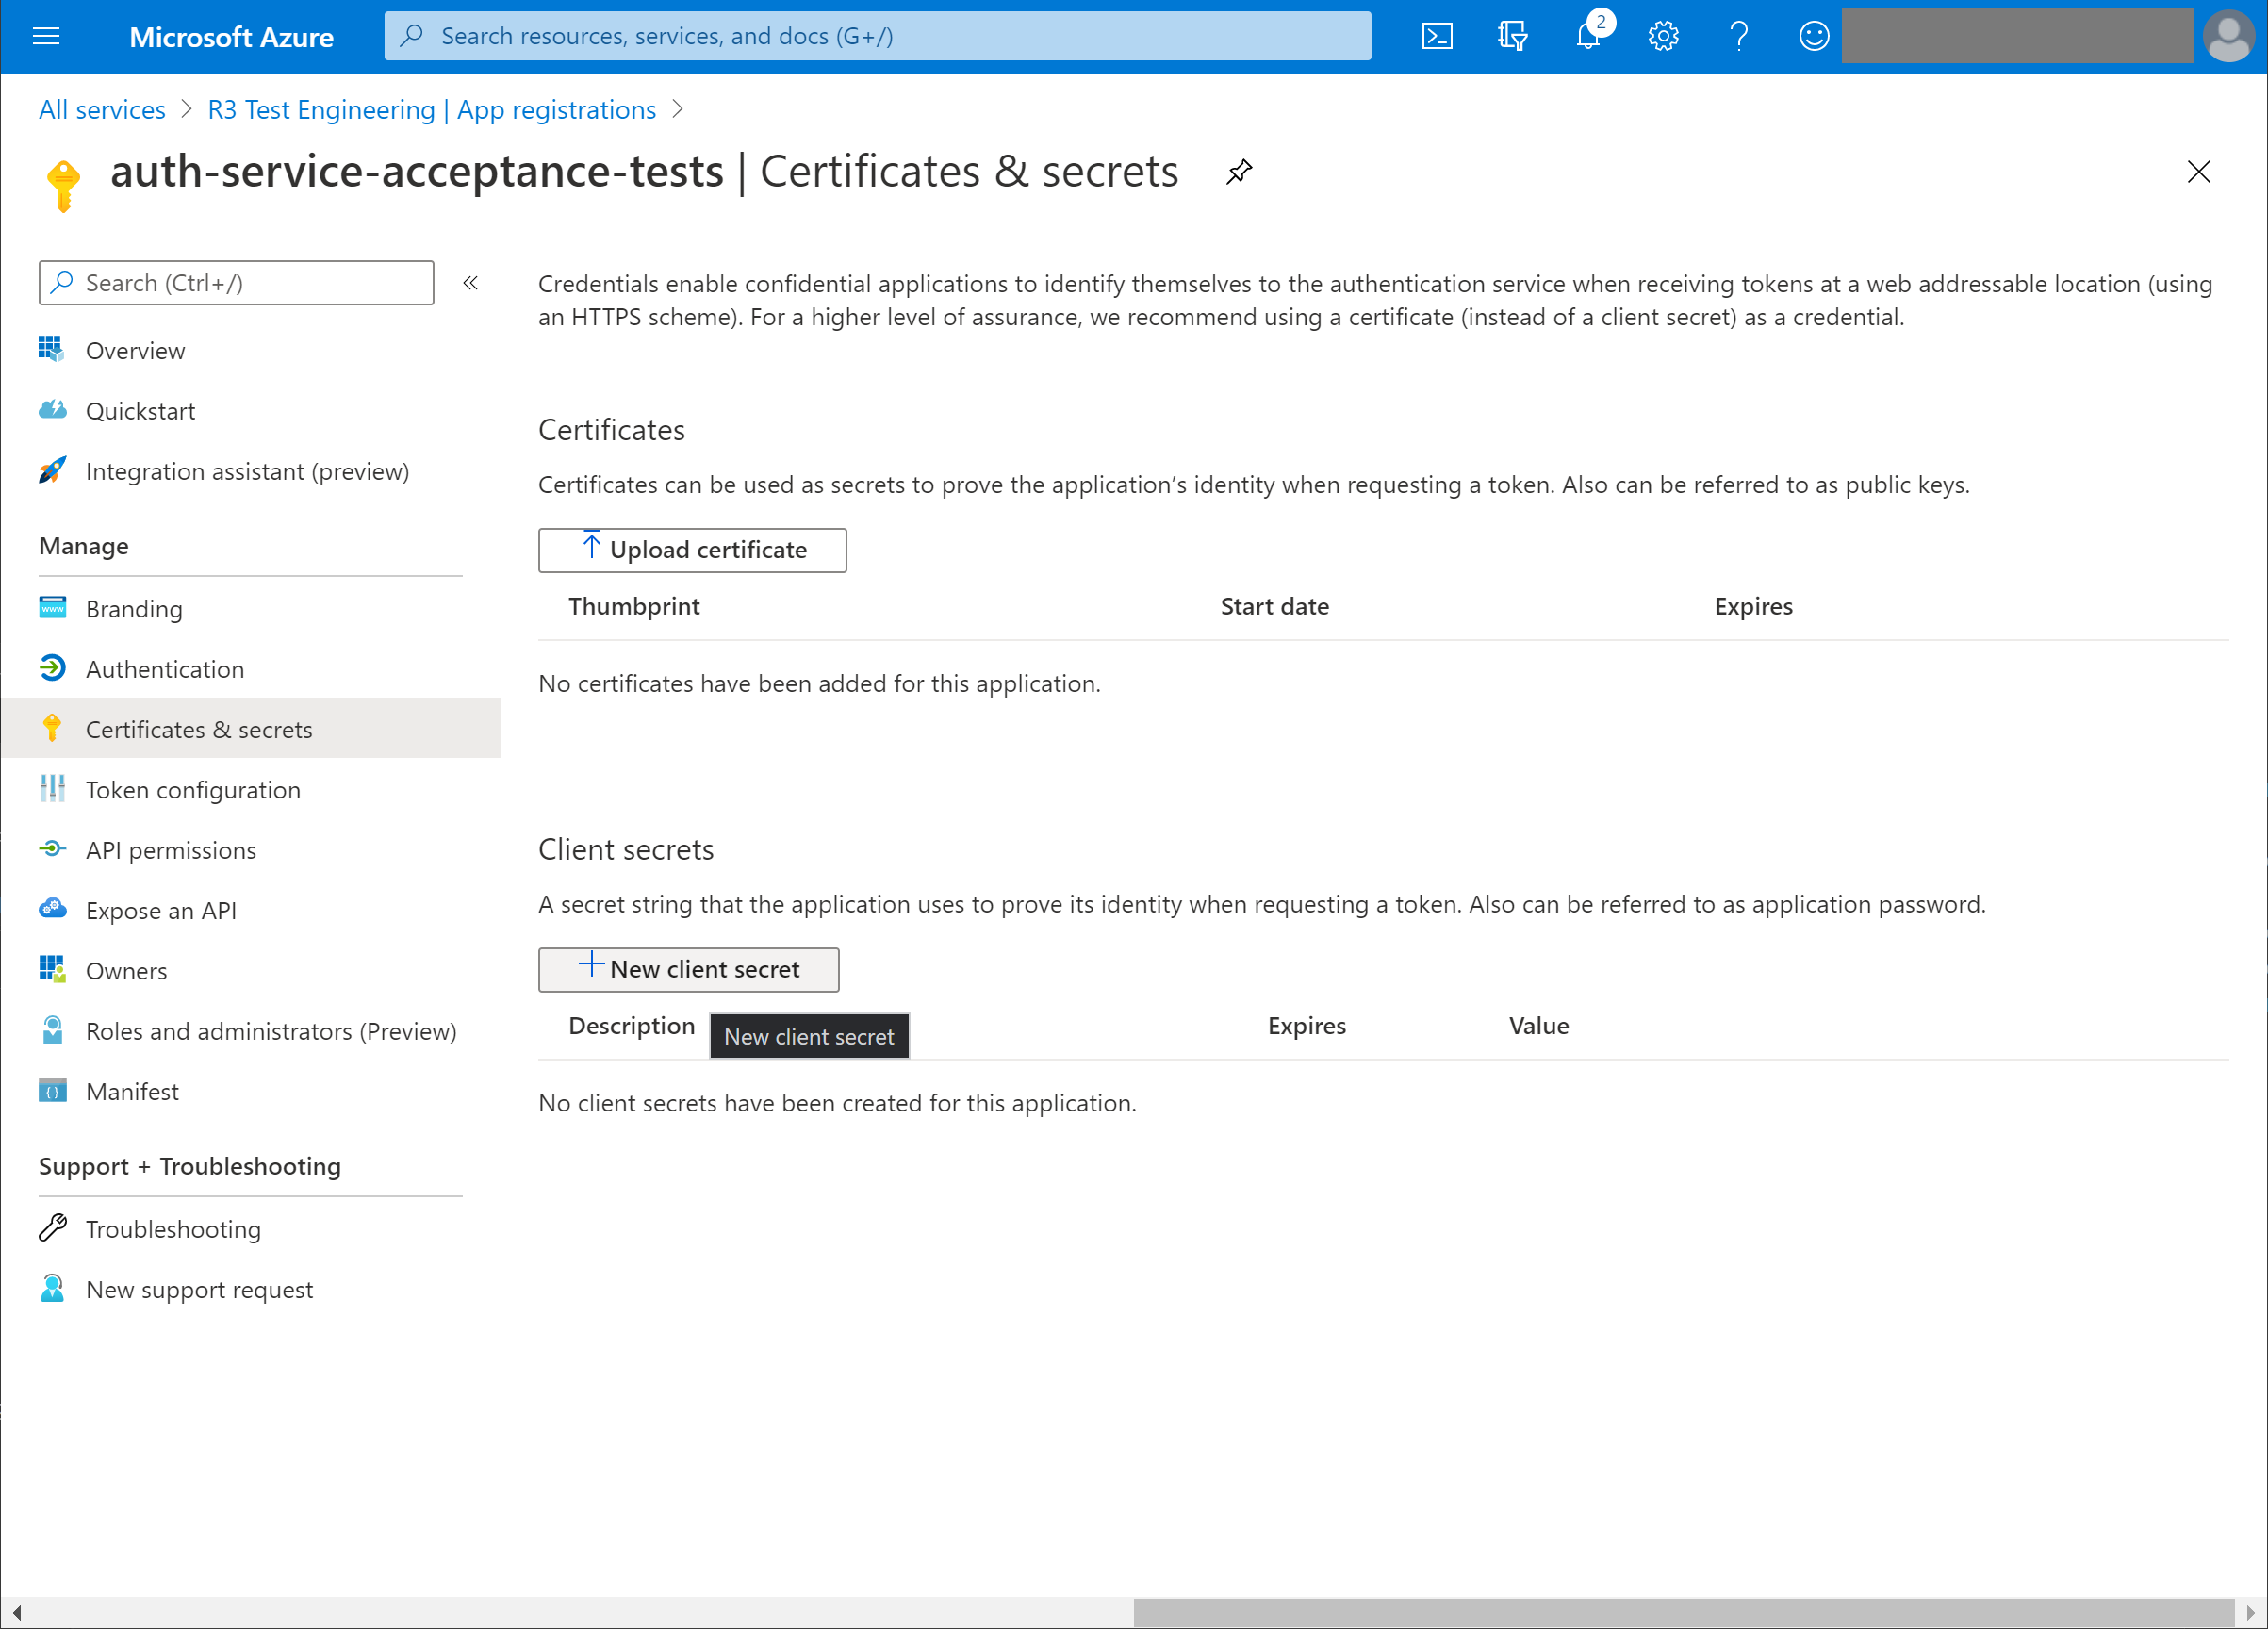
Create new Client Secret.
- Add user permissions - you must apply at least User.Read. This is the minimum required scope. In the Azure AD setup, you can select scopes with greater permissions to suit your requirements.
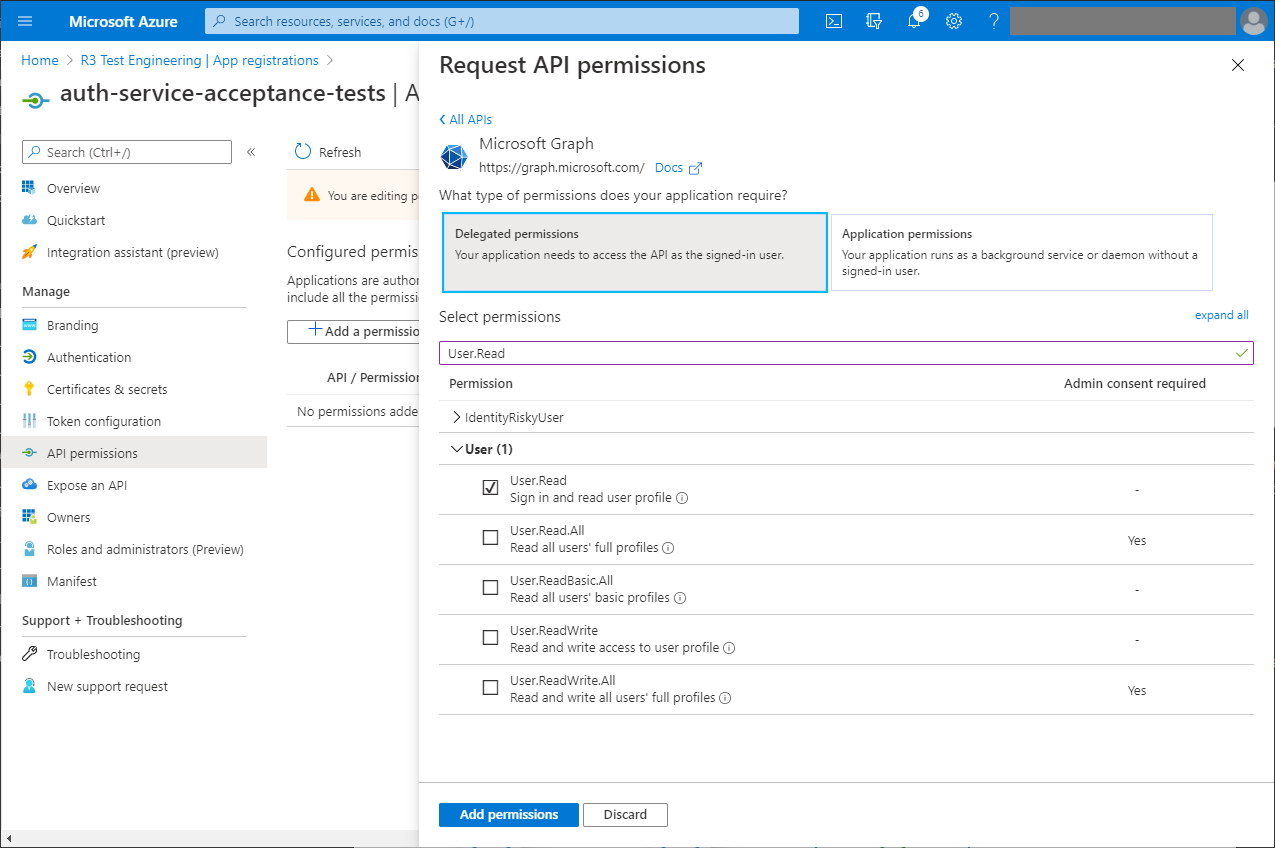
Confirm user permissions.
Add group permissions.
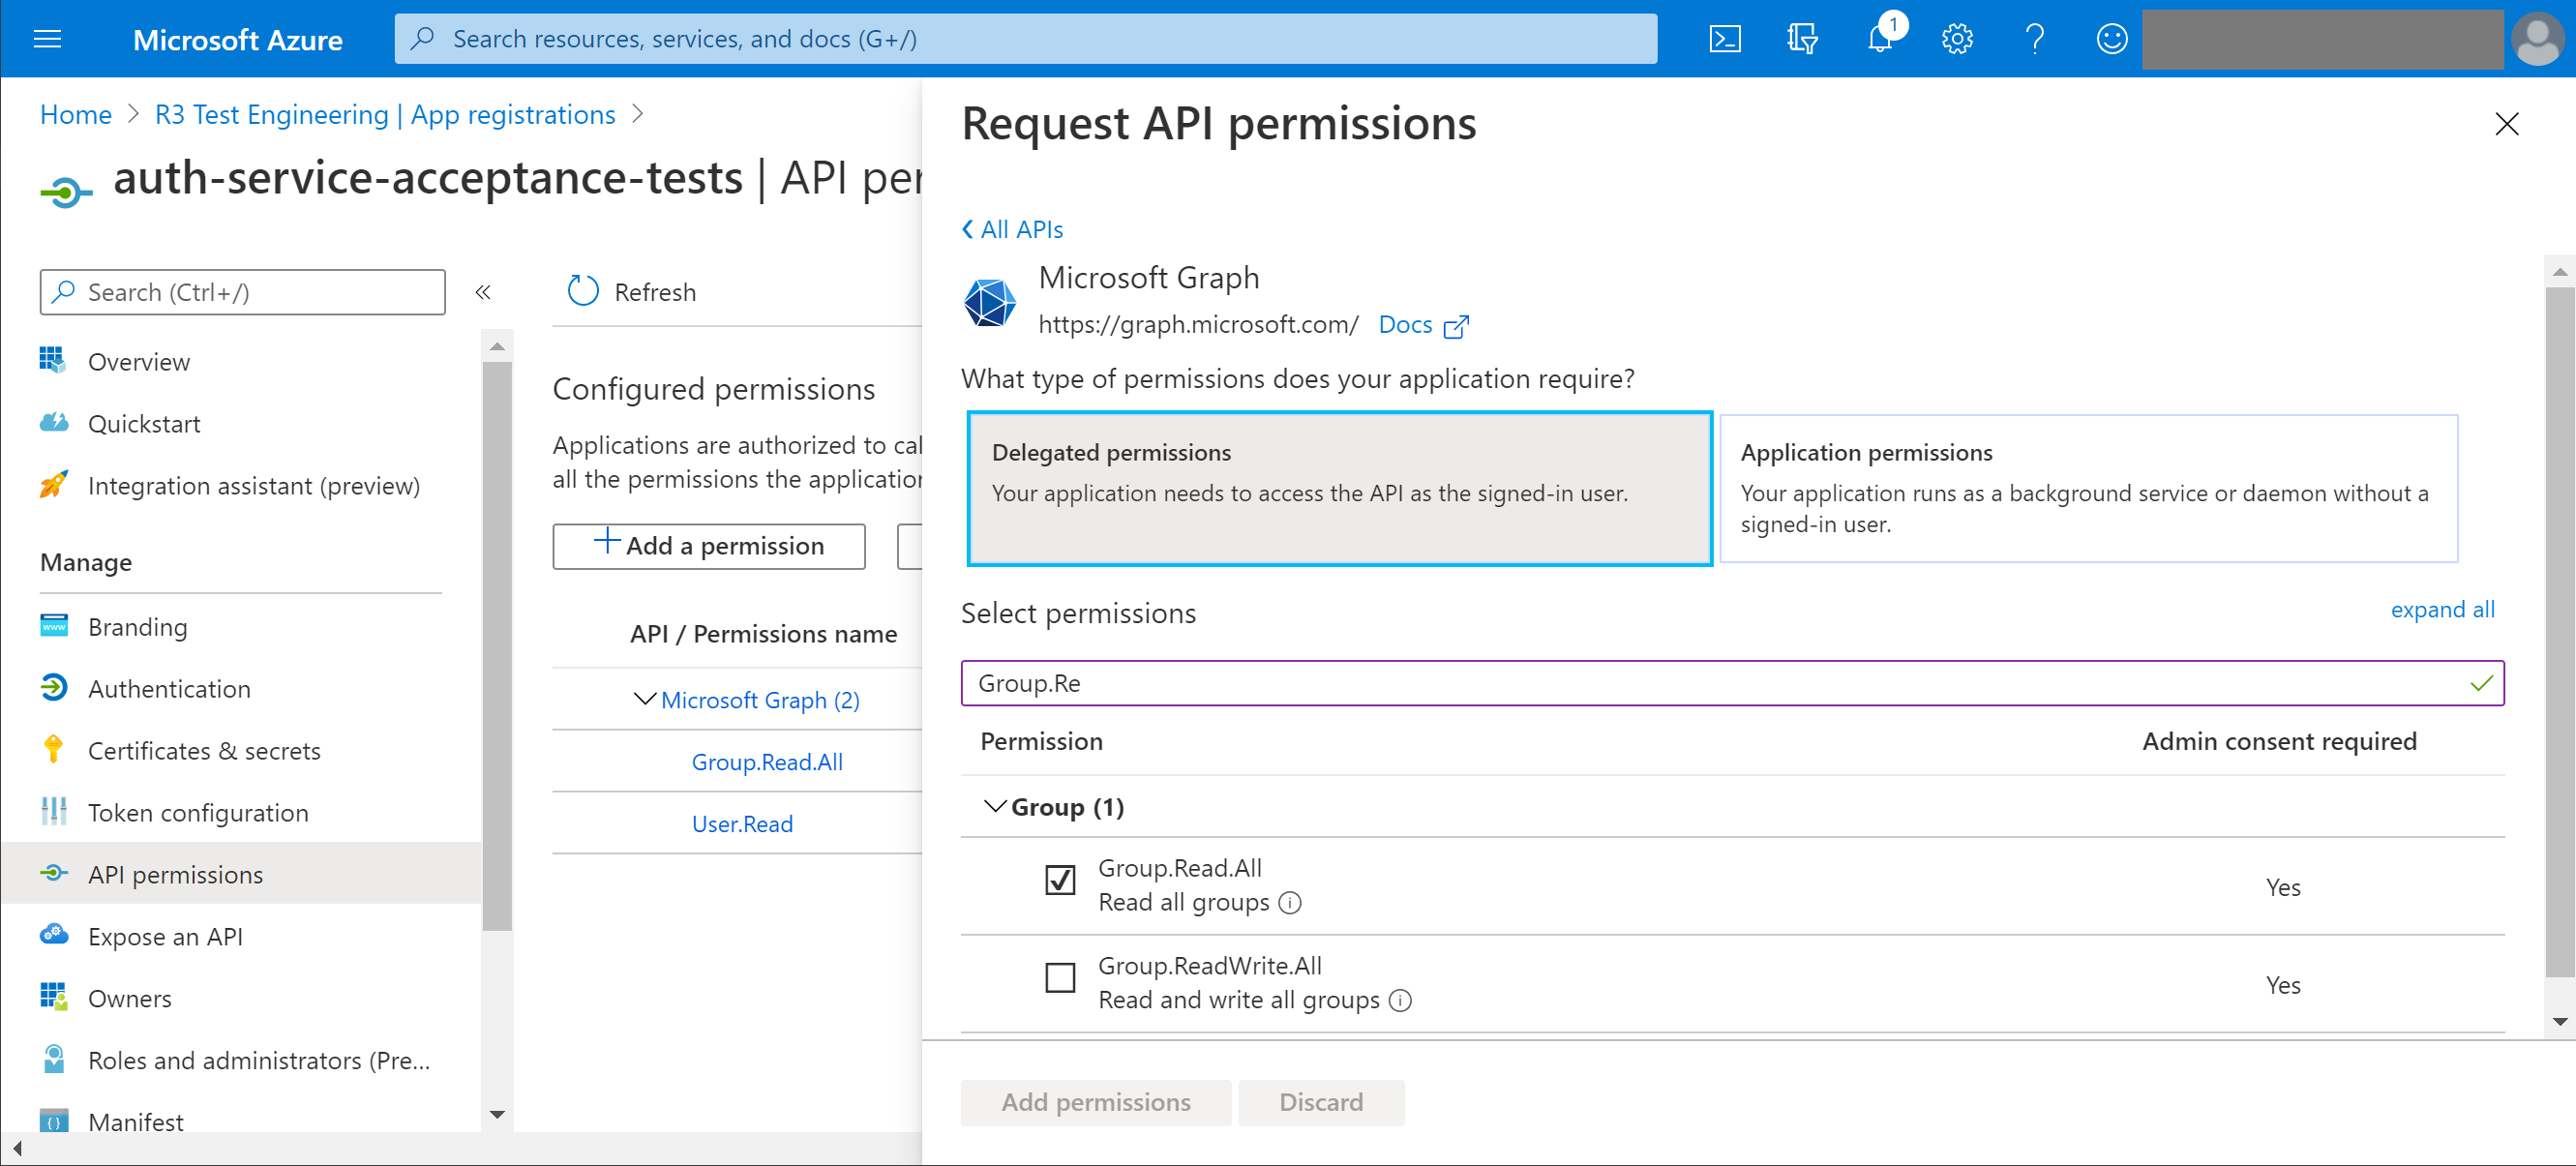
- Confirm group permissions.
You have configured your Corda services on the Azure AD console.
Auth Service configuration
For Azure AD SSO, you can control the following options in your Auth Service configuration file:
    azuread {
      enabled = true
      tenantId = "tenantid"
      clientId = "clientid"
      clientSecret = "clientsecret"
      synchronizeGroups = true
      groups = {
        createMissing = true
        filter ="startsWith(displayName,'group')"
      }
    }
You must apply the following settings in your Auth Service configuration file, and in most cases they must correspond with your Azure AD setup:
Add properties from Azure
Add the tenantId, clientId, and clientSecret property values from Azure. This means your setting in the configuration file must match the corresponding setting in Azure AD. In order for this to work, they must belong to a valid App Registration that was configured for the AzureAD you wish to use. The App Registration should be enabled to use at least the User.Read scope.
When User.Read is enabled, the Corda Auth Service can only confirm who is in a group, and allow SSO access to the relevant services for group members. This is the minimum required scope. In the Azure AD setup, you can select scopes with greater permissions to suit your requirements.
Add group syncronization
The synchronizeGroups setting controls whether the user should be added to the same groups in Corda services as they have been in AzureAD. By default this happens by matching internal groups by name to AzureAD membership groups. This is set to true by default in your configuration, and can be turned to false if you do not want to automatically synchronize adding users to groups.
Set filtered group synchronization
You can use Group synchronization to keep the memberships of each user up to date in Azure AD. You can use group synchronization to:
- Create groups that do not yet exist. If a user is a member of groups that do not yet exist in Azure AD, you can use group synchronization to automatically have these groups created.
- Control which of the membership groups should be synchronized. To do this, you can provide a filter string, which has to be a valid
OData4filter string https://docs.microsoft.com/en-us/graph/api/group-list?view=graph-rest-1.0&tabs=http.
Enable Group.Read.All
When setting up the App Registration in Azure, the Group.Read.All scope must be enabled in order for group filtering to work. If querying the filtered group list fails (either because of an invalid filter or insufficient rights), the user will have no groups synchronized.
Set authentication provider filters
When setting up clients, you have the option to filter authentication providers. You must include azuread here:
  clients = [{
    clientId = cli
    clientSecret = sec
    ...
    authenticationTypes = [
      "password",
      "azuread"
    ]
  }]
password authentication type enables users outside of Azure AD SSO. If you wish only to allow Azure AD users, then do not include password authentication type.If the authenticationTypes option is skipped, the default is to enable all configured types (password+azuread in the case of the above example).
Set up the CENM Command-line Interface Tool for Azure AD
To allow use of the CENM Command-line Interface Tool, you need to enable a few additional settings on the App Registration in Azure AD console that you used to configure the Auth Service.
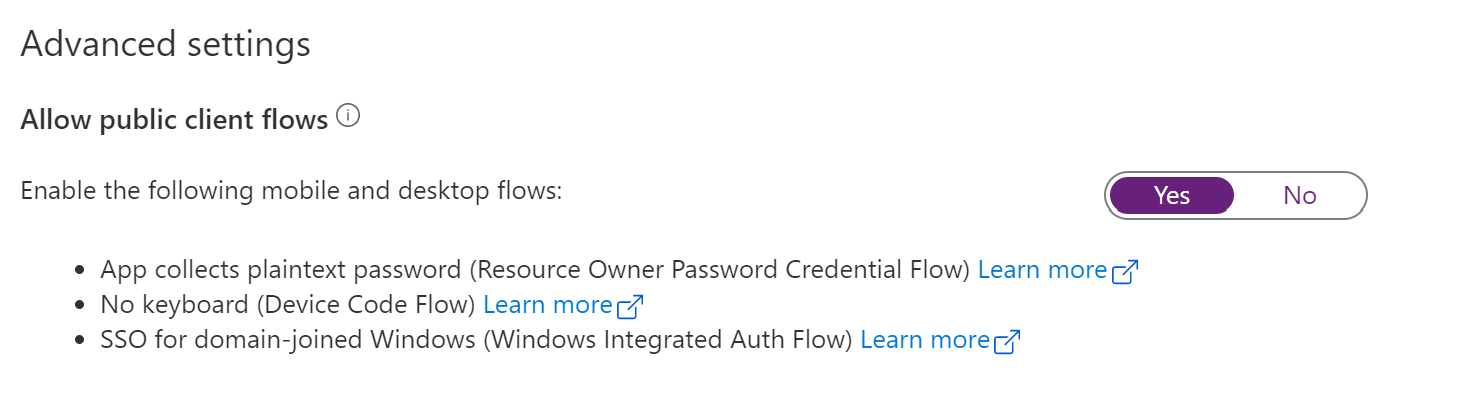
- In the Azure AD console app registration Authentication section, use the switch to treat the application as a public client.
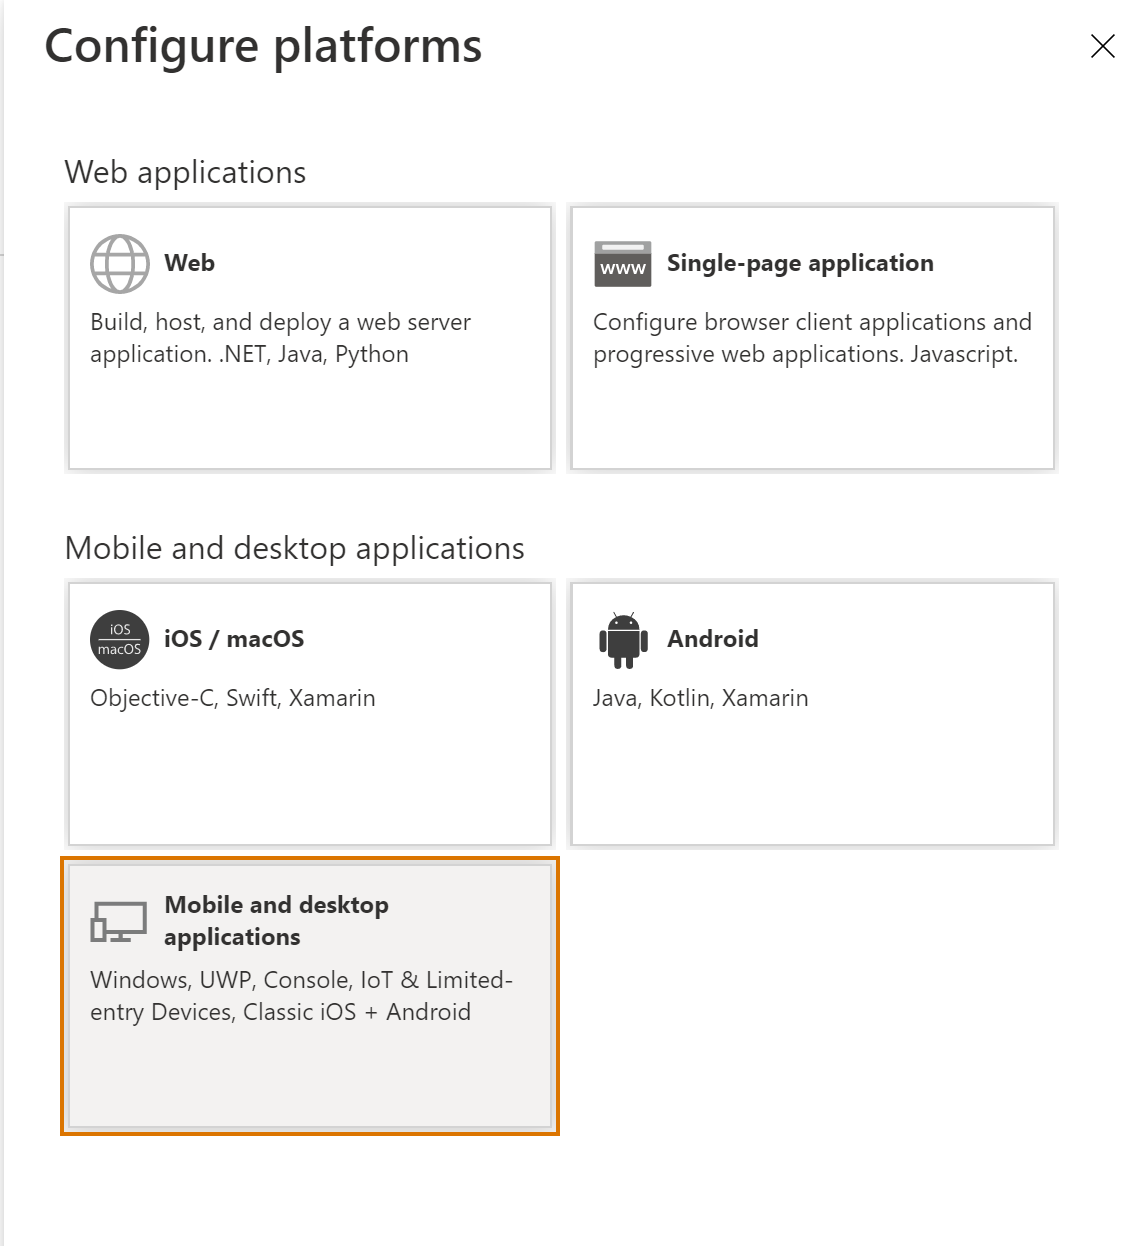
- Click Add a platform.
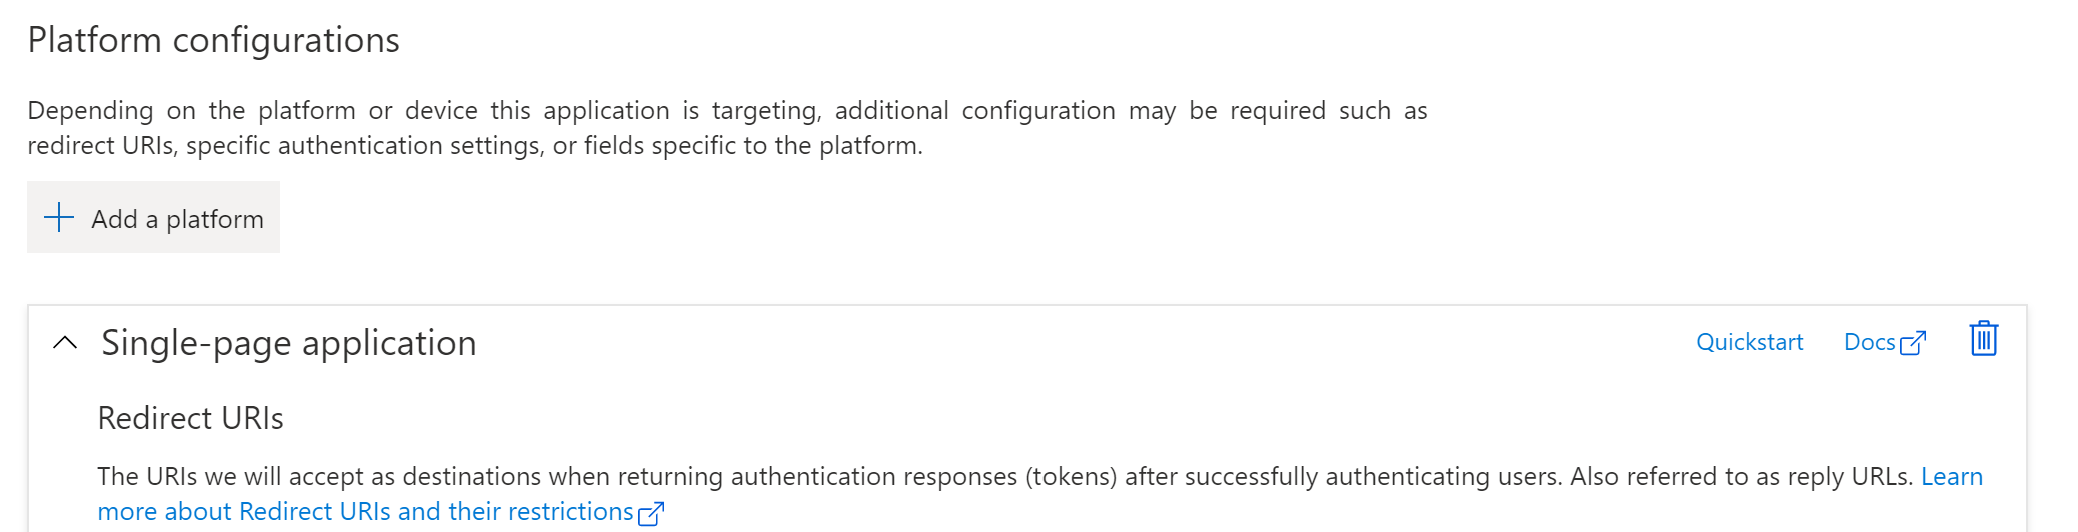
- In Configure platform, select Mobile and Desktop Applications.
- In Configure desktop and devices, select the predefined url that starts with msal.
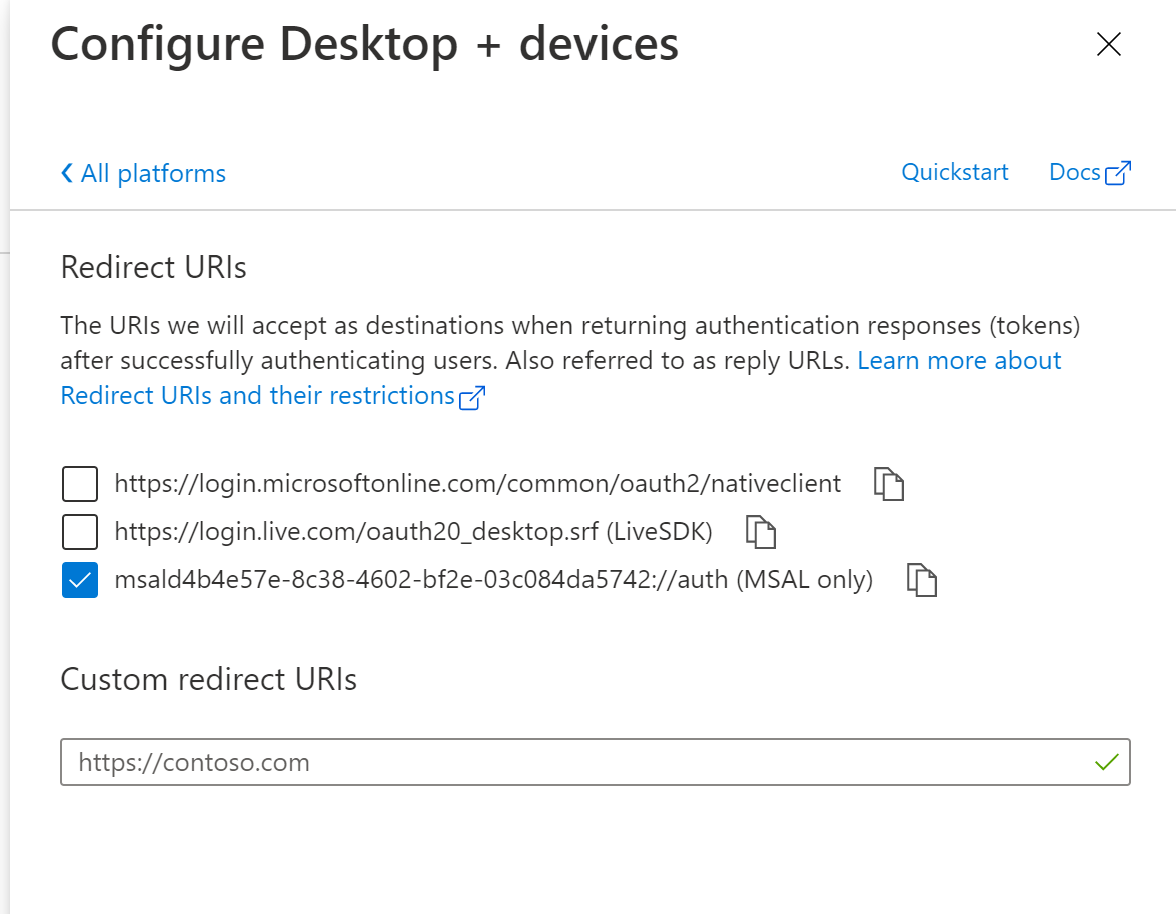
https://login.microsoftonline.com/common/oauth2/nativeclient.You can now access Azure login using the CENM Command-line Interface Tool.
To log in:
- Use the command shown below. You can see that where you would normally add password credentials, there is a request to log in using Azure AD:
<main> context login --azure-ad <gateway-service address>
- This command prints further instructions to be followed. During this process, you need to copy the login code and navigate to the Microsoft device login page in a browser (you can use a different device for this process).
Was this page helpful?
Thanks for your feedback!
Chat with us
Chat with us on our #docs channel on slack. You can also join a lot of other slack channels there and have access to 1-on-1 communication with members of the R3 team and the online community.
Propose documentation improvements directly
Help us to improve the docs by contributing directly. It's simple - just fork this repository and raise a PR of your own - R3's Technical Writers will review it and apply the relevant suggestions.
We're sorry this page wasn't helpful. Let us know how we can make it better!
Chat with us
Chat with us on our #docs channel on slack. You can also join a lot of other slack channels there and have access to 1-on-1 communication with members of the R3 team and the online community.
Create an issue
Create a new GitHub issue in this repository - submit technical feedback, draw attention to a potential documentation bug, or share ideas for improvement and general feedback.
Propose documentation improvements directly
Help us to improve the docs by contributing directly. It's simple - just fork this repository and raise a PR of your own - R3's Technical Writers will review it and apply the relevant suggestions.