CENM Management Console
The CENM management console is a web interface that allows you to perform key CENM tasks using a visual UI.
You can use the CENM management console to perform key CENM tasks and access CENM services and network information. With the CENM management console, you can:
- Access the network map.
- Update Network Parameters.
- Review Identity Manager progress for Onboarding and Removing members.
To use the CENM management console, you must install it as a plug-in to your Gateway Service. Once you have installed the plug-in, anyone with the required permissions can access and use the management console from any web browser.
Installation

Requirements
- Auth Service that has been set up with at least one user (ideally an admin user) and running.
- Zone Service running.
- Gateway Service is installed and running.
Install the CENM management console
The CENM management console is accessed via the Gateway Service. Once you have added the plugin binaries to the correct directory on the machine that hosts your Gateway Service, you can access the web service from any browser.
To install the CENM management console:
- Download the latest Gateway Service binaries from the Customer Hub.
- Download the CENM management console Gateway Plugin binaries from the Customer Hub.
- Create a directory called
pluginsin the same directory as the Gateway Service JAR file (if you do not already have this directory for other plug-ins). - Copy the CENM Gateway Plugin JAR file to the
pluginsdirectory. - Configure the Gateway Service using the
auth { }andcenm { }properties. Example configuration:auth { serverUrl = "https://auth-service:8081/" sslConfig = { trustStore = "/etc/corda/trust-stores/corda-ssl-trust-store.jks" trustStorePassword = "trustpass" } clientCredentials = { clientId = "farm1" clientSecret = "secret1" } } cenm { zoneHost: "zone-service" zonePort: 5063 ssl = { keyStore = { keyPassword = "password" location = "/etc/corda/key-stores/farm-ssl-keys.jks" password = "password" } trustStore = { location = "/etc/corda/trust-stores/corda-ssl-trust-store.jks" password = "trustpass" } } } server { port = 8081 } - Launch the Gateway Service.
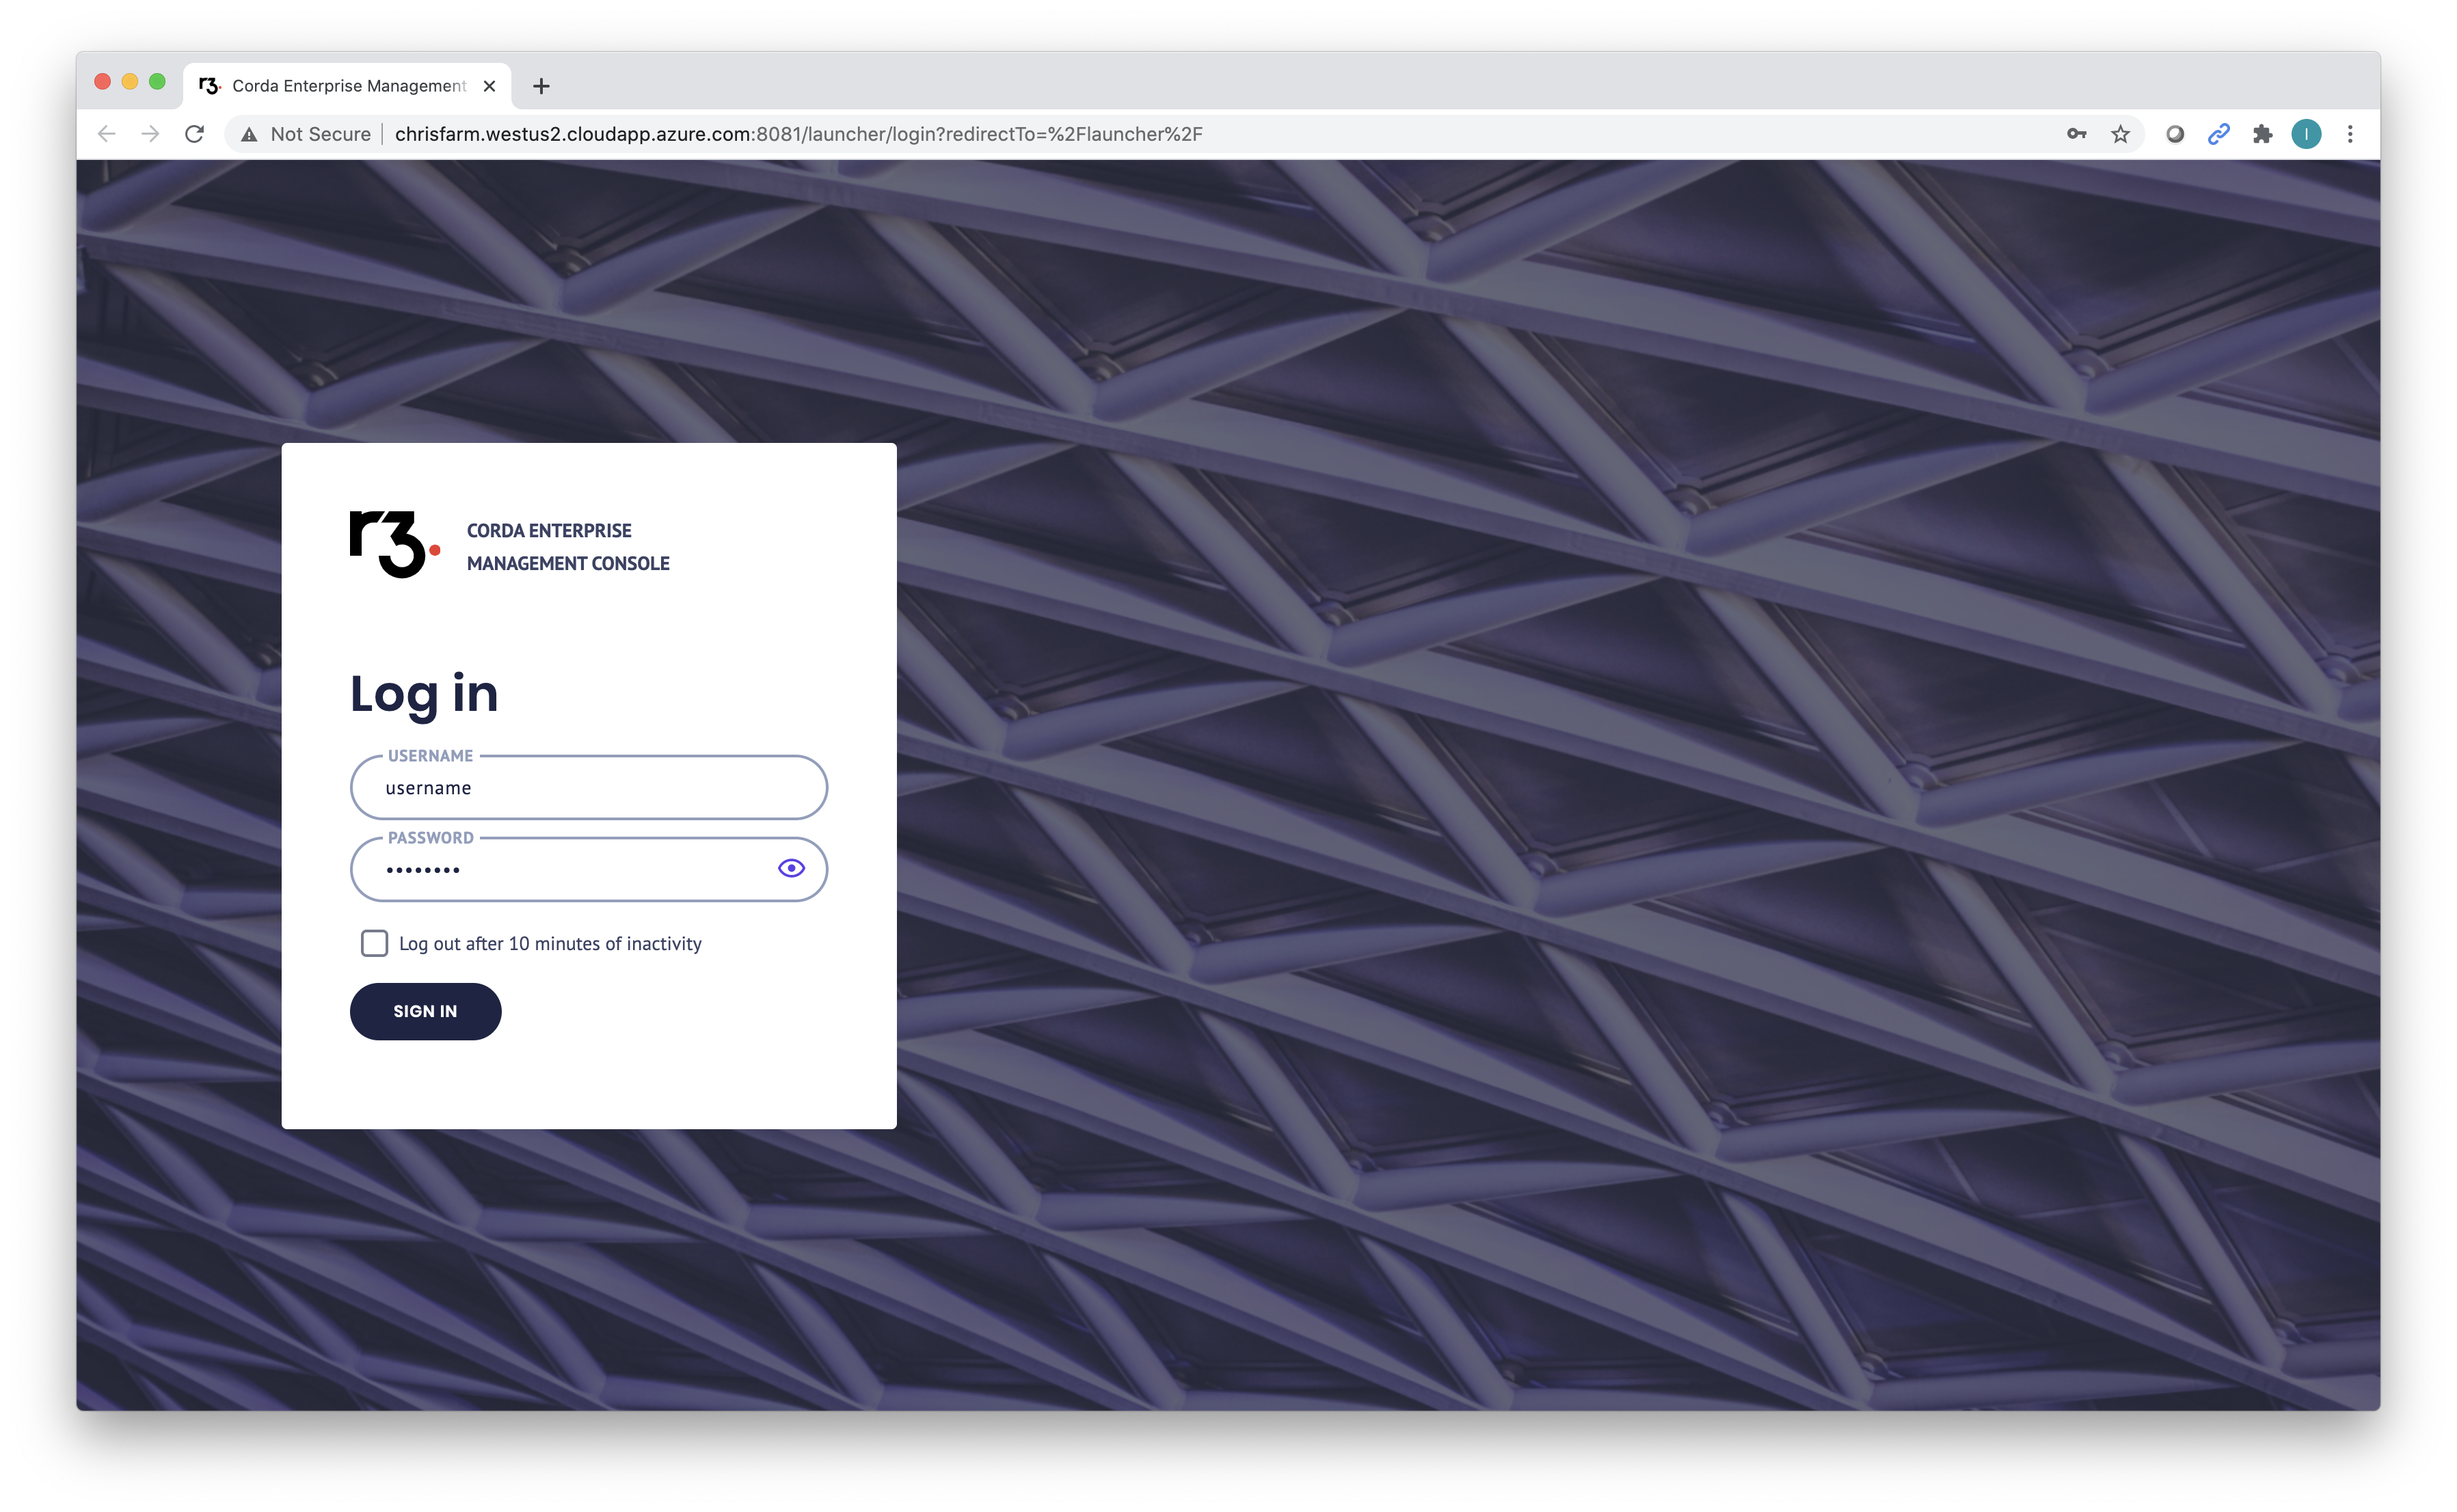
- Open your browser and use the Gateway Service’s host and the
portproperty from the configuration (localhost:8081in the example above).Internet Explorer 11 is not supported for this tool. - The login page is displayed. Log in using the initial user credentials.
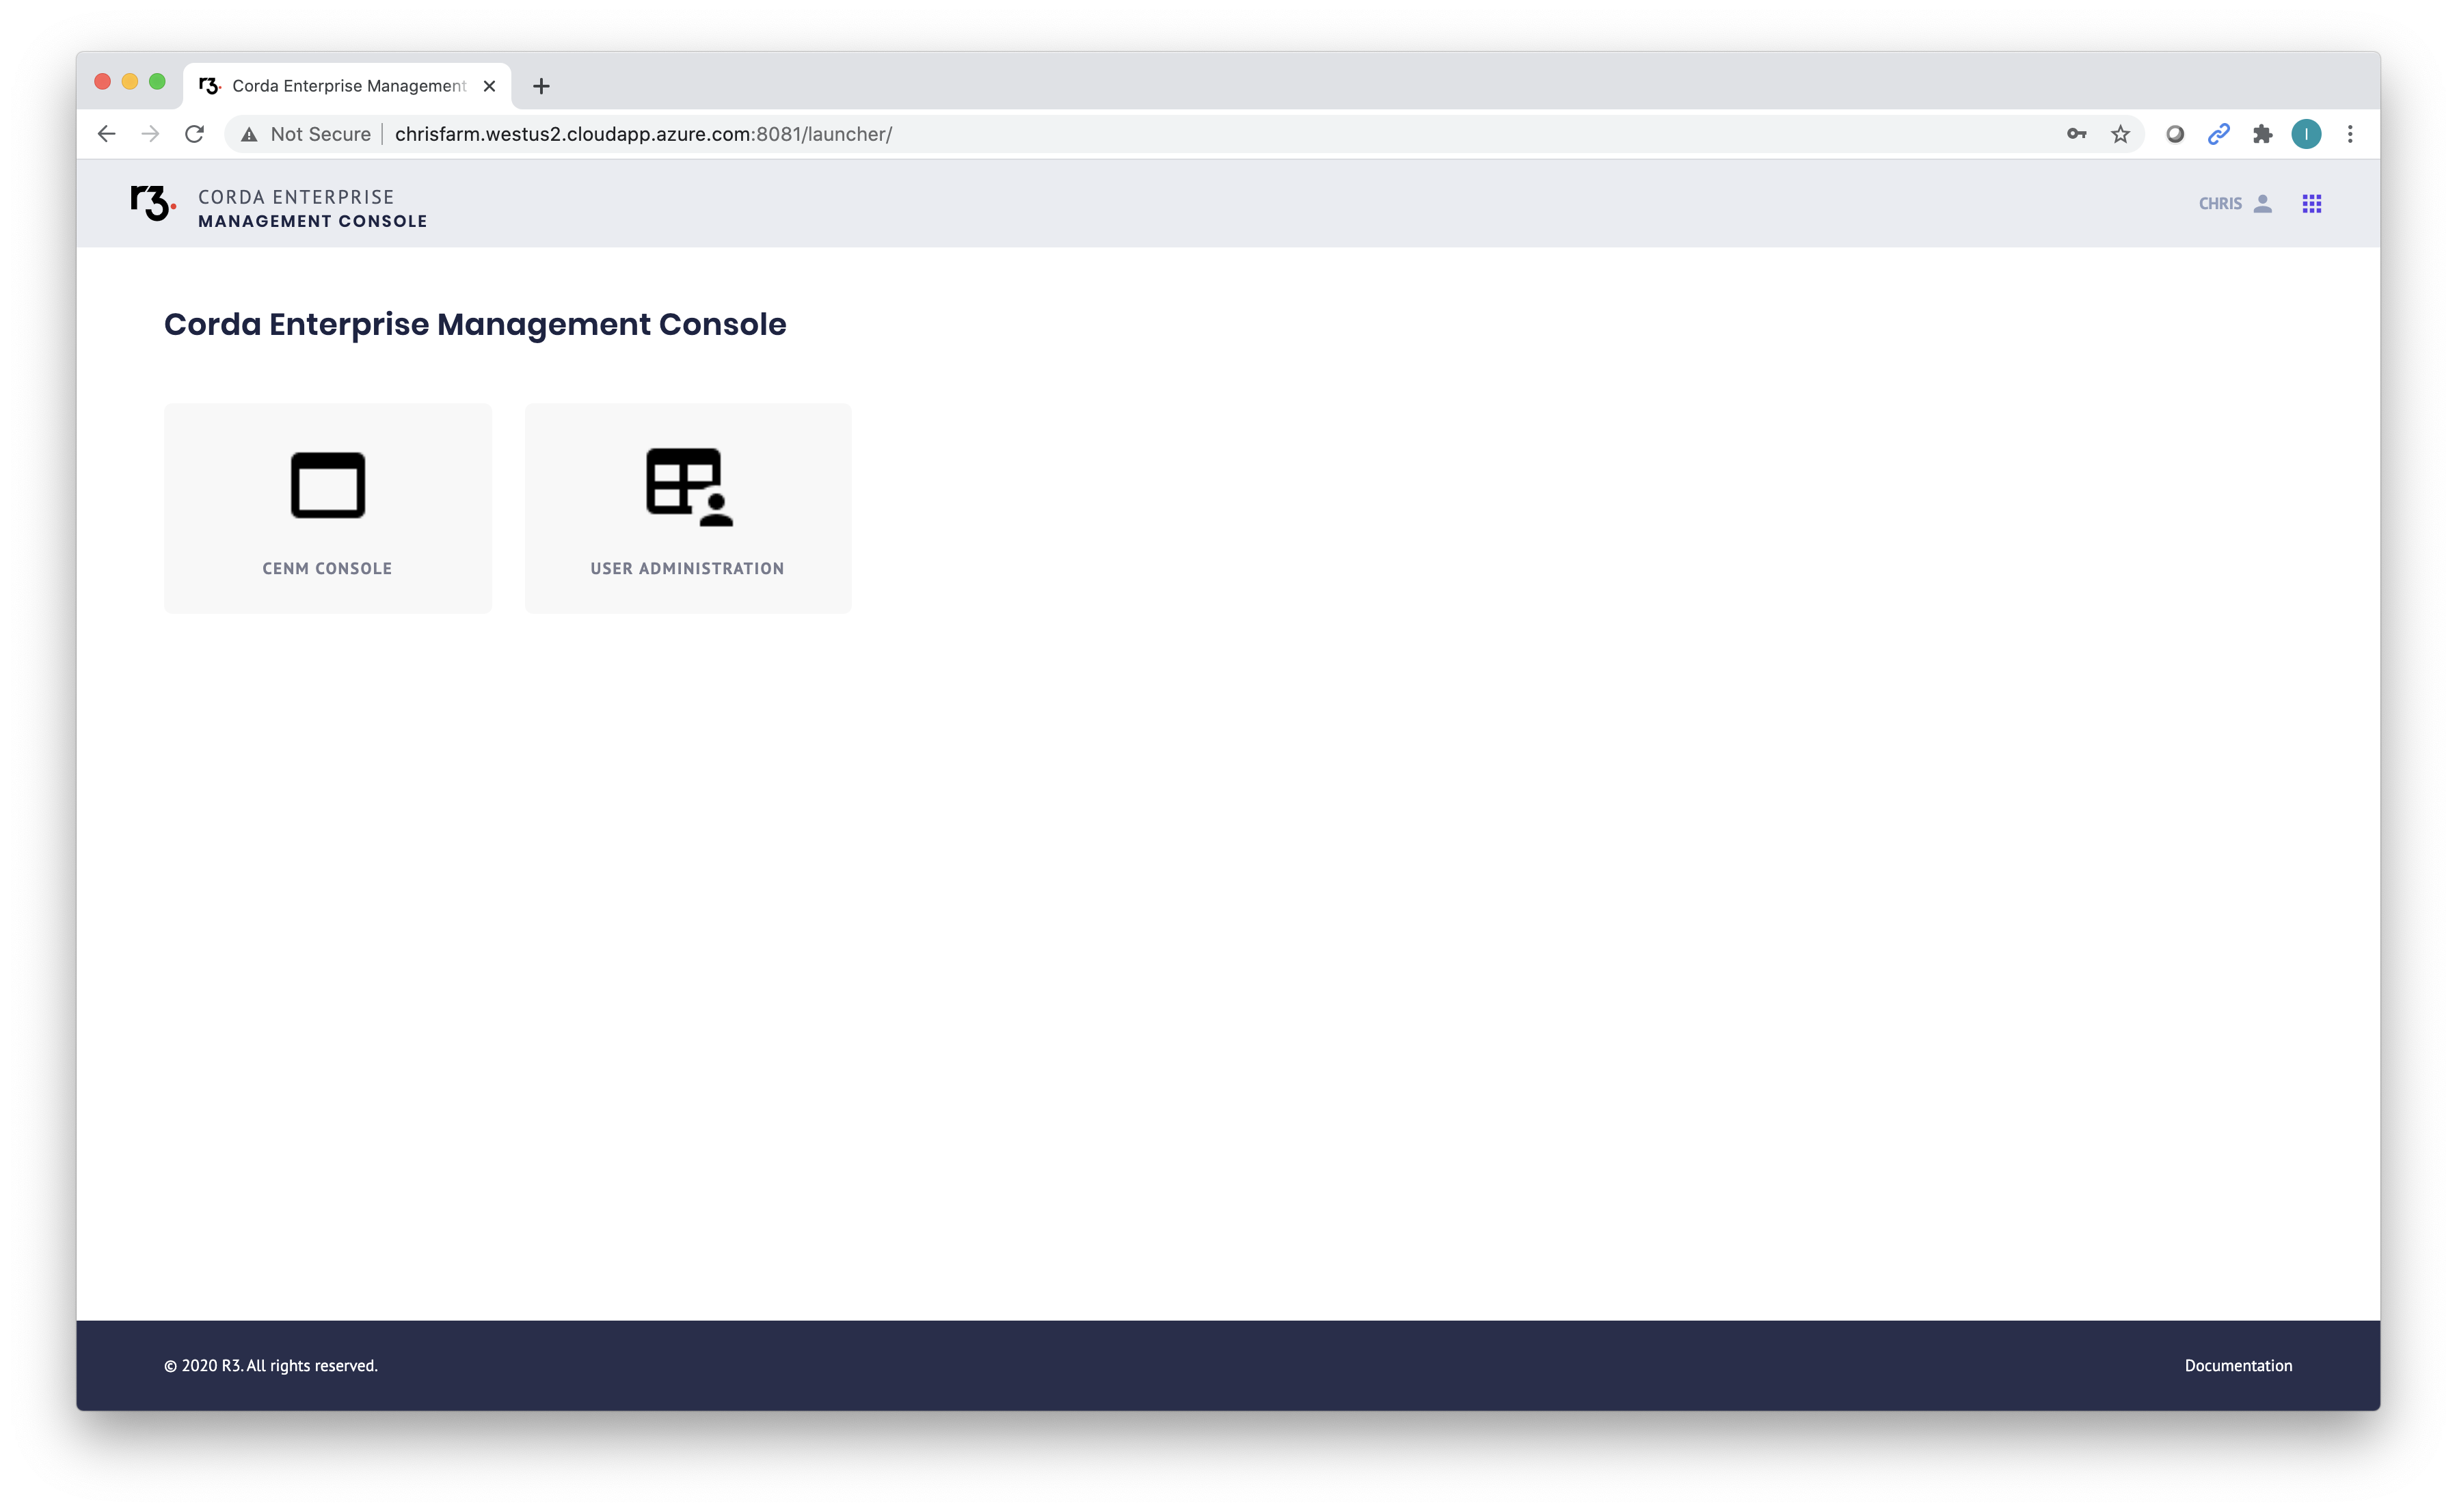
- You can either open the USER ADMINISTRATION page to manage users, groups, and roles (please note that this requires admin rights), or open the CENM management console to manage your CENM instance.
User guide
Access the CENM management console
The CENM management console is located in a directory within the machine that hosts your Gateway Service, followed by /cenm.
For example: http://10.230.41.12:8080/cenm
To access the CENM management console:
Navigate to the URL address for your CENM management console instance.
On the login screen, enter your user login credentials:
- Select CENM CONSOLE.
The CENM management console loads on the NETWORK MAP Service screen.
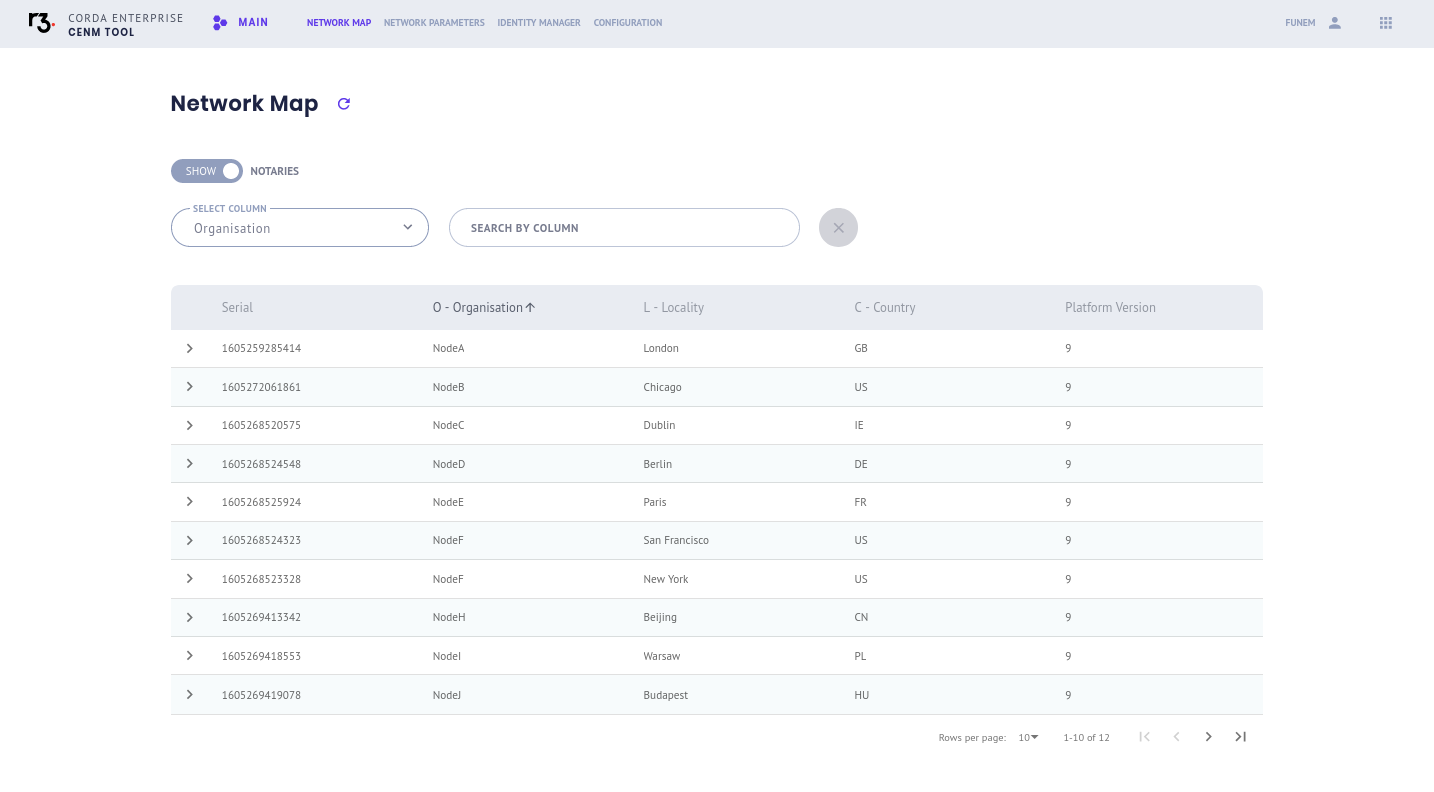
Explore the Network Map Service
You can access network member details, filter information, and search using the Network Map Service screen.
Switch between Layout View and Map View of the Network Map
The default Network Map view is called LAYOUT VIEW - this is what you see when you log in to the CENM management console (as shown above).
There is also a MAP VIEW, which shows the Network Map as an actual map grid:
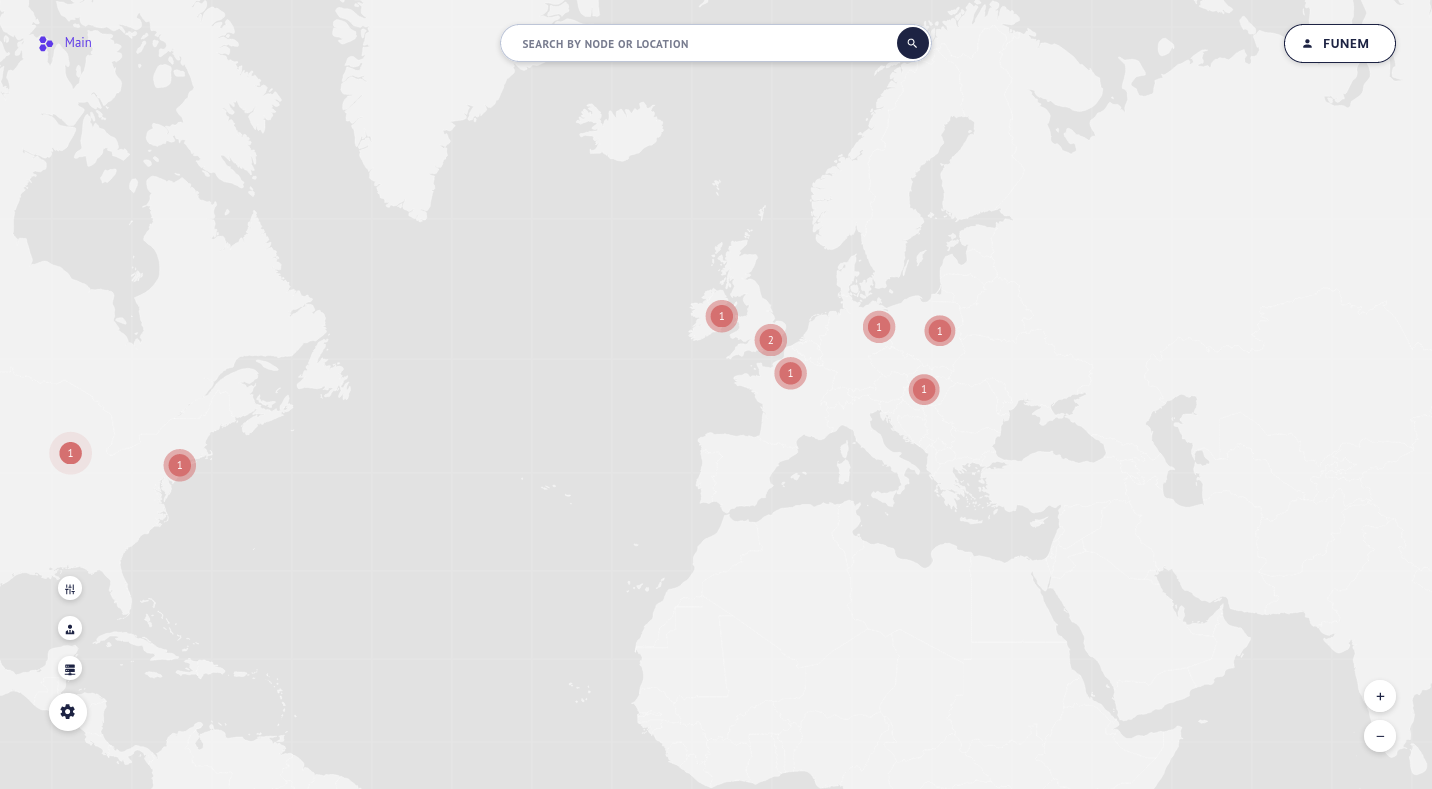
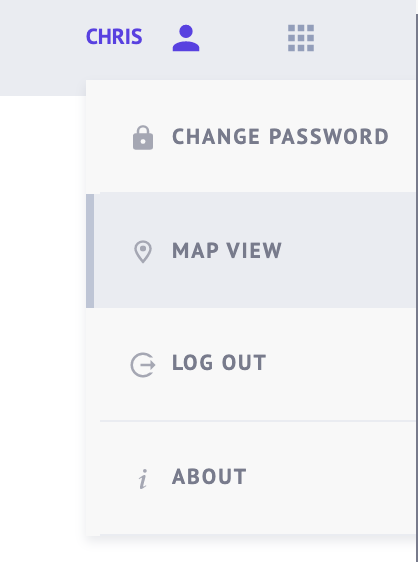
You can switch between the two views by selecting MAP VIEW/LAYOUT VIEW respectively from the drop-down menu that opens when you click on your username in the top right corner of the screen:
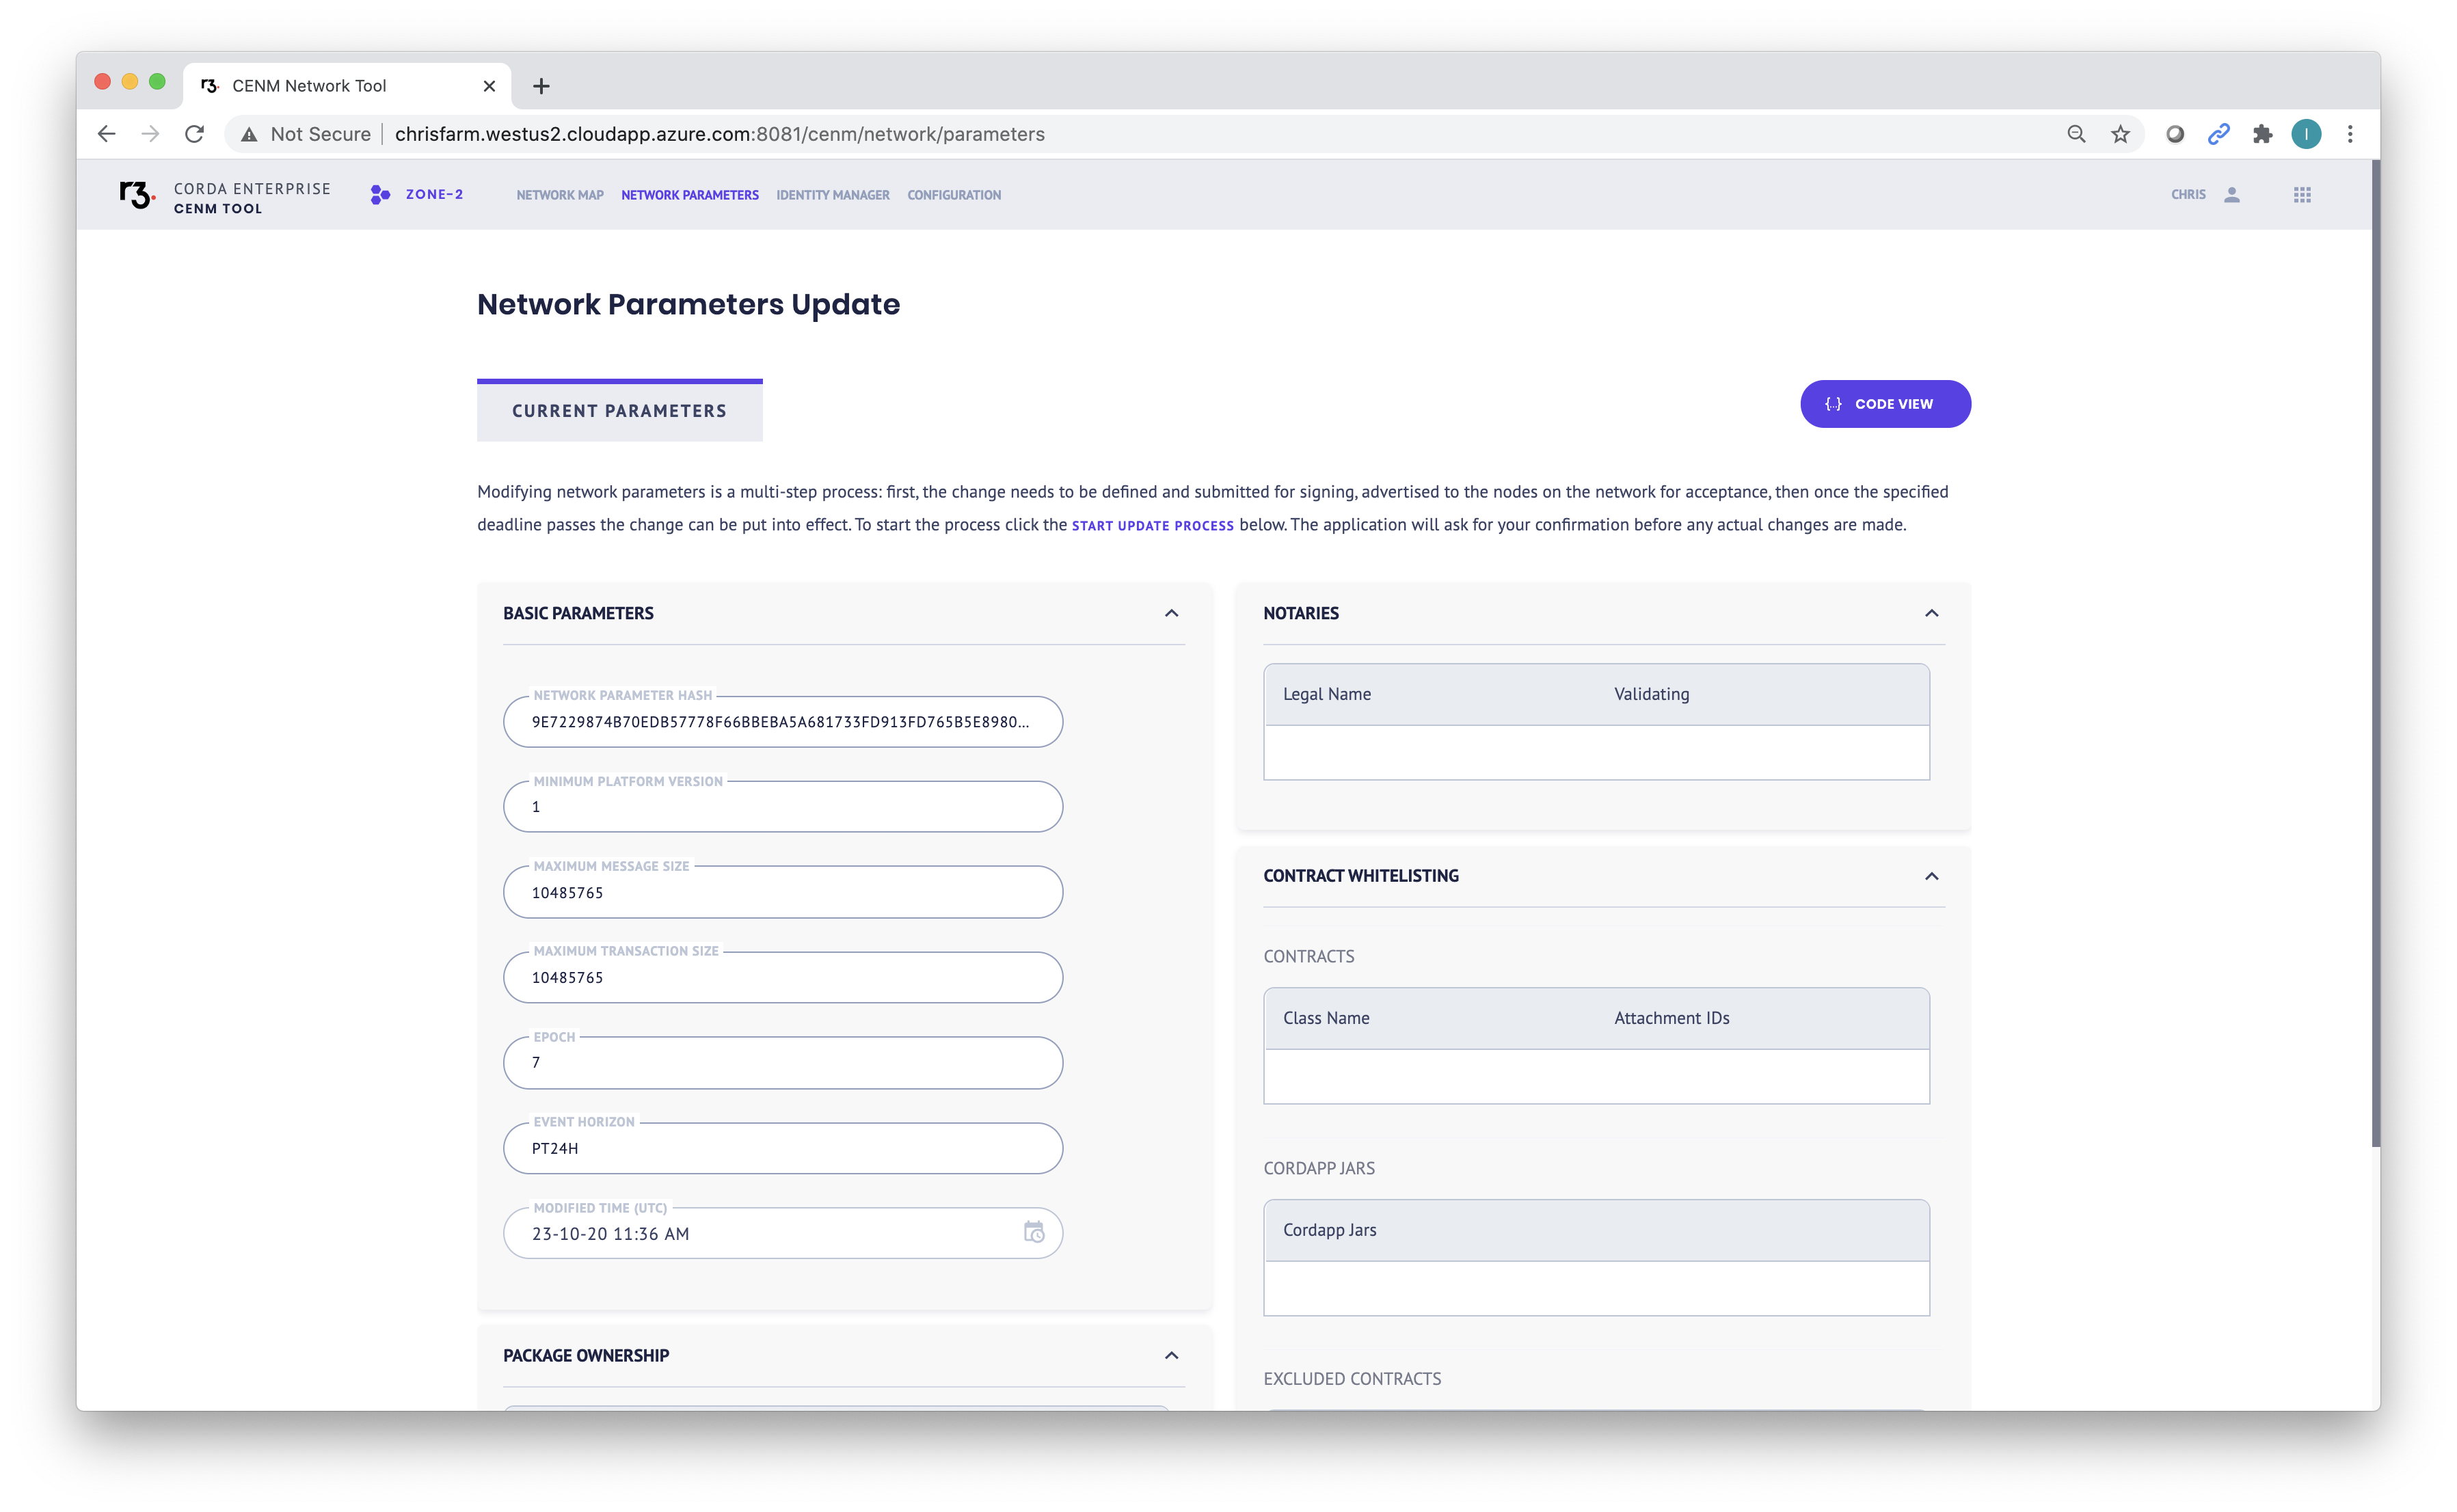
View and update Network Parameters
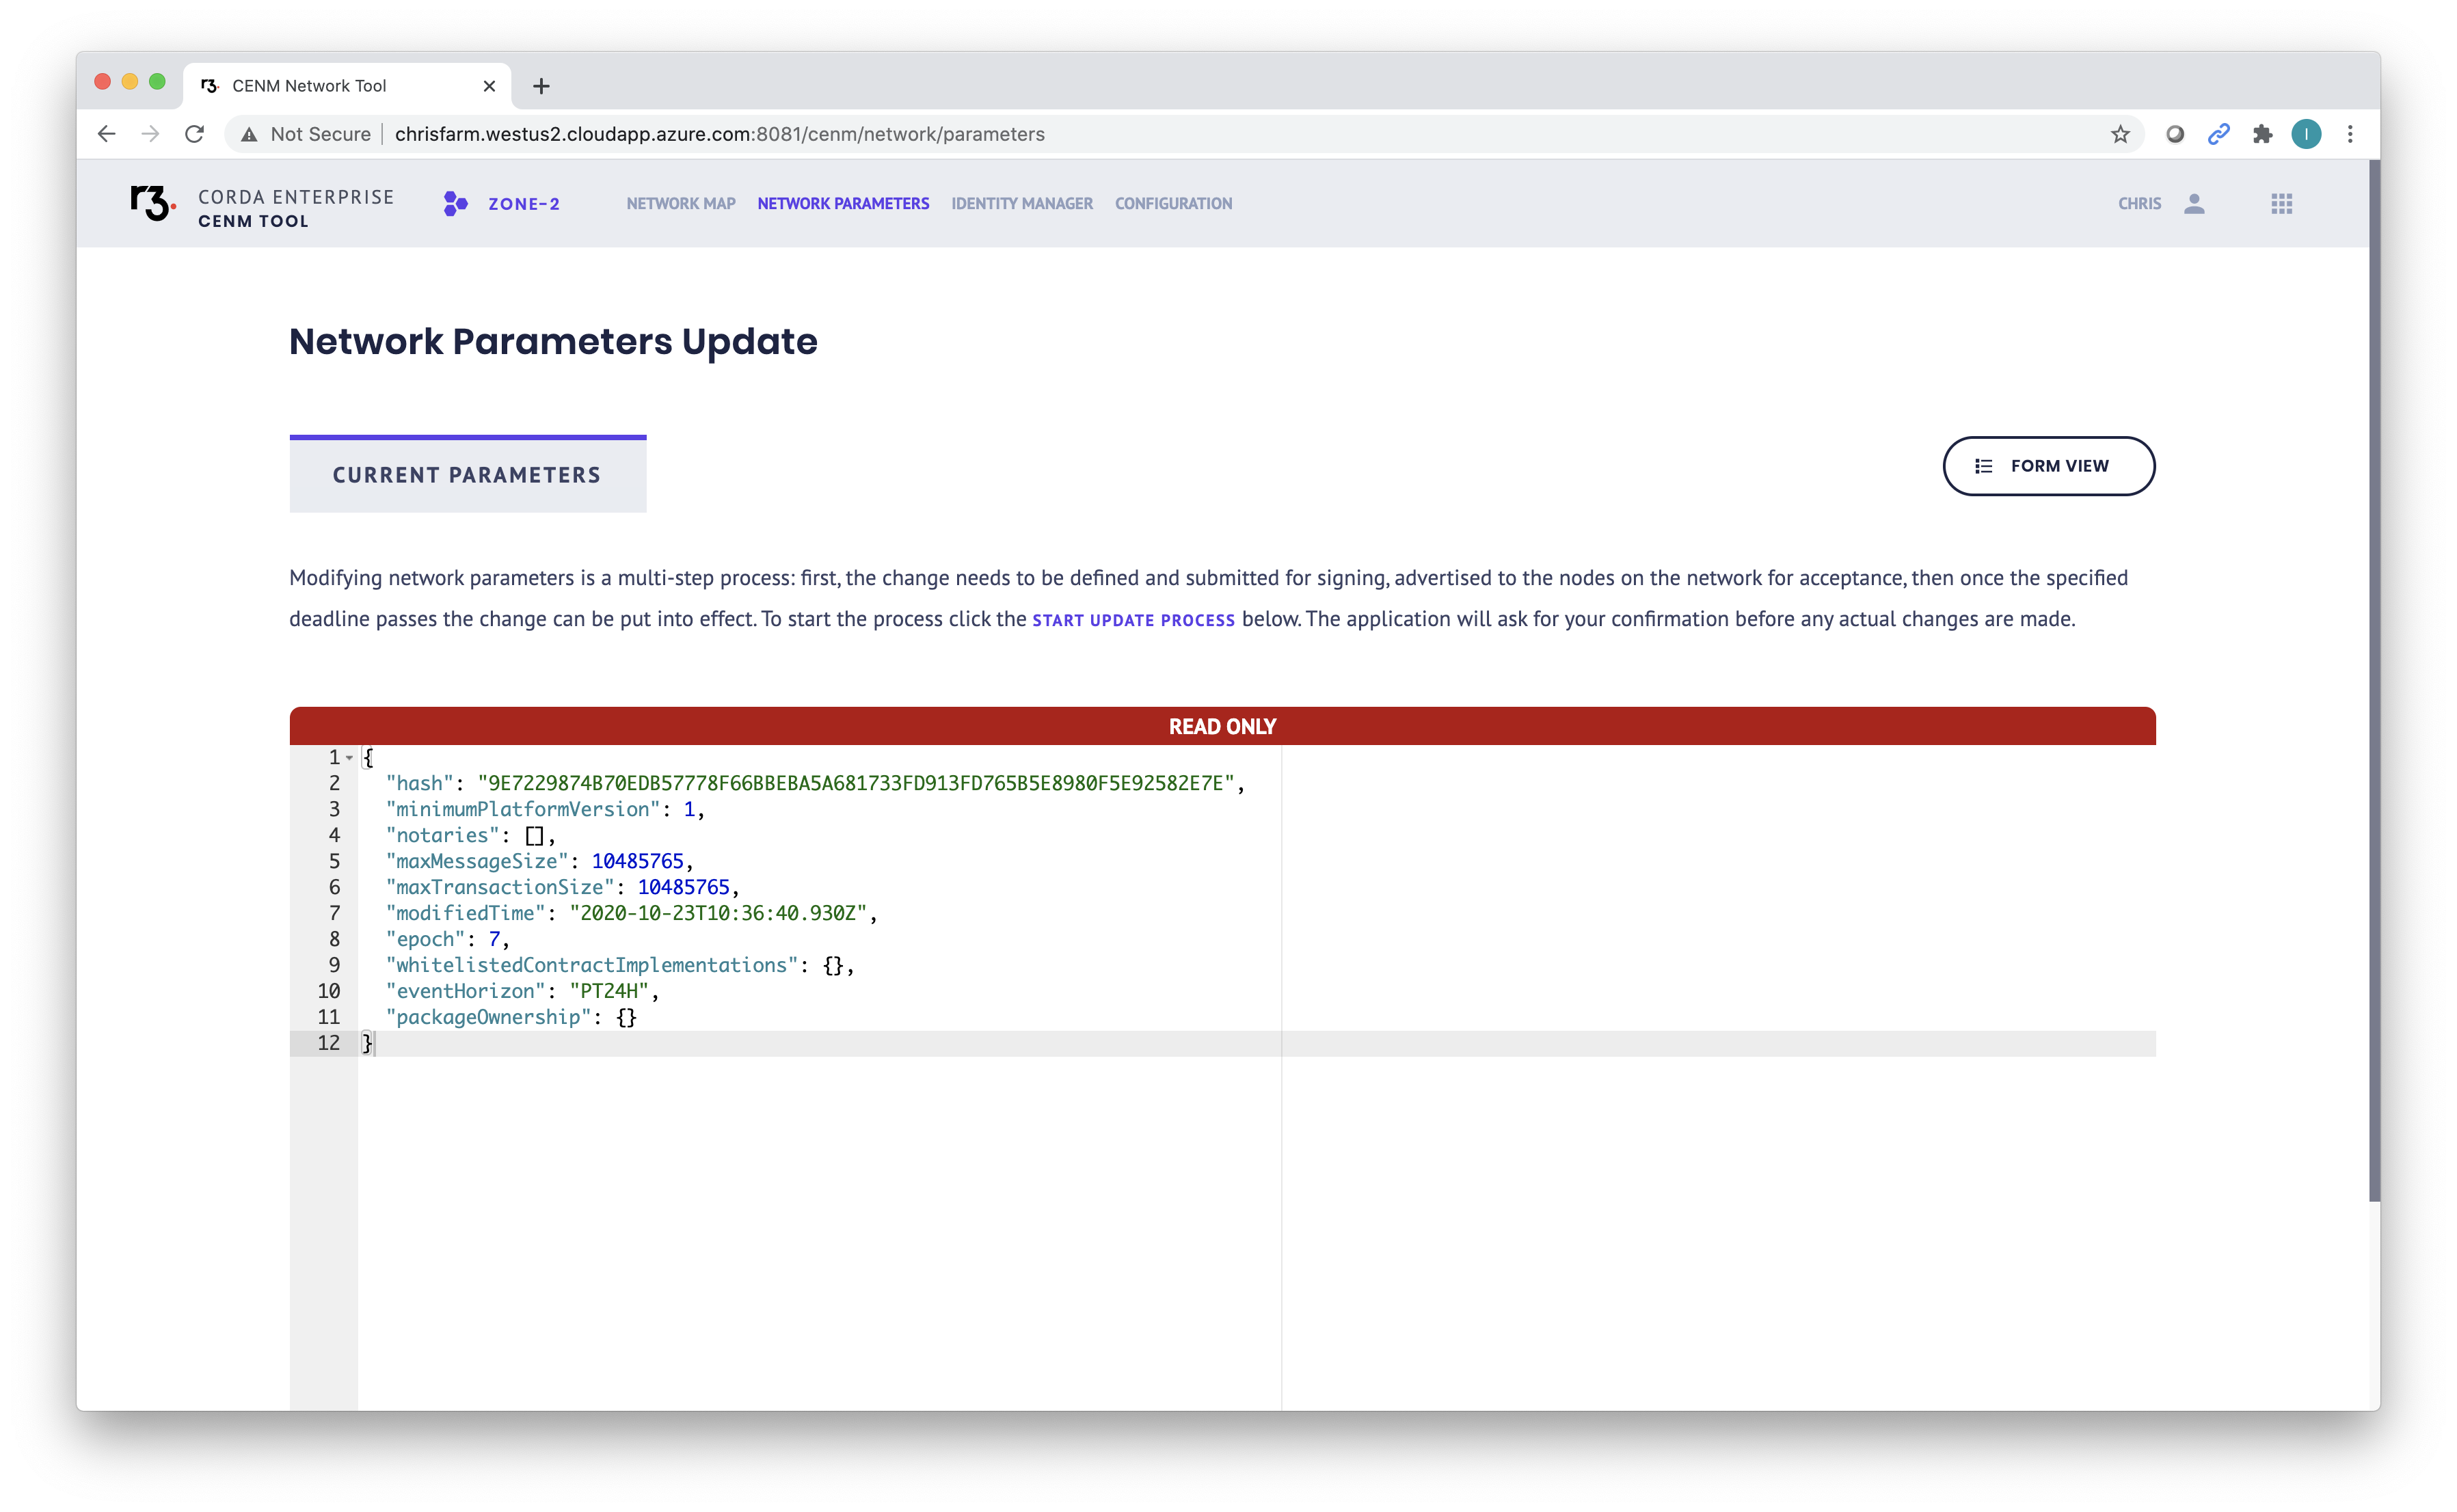
To view the status and any pending changes to the Network Parameters, or to make new updates, click NETWORK PARAMETERS in the top navigation area of the screen. The Network Parameters view shows the current network parameters in the CURRENT PARAMETERS tab:
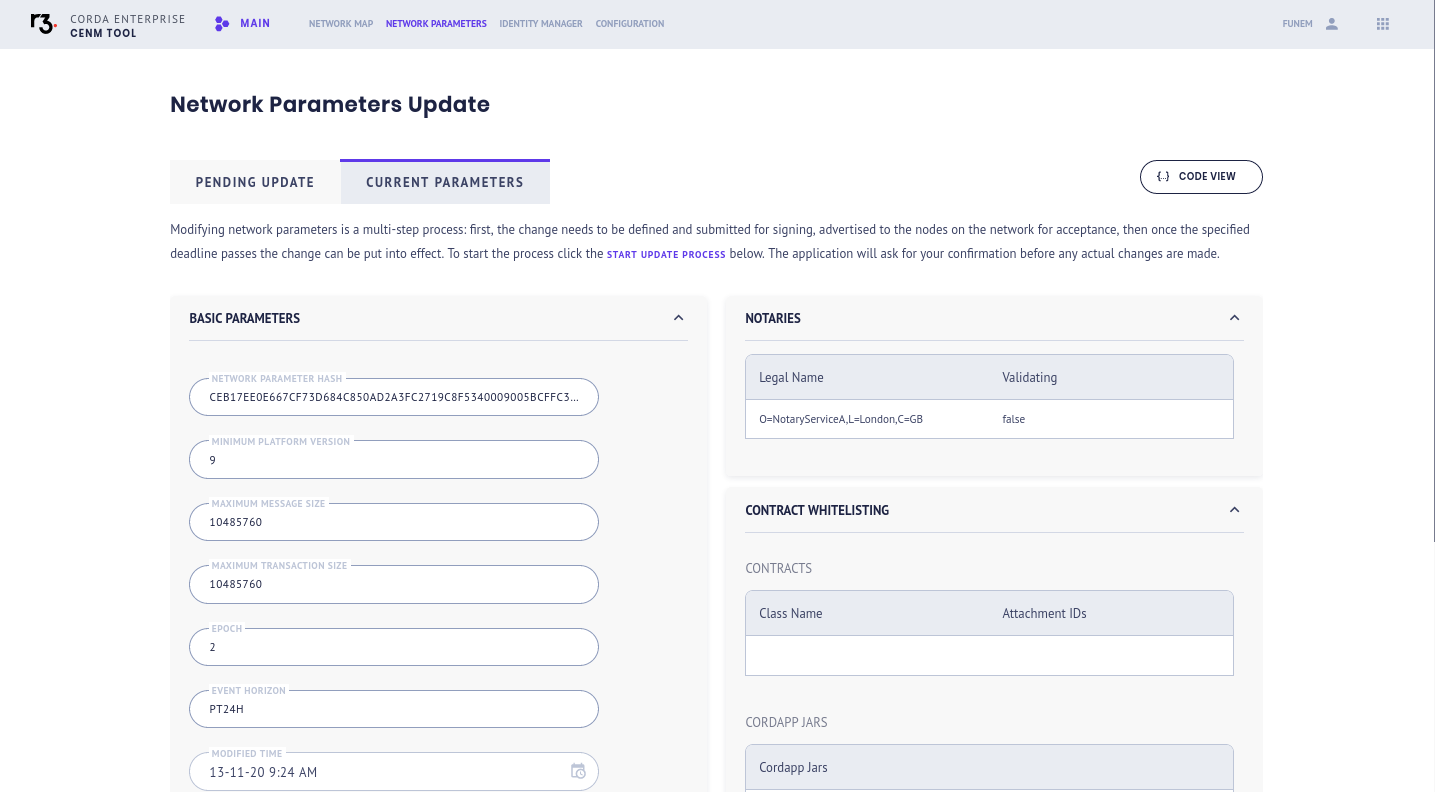
If there are pending updates, you will see them in the PENDING UPDATE tab:
To update the Network Parameters:
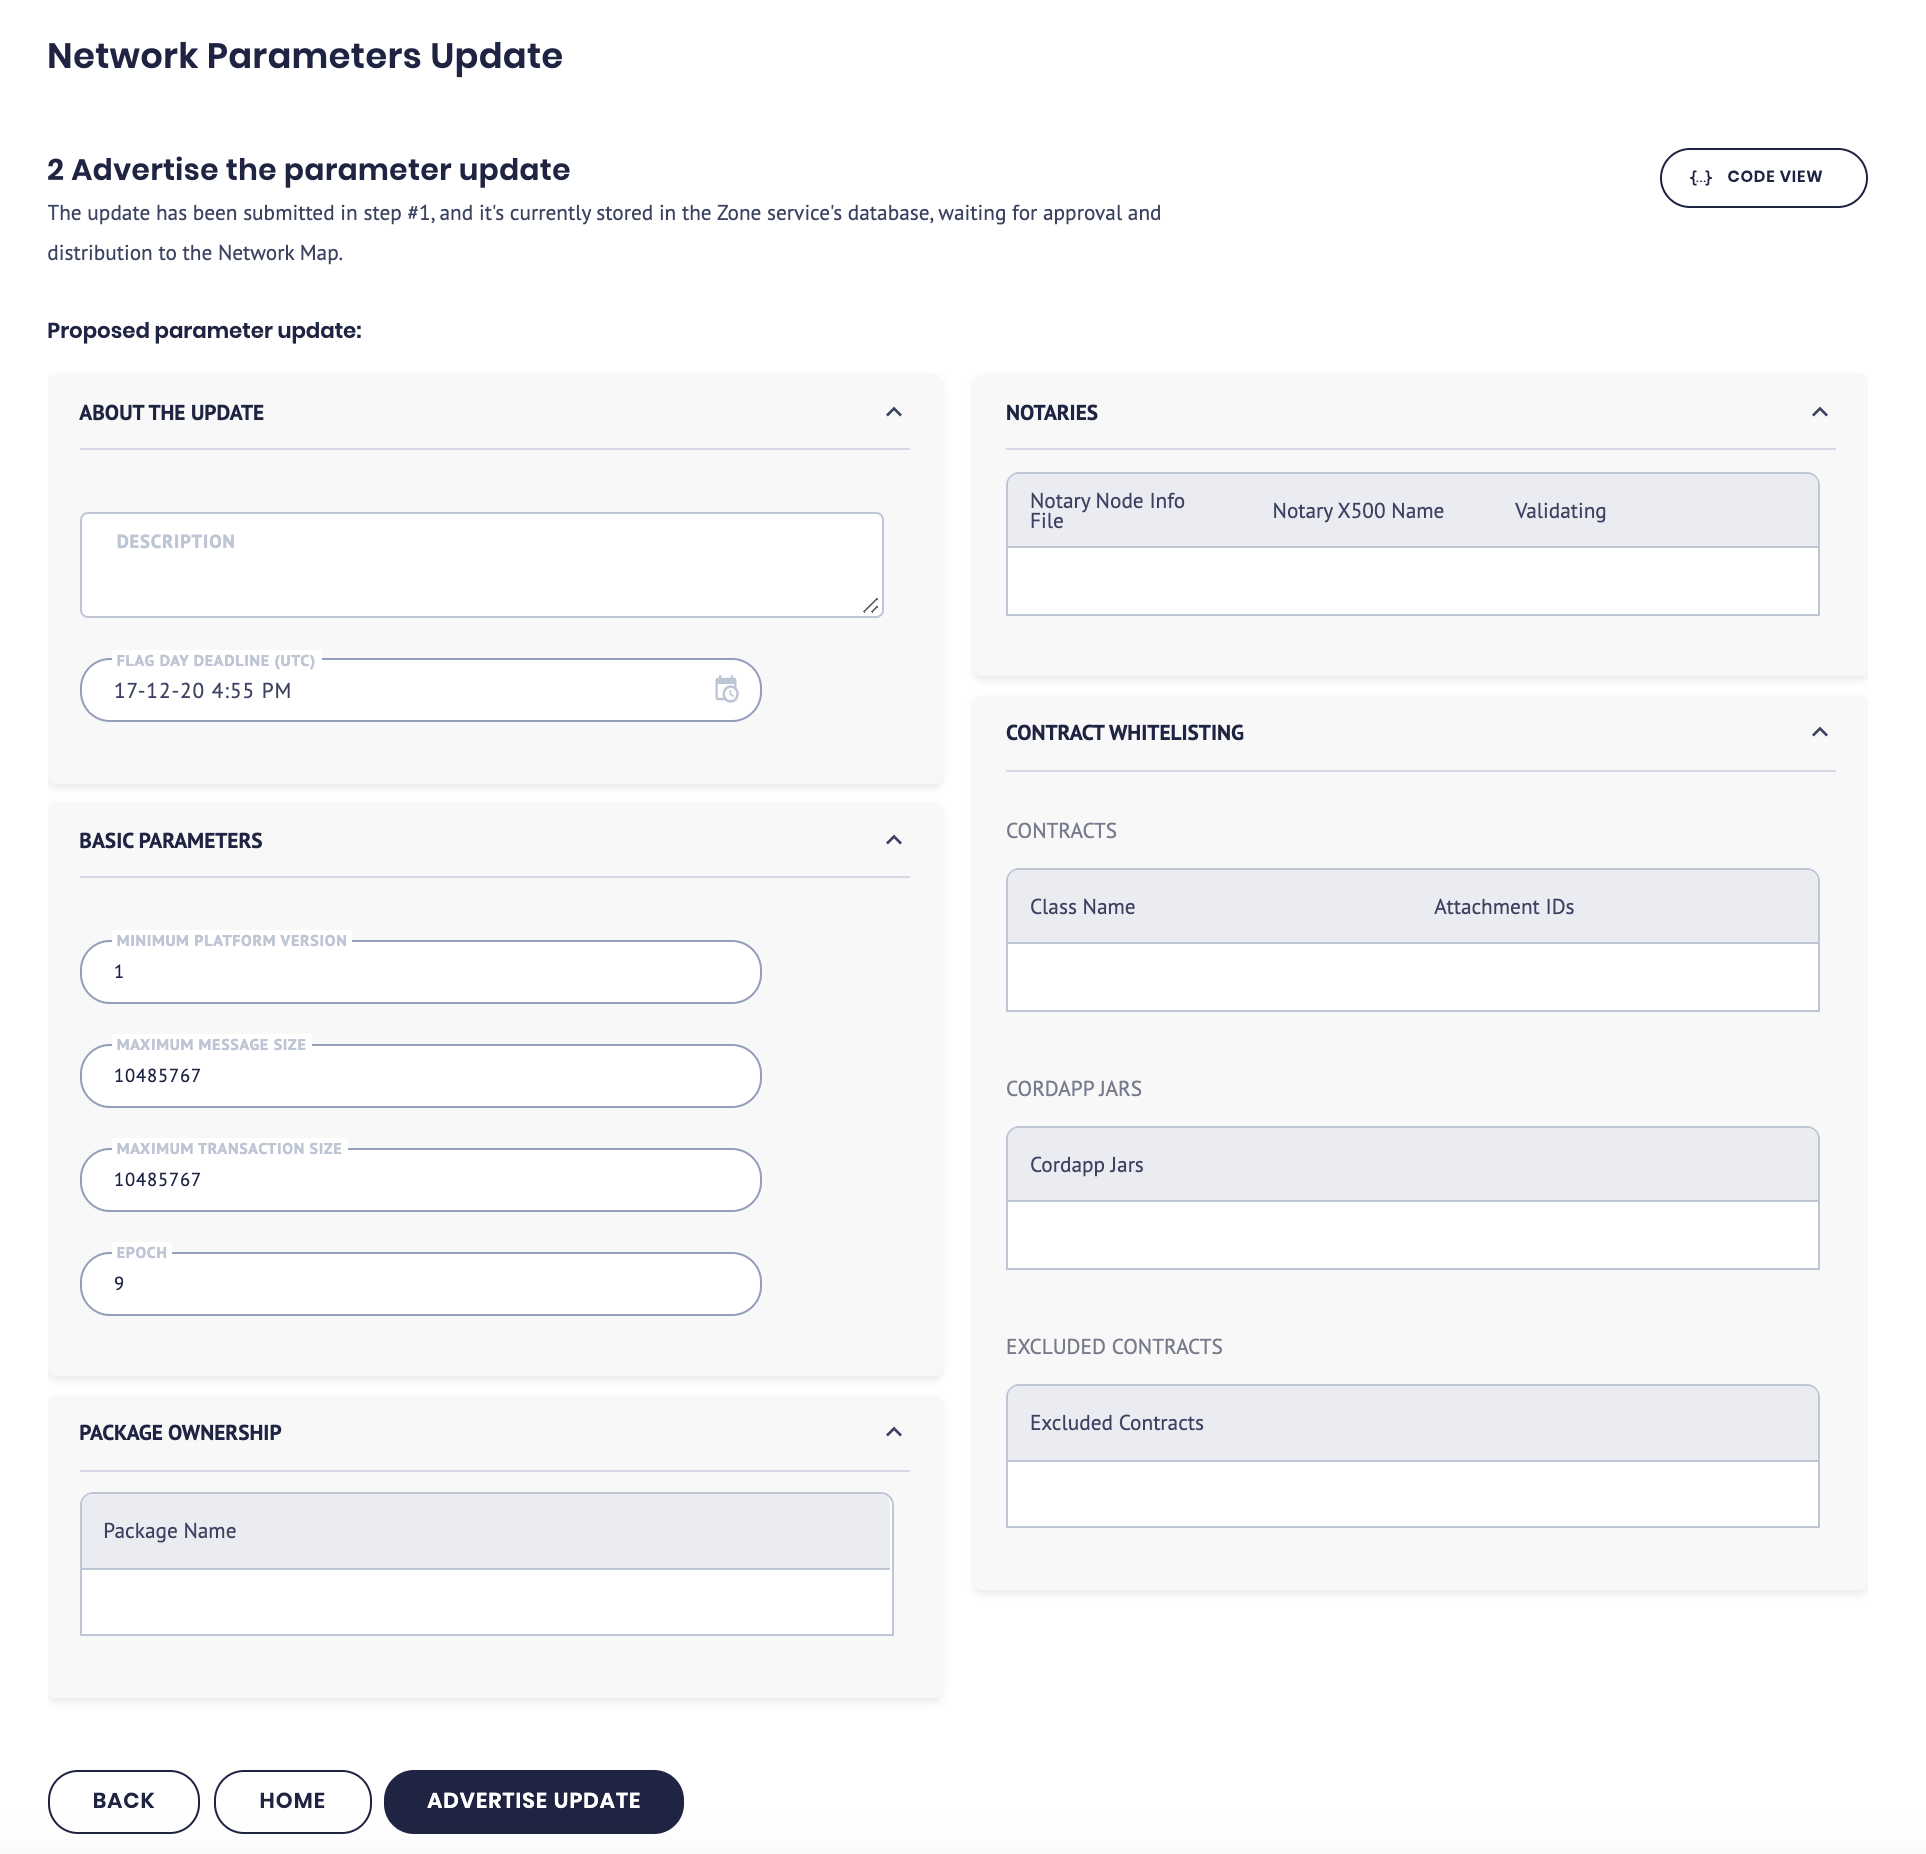
- On the NETWORK PARAMETERS screen, scroll to the bottom and click START UPDATE PROCESS to open the Network Parameters Update form view:
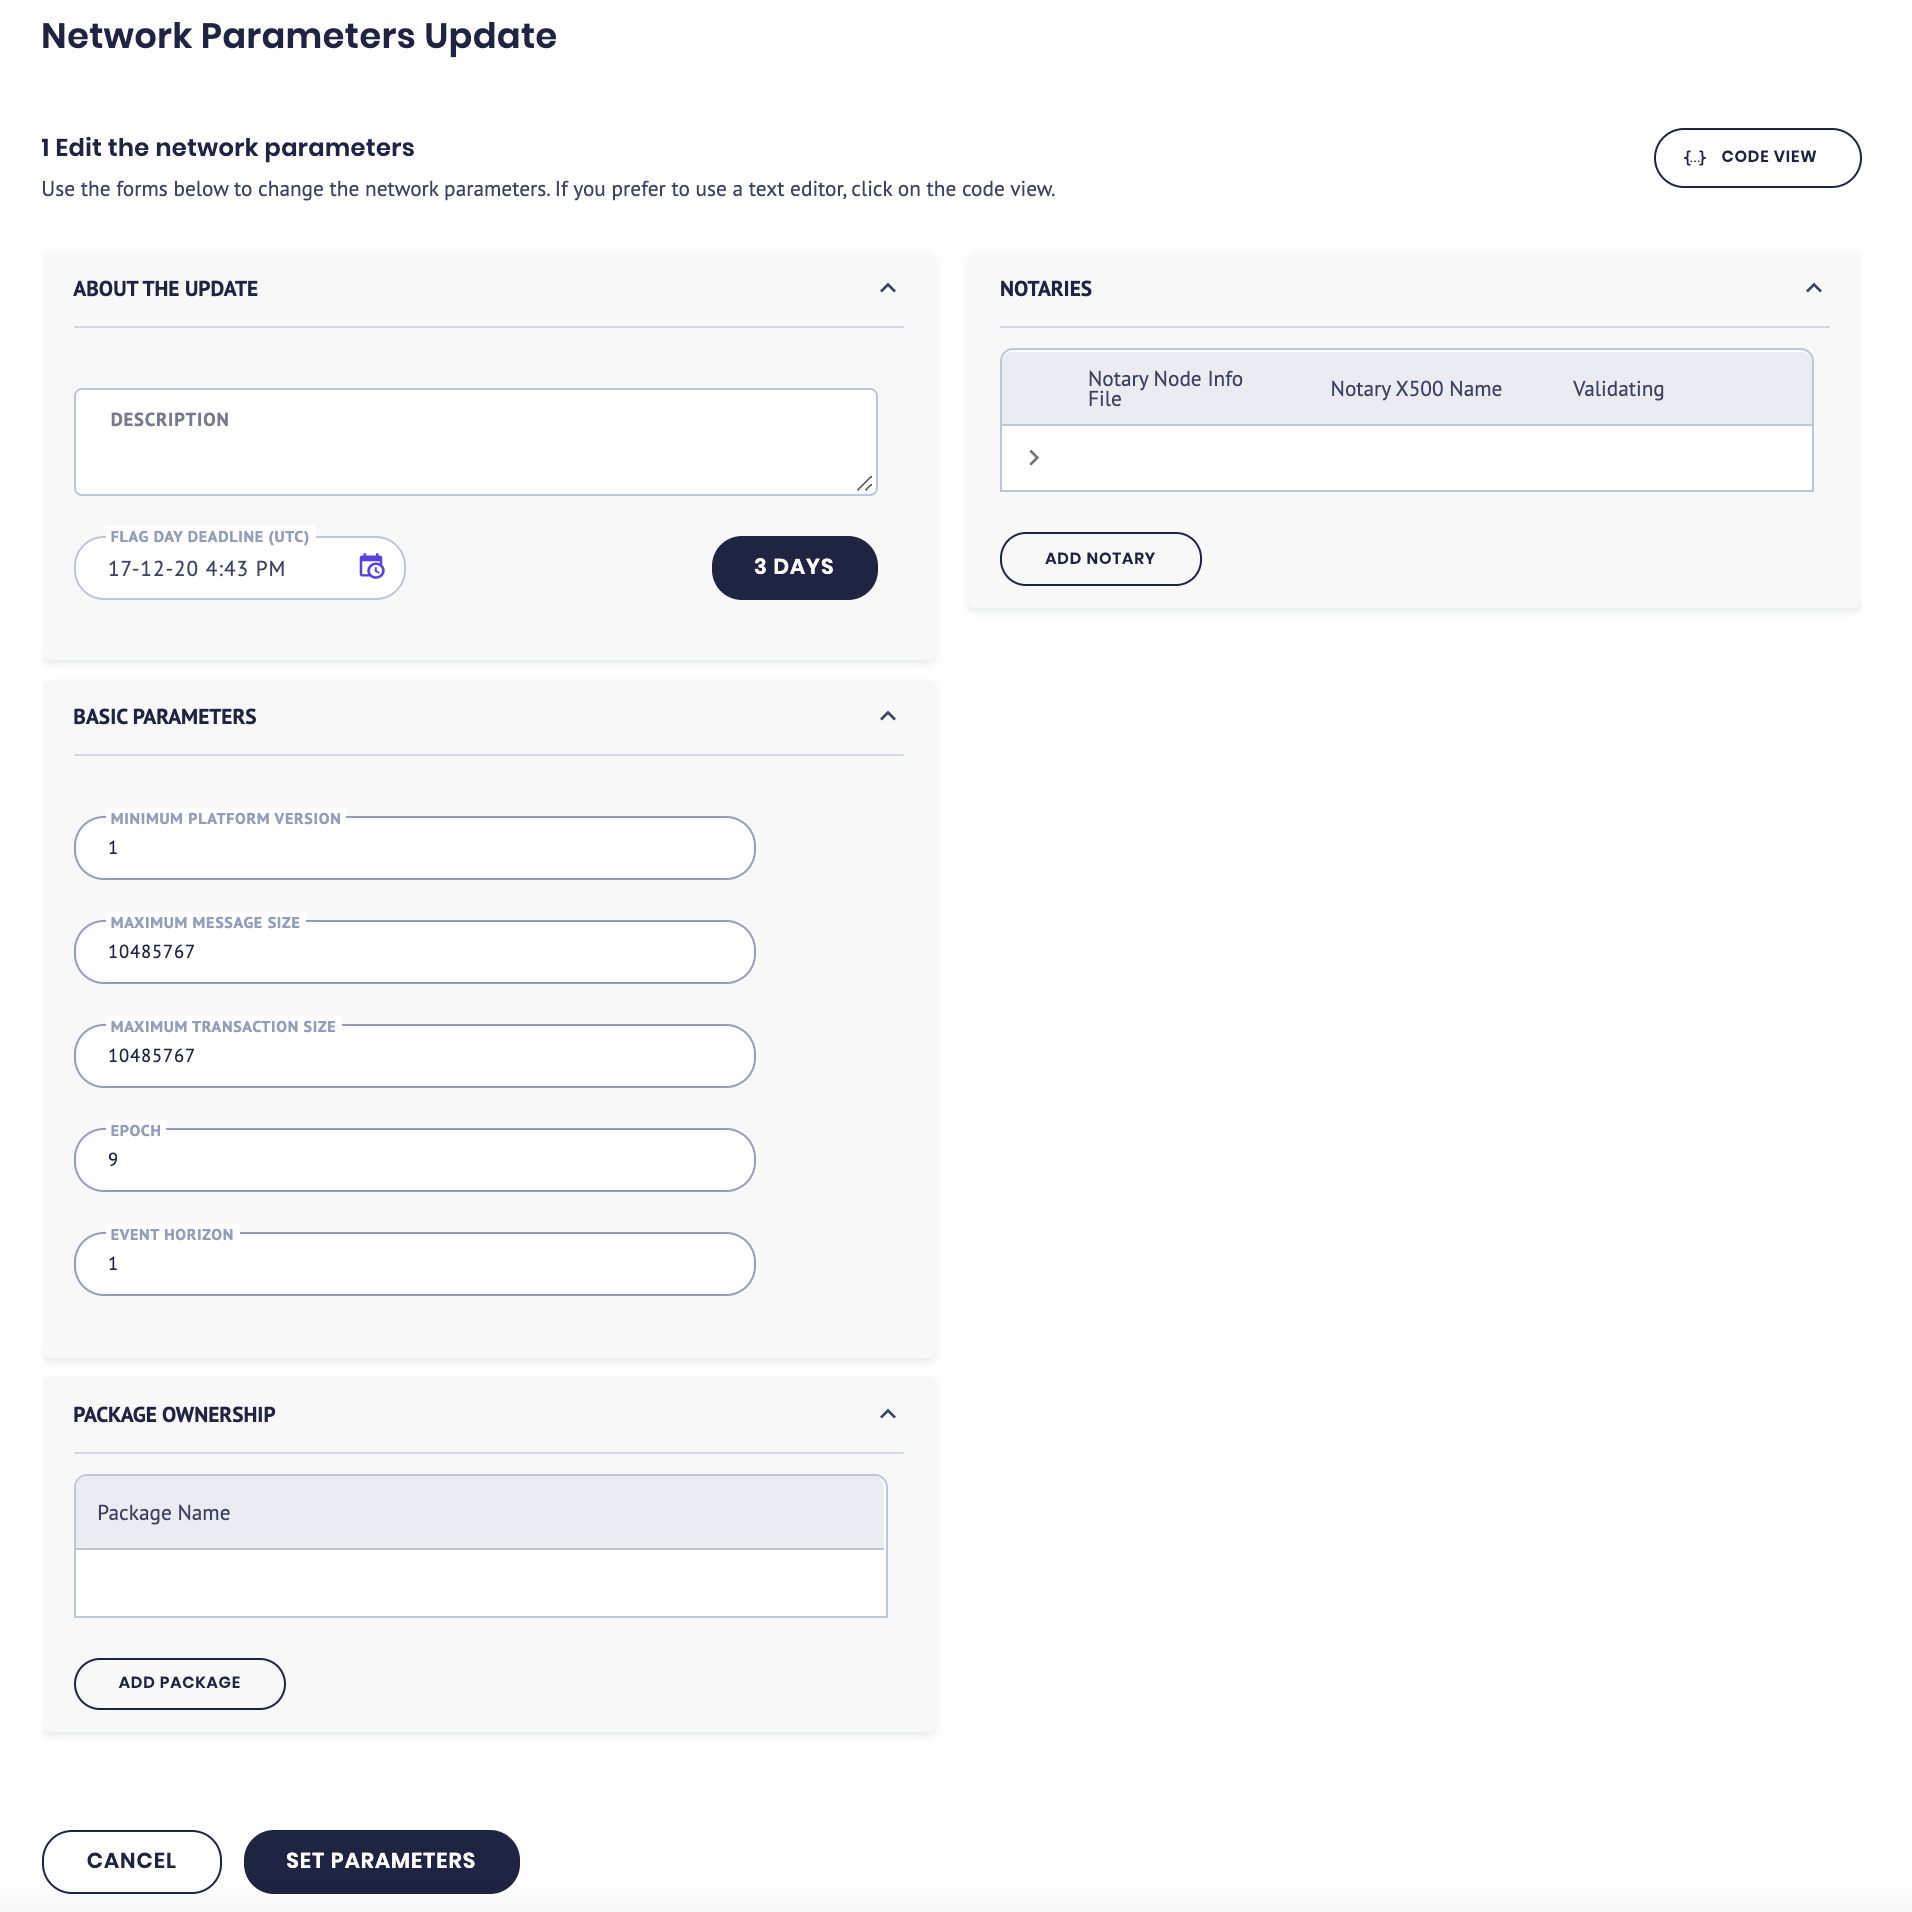
Give a name to the update in the ABOUT THE UPDATE field.
Use the calendar picker to schedule the time and date of the Flag Day - this is the period during which the network parameters will update.
Make the required changes in the BASIC PARAMETERS fields. Alternatively, to make the changes in a command-line interface within the console, select the CODE VIEW in the top right corner of the screen:
If required, add a Notary to the update in the NOTARIES section.
Click SET PARAMETERS.
Now that the update has been scheduled, click ADVERTISE UPDATE to advertise the update:
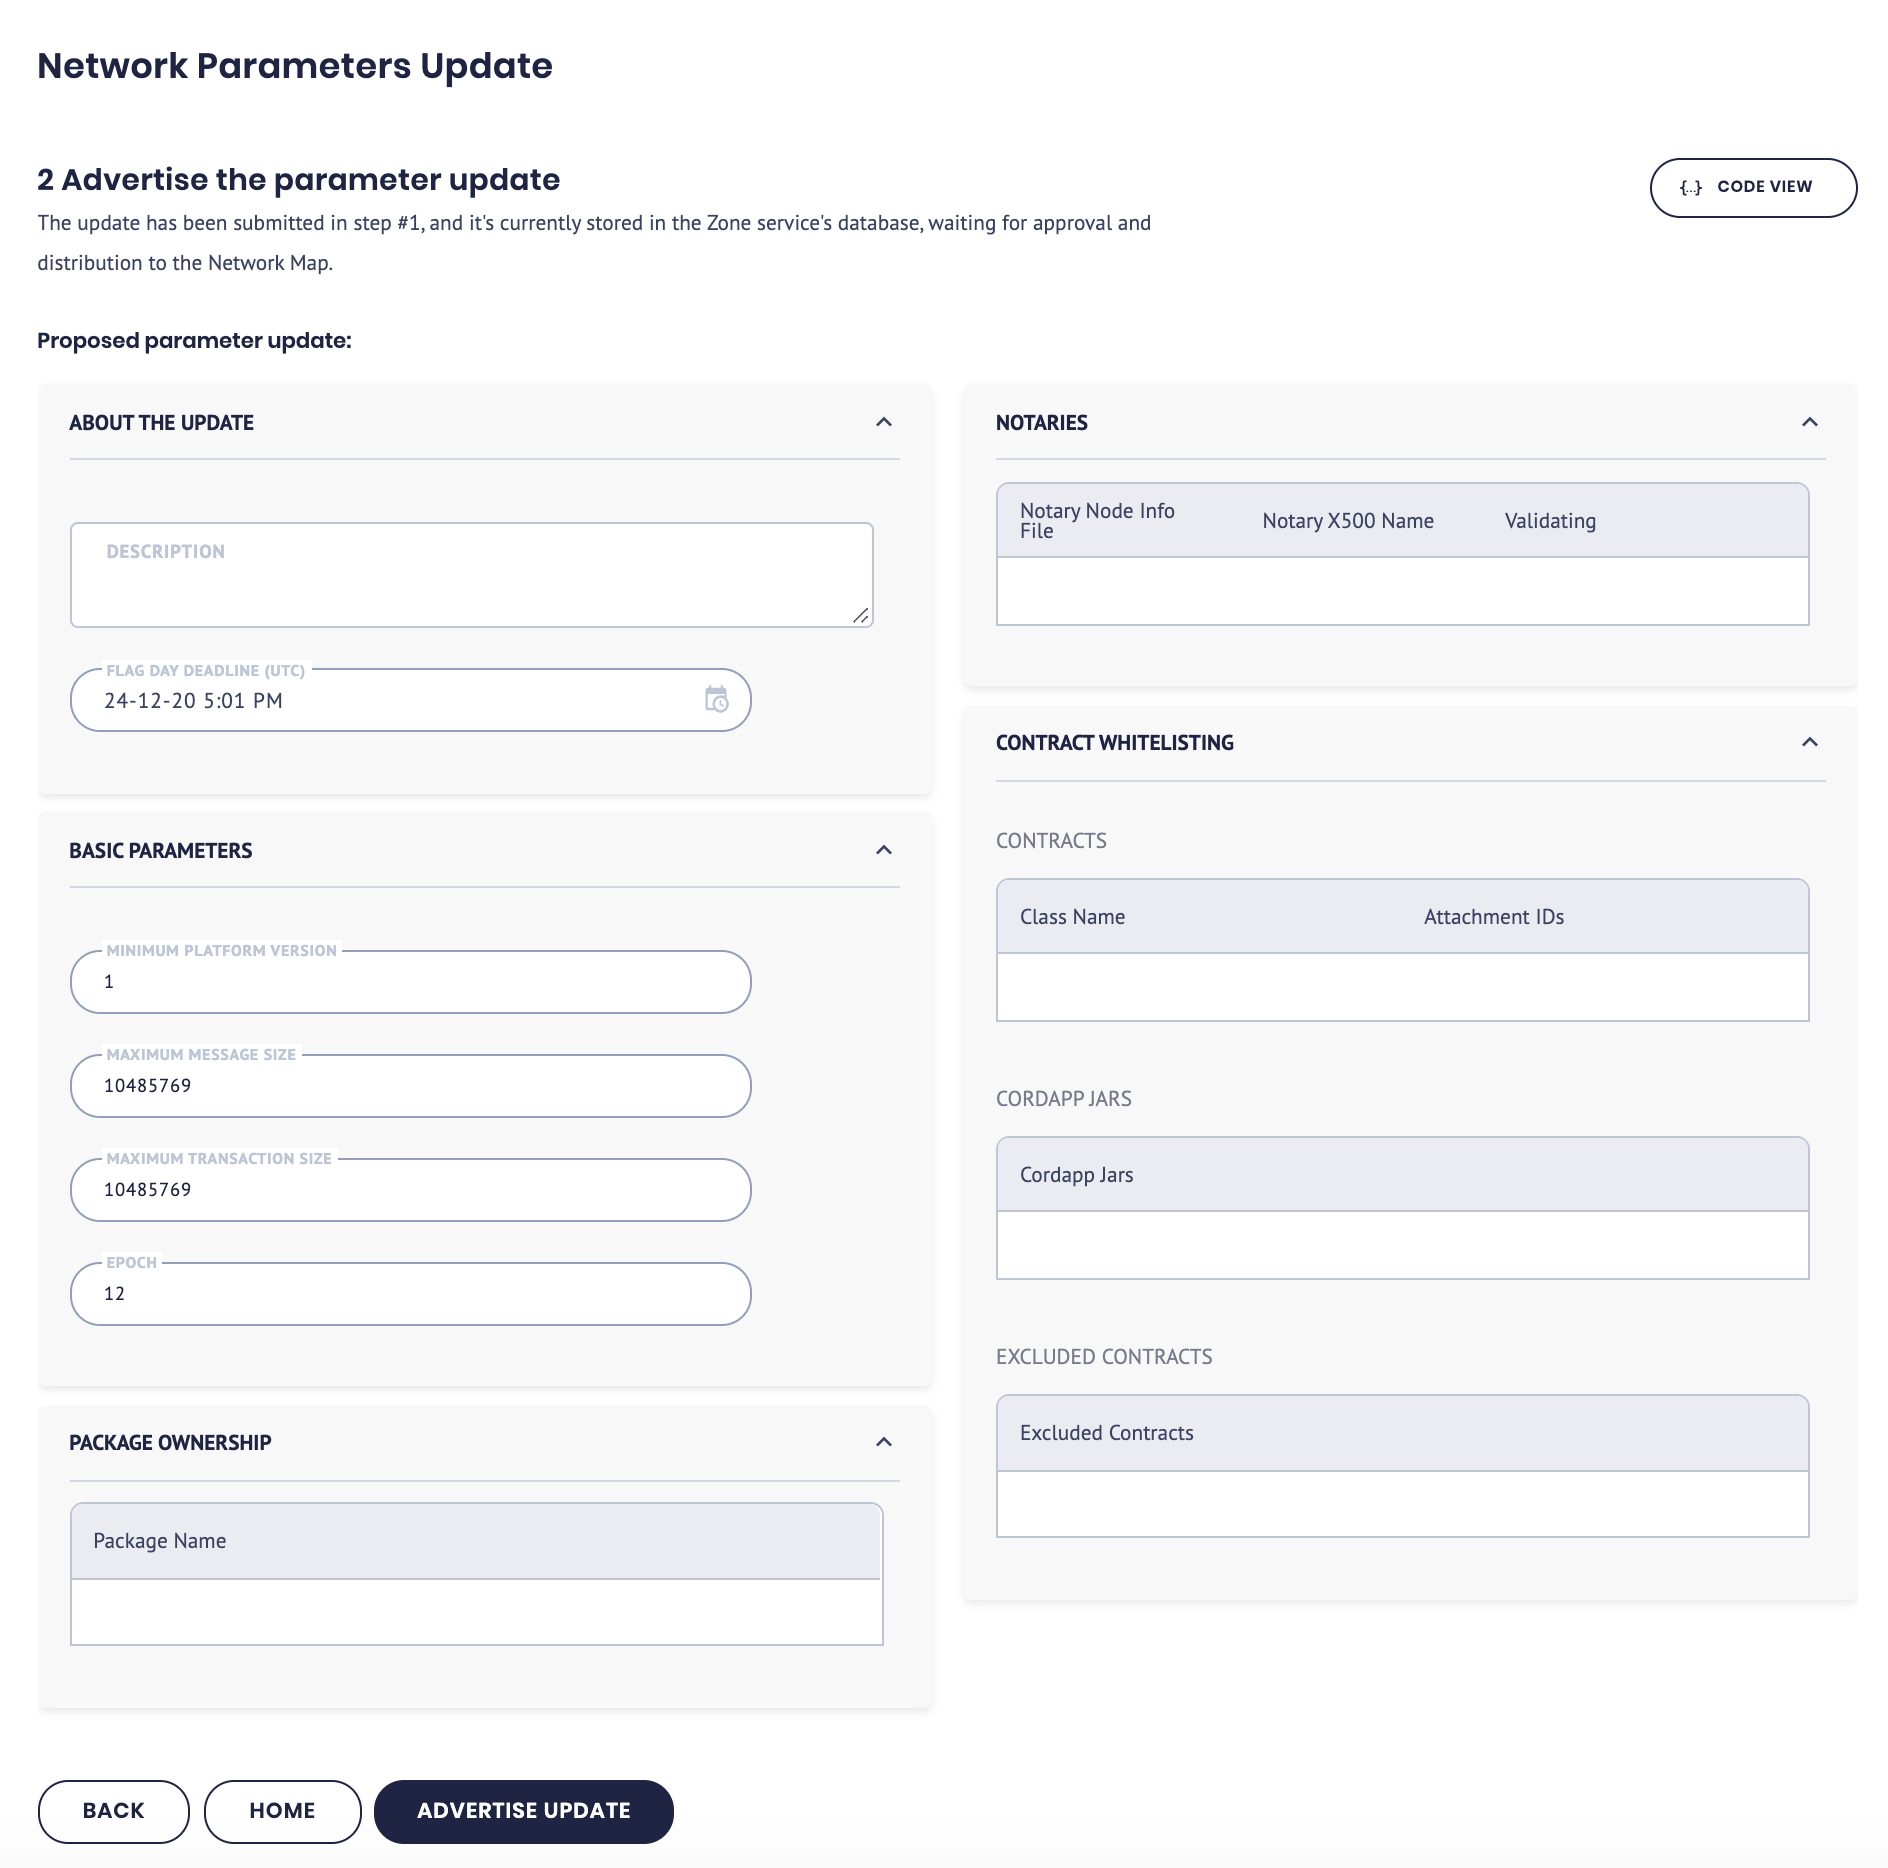
- Once you have updated the parameters, scroll down and click ADVERTISE UPDATE again to advertise the parameters update:
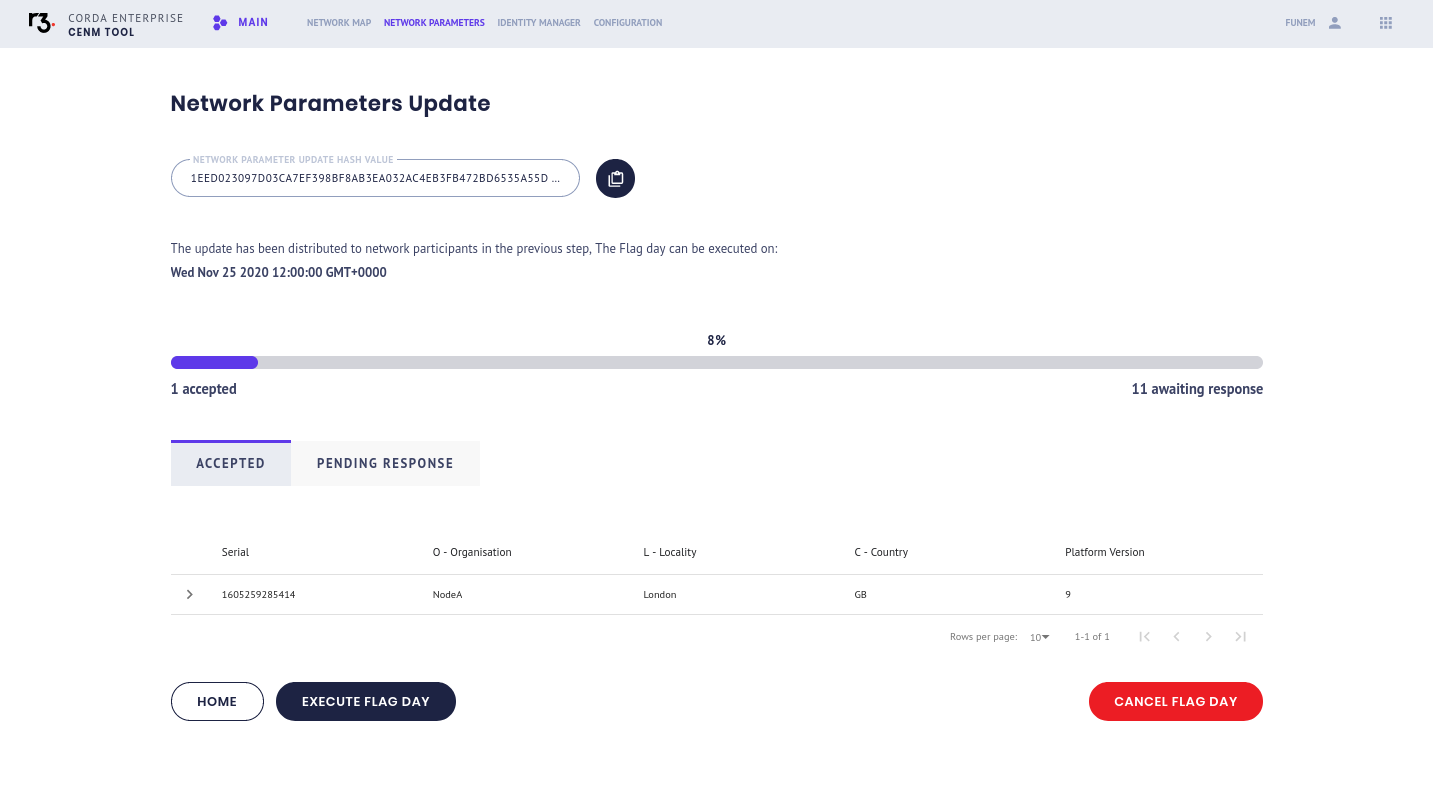
You can now see the nodes that have accepted the update, and those that are still pending.
Once you have advertised the update, and the scheduled time has been reached, you can execute the flag day.
Scroll down and click Execute Flag Day:
Check Identity Manager Service status and progress
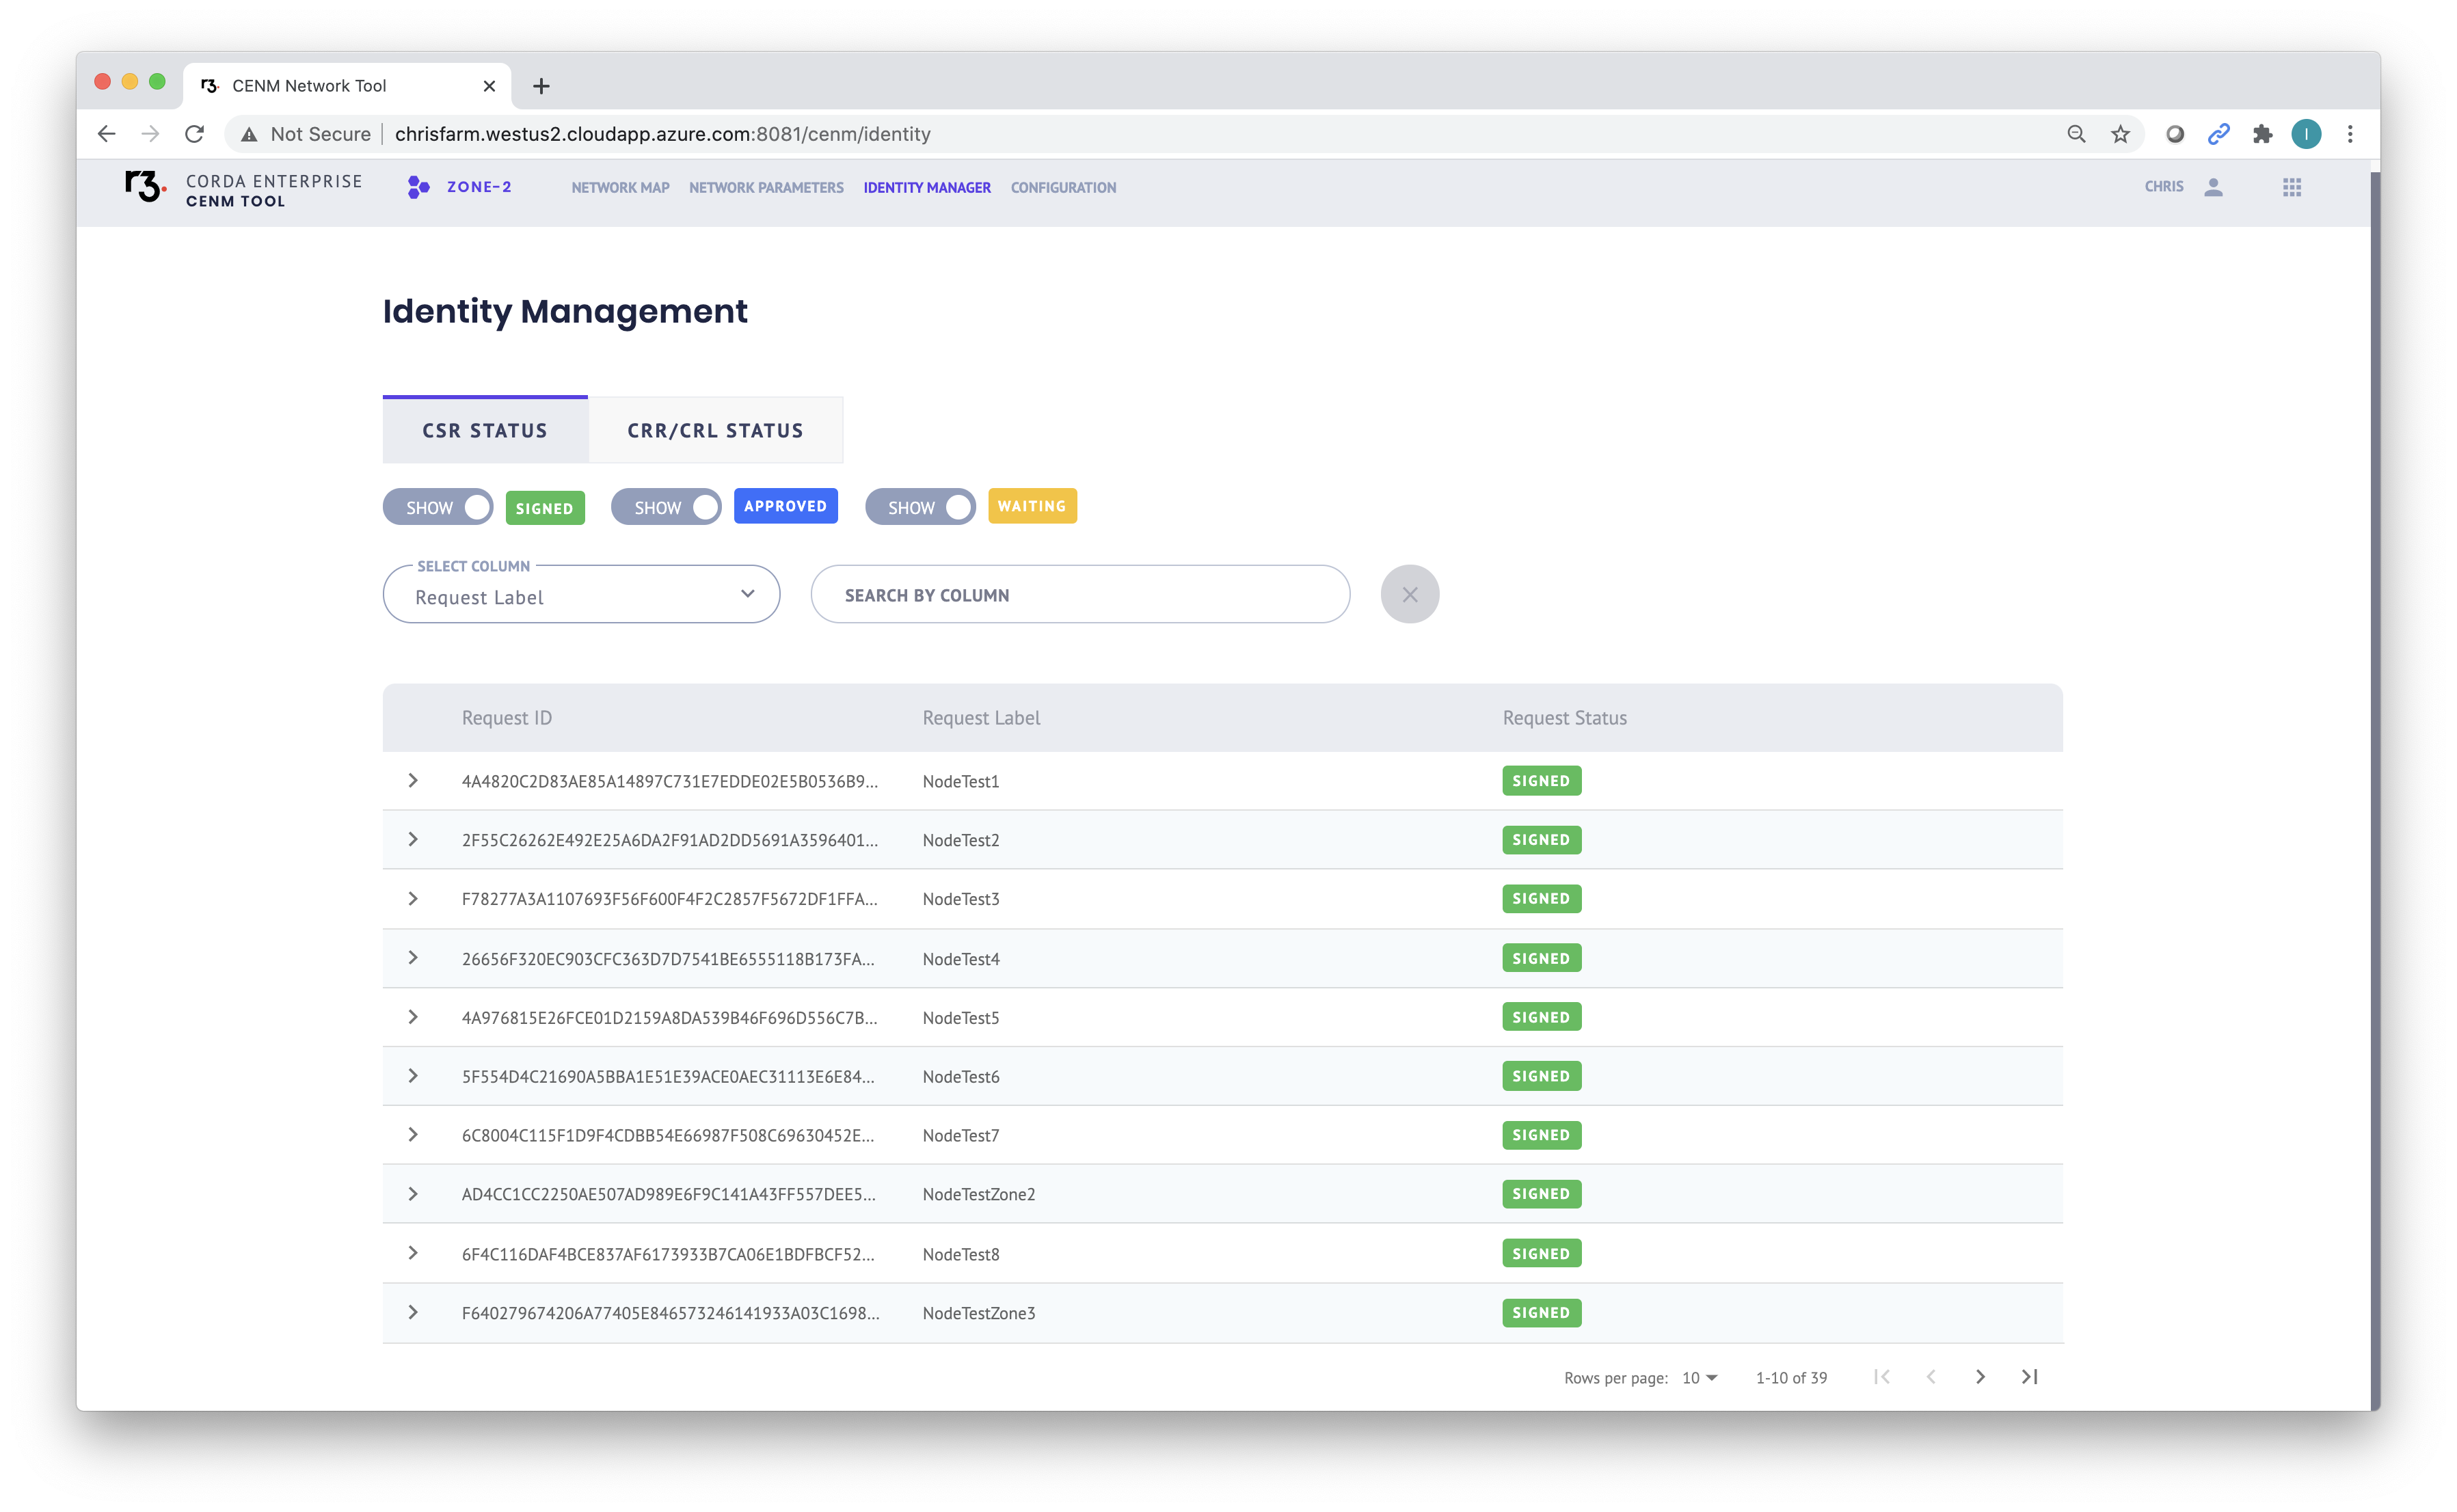
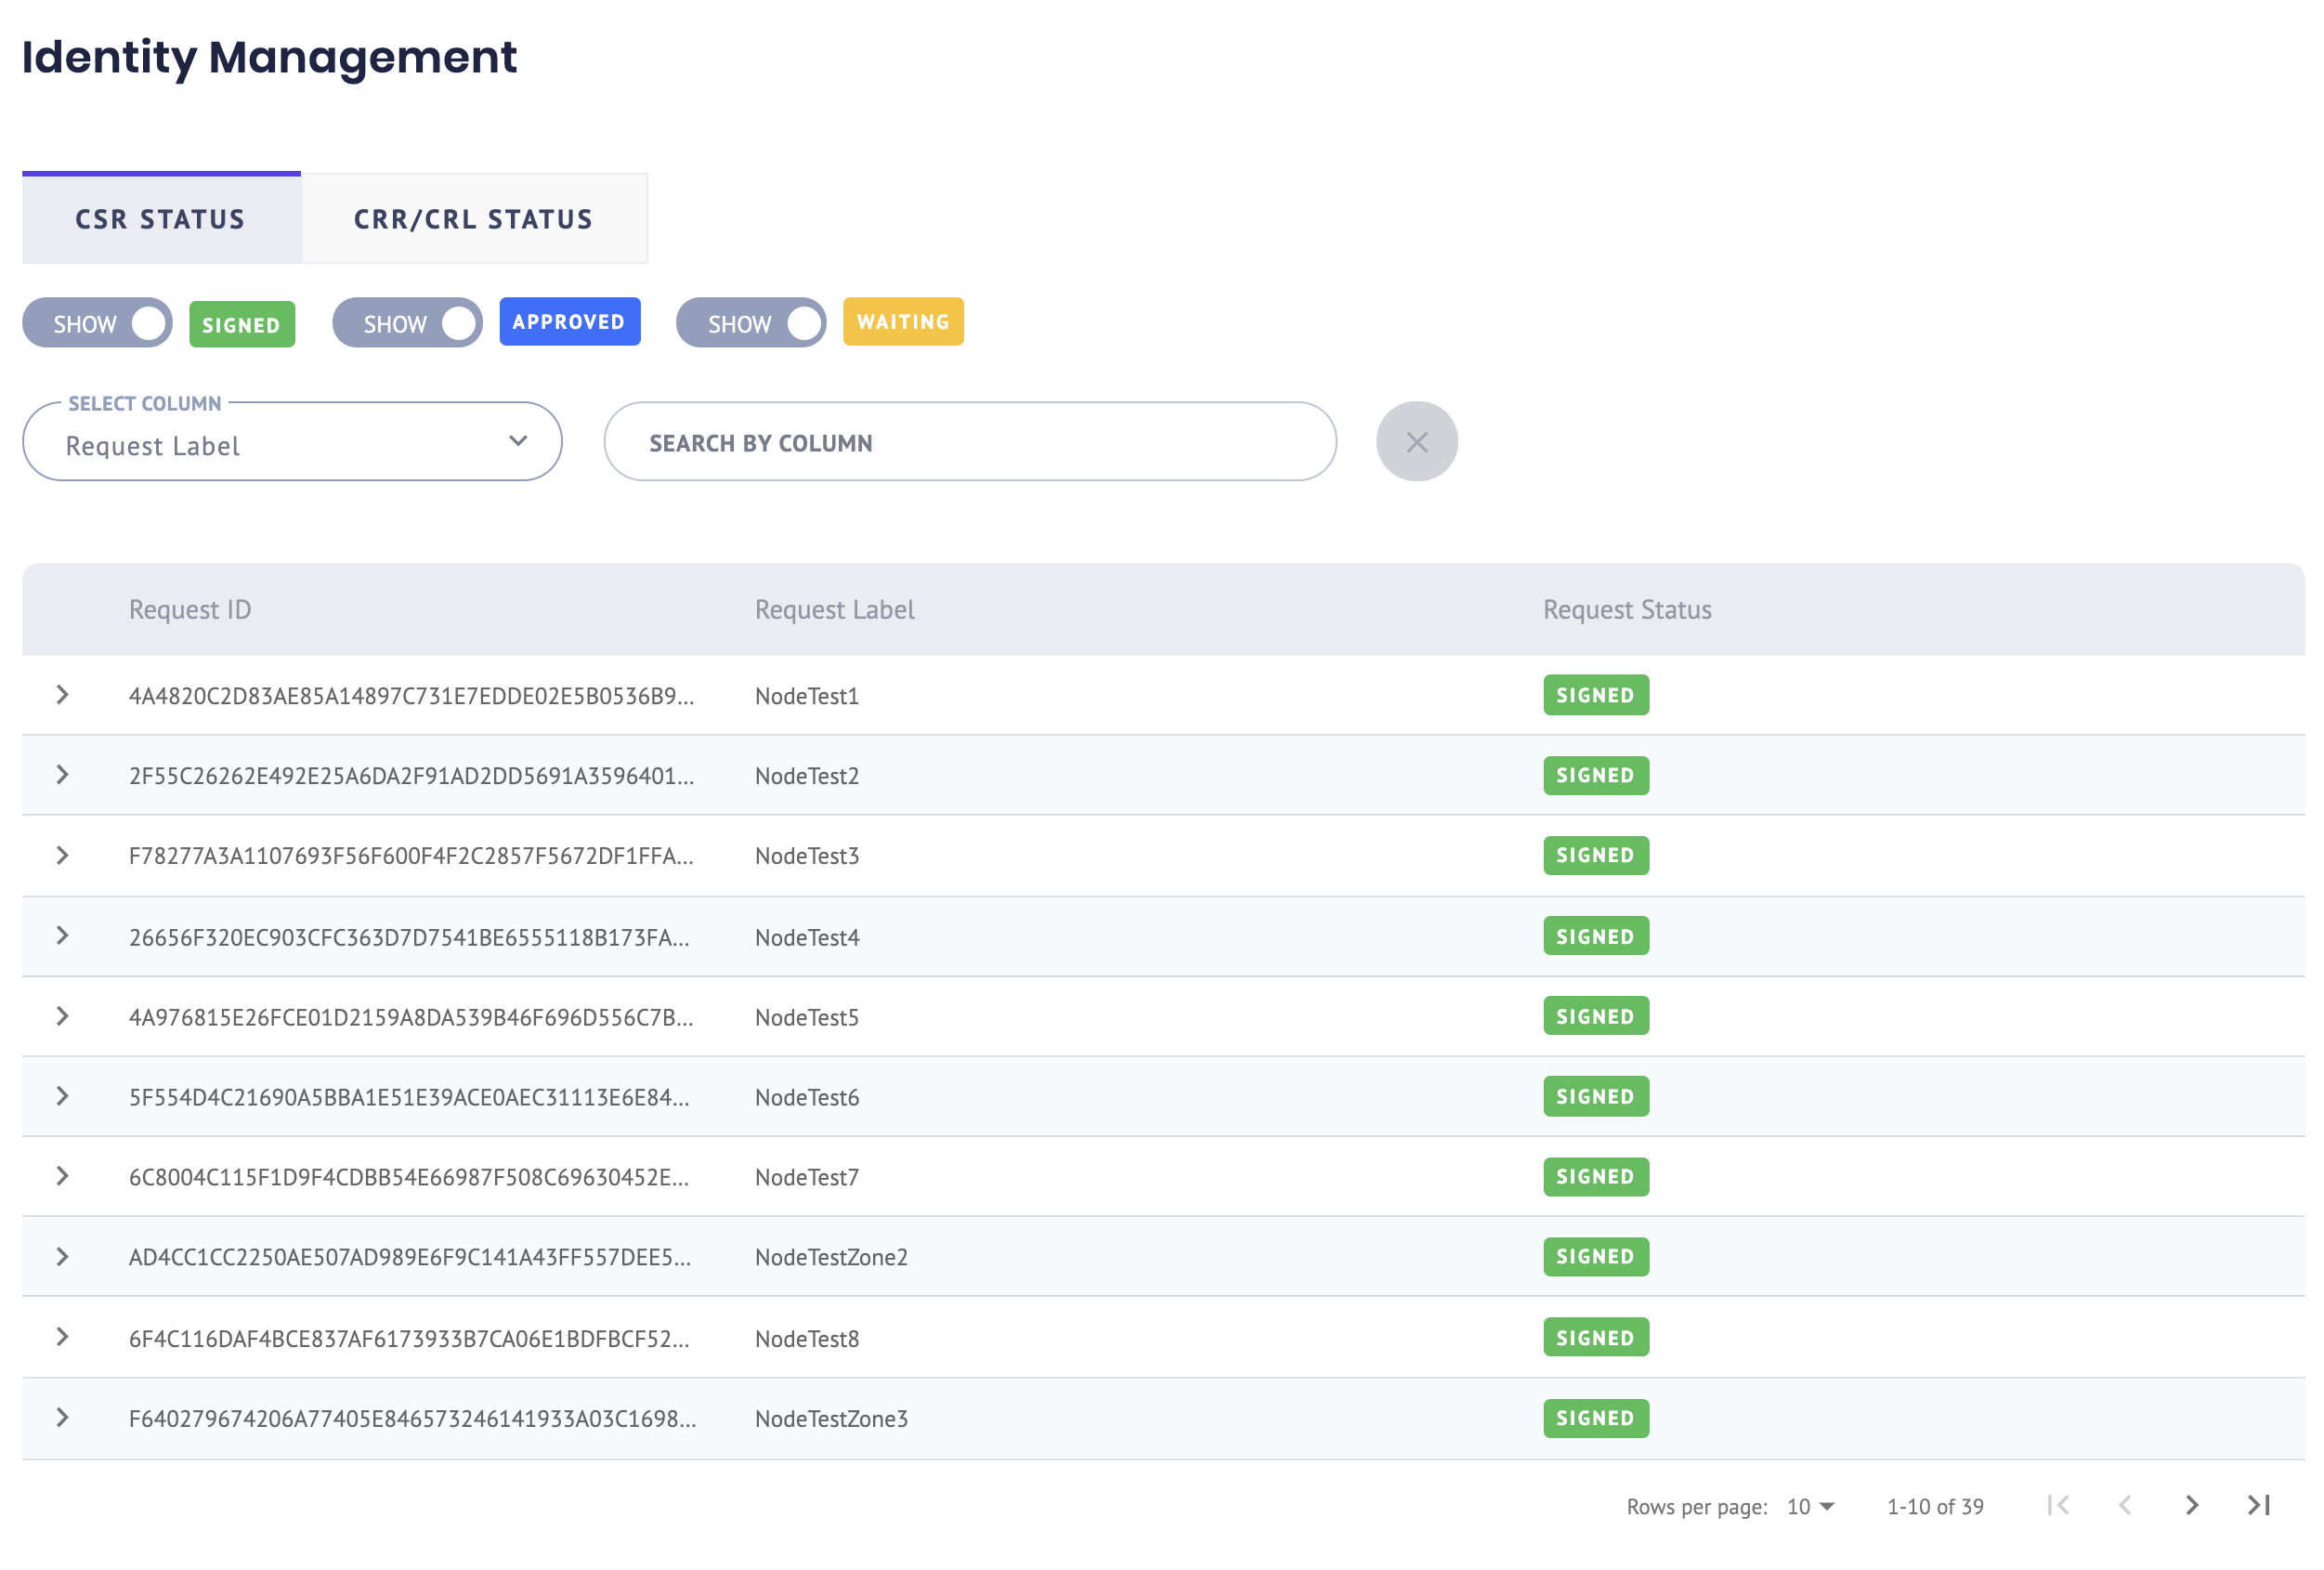
To access the Identity Manager Service, click IDENTITY MANAGER in the top navigation area of the screen. A list of CSR requests and their statuses is shown in the CSR STATUS tab:
Check CSR (onboarding) and CRL (removal) status
To check the status of members being onboarded to the network, click the CSR STATUS tab. You can see the status tag, and details of the request like the Request ID and legal name of the prospective member:
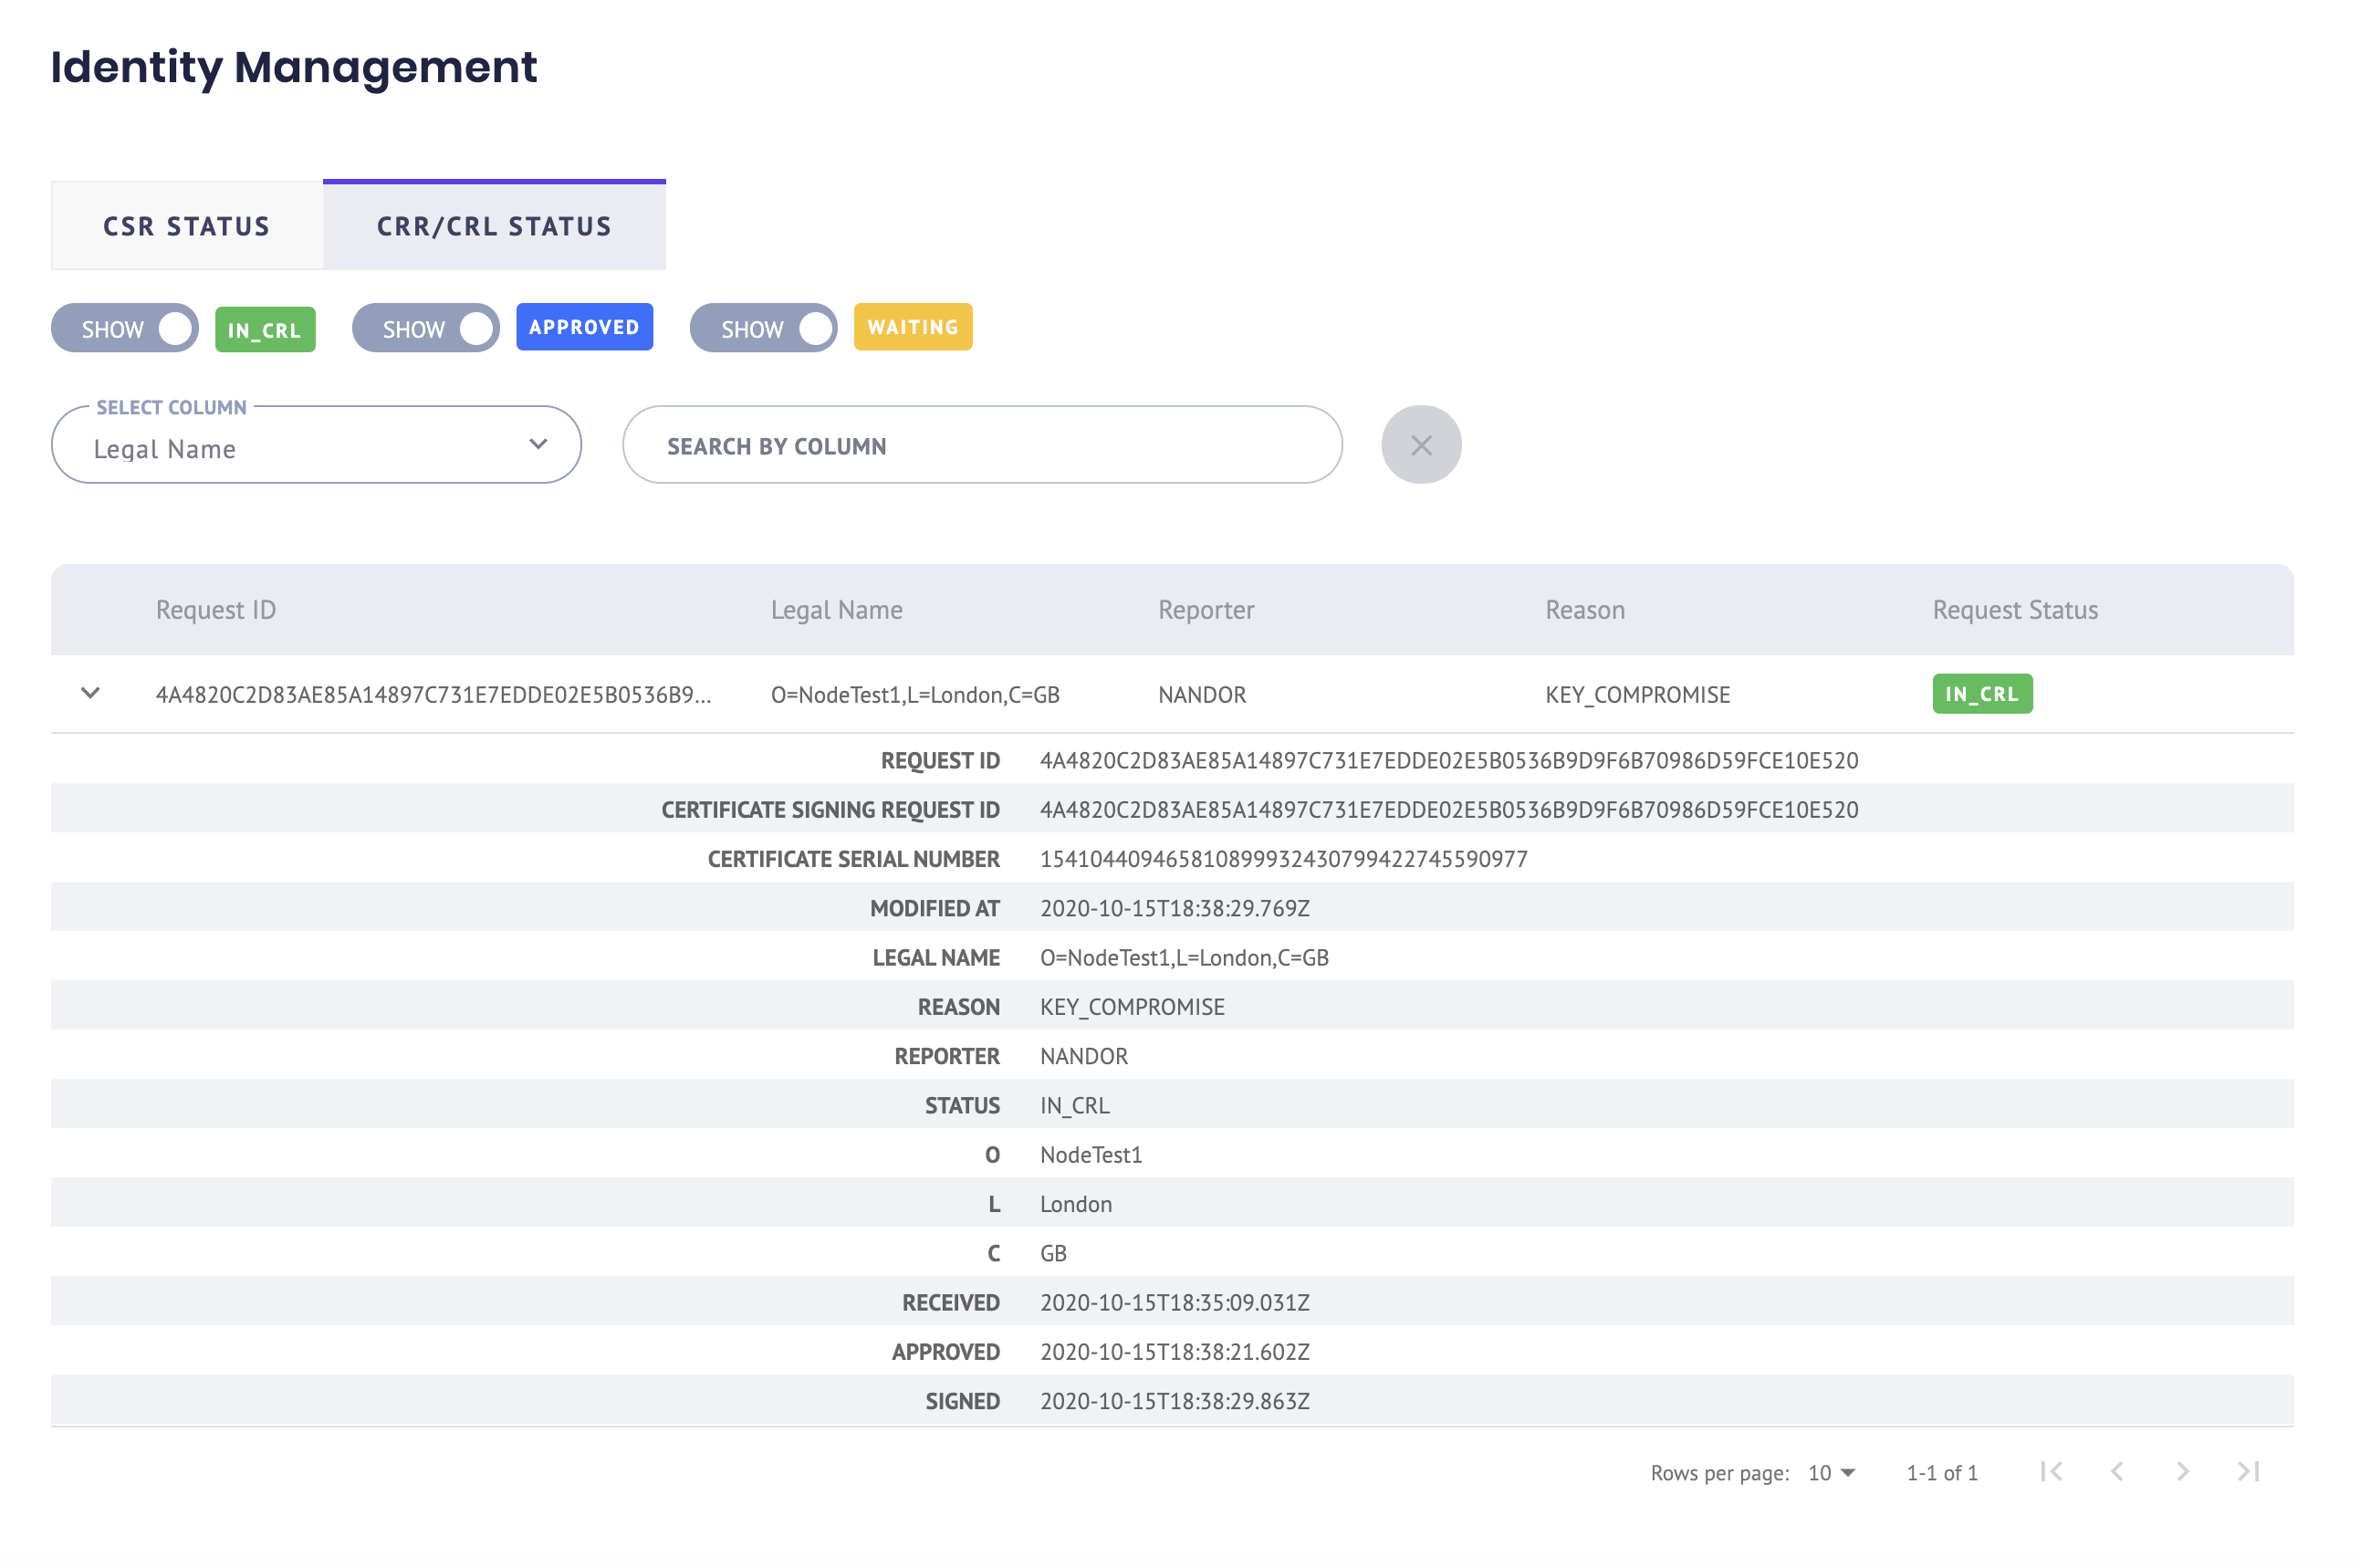
To check the status of members being removed from the network, click the CRR/CRL STATUS tab. You can view the status tag for the removal progress, and details of the membership:
Update services configuration files
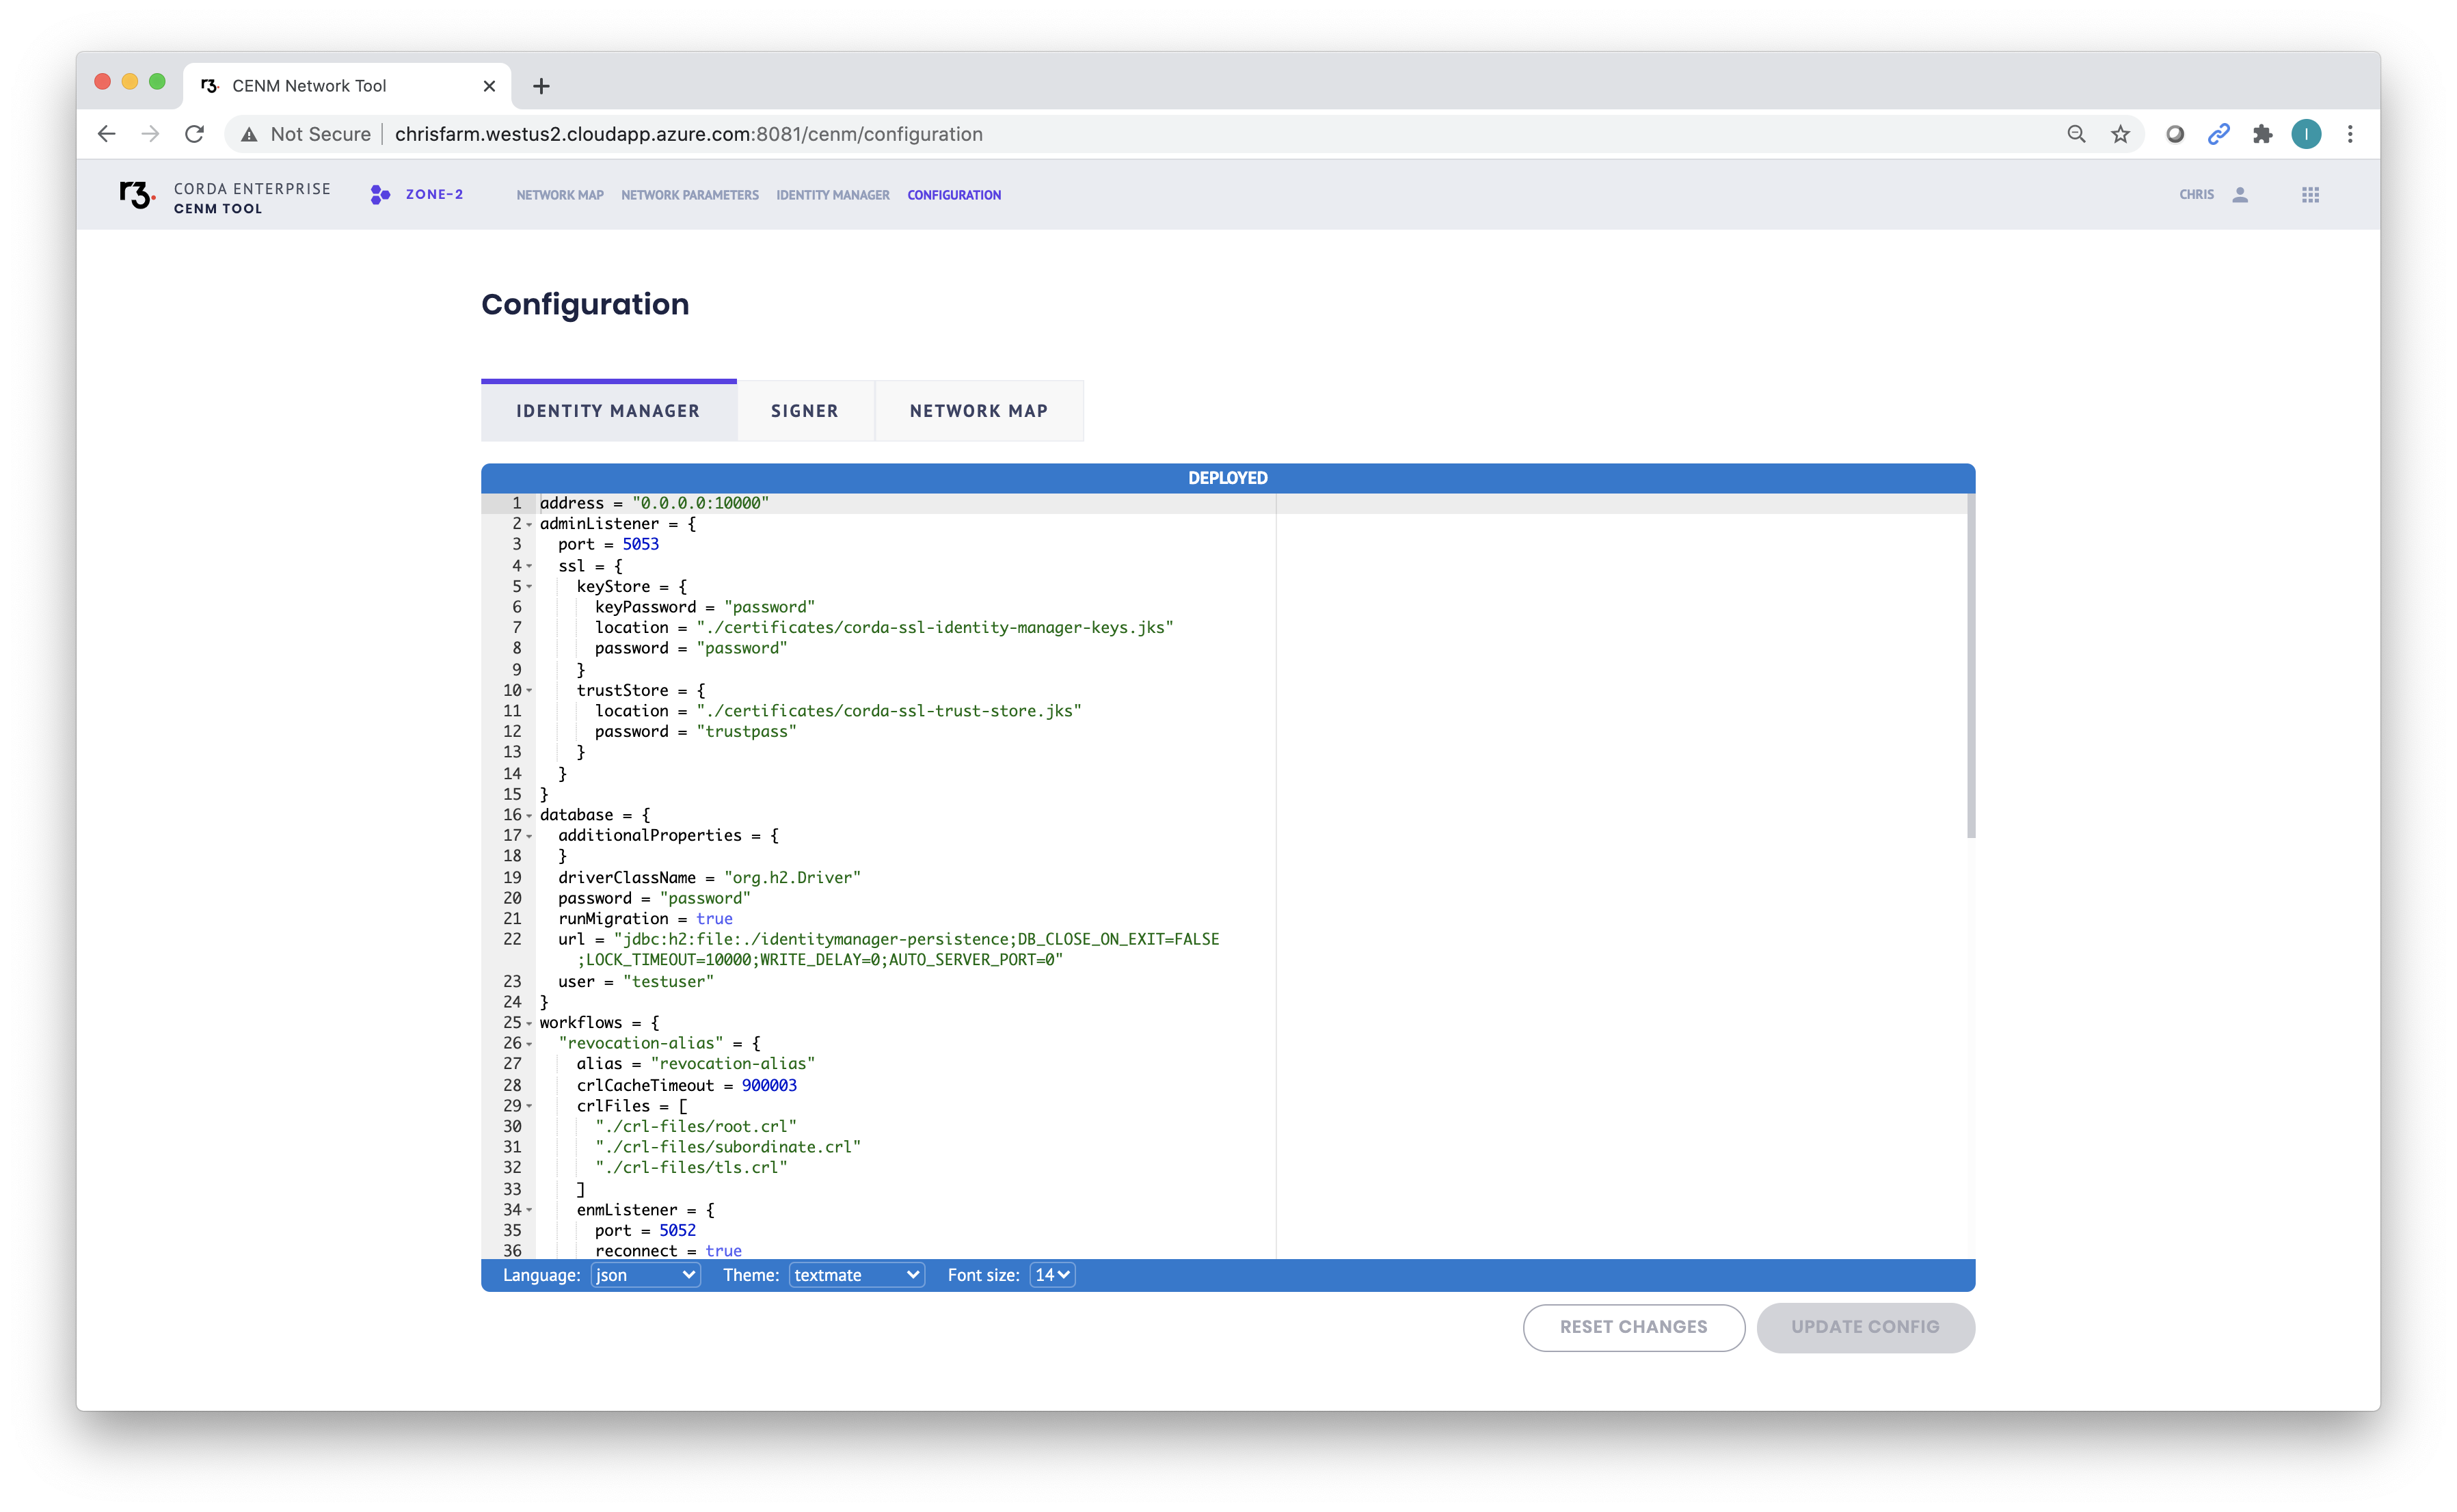
You can access and edit the configuration files of the Identity Manager Service, the Signing Service, and the Network Map Service.
Identity Manager Service configuration
To access and edit the configuration files of the Identity Manager Service, click CONFIGURATION in the top navigation area of the screen, and then the IDENTITY MANAGER tab:
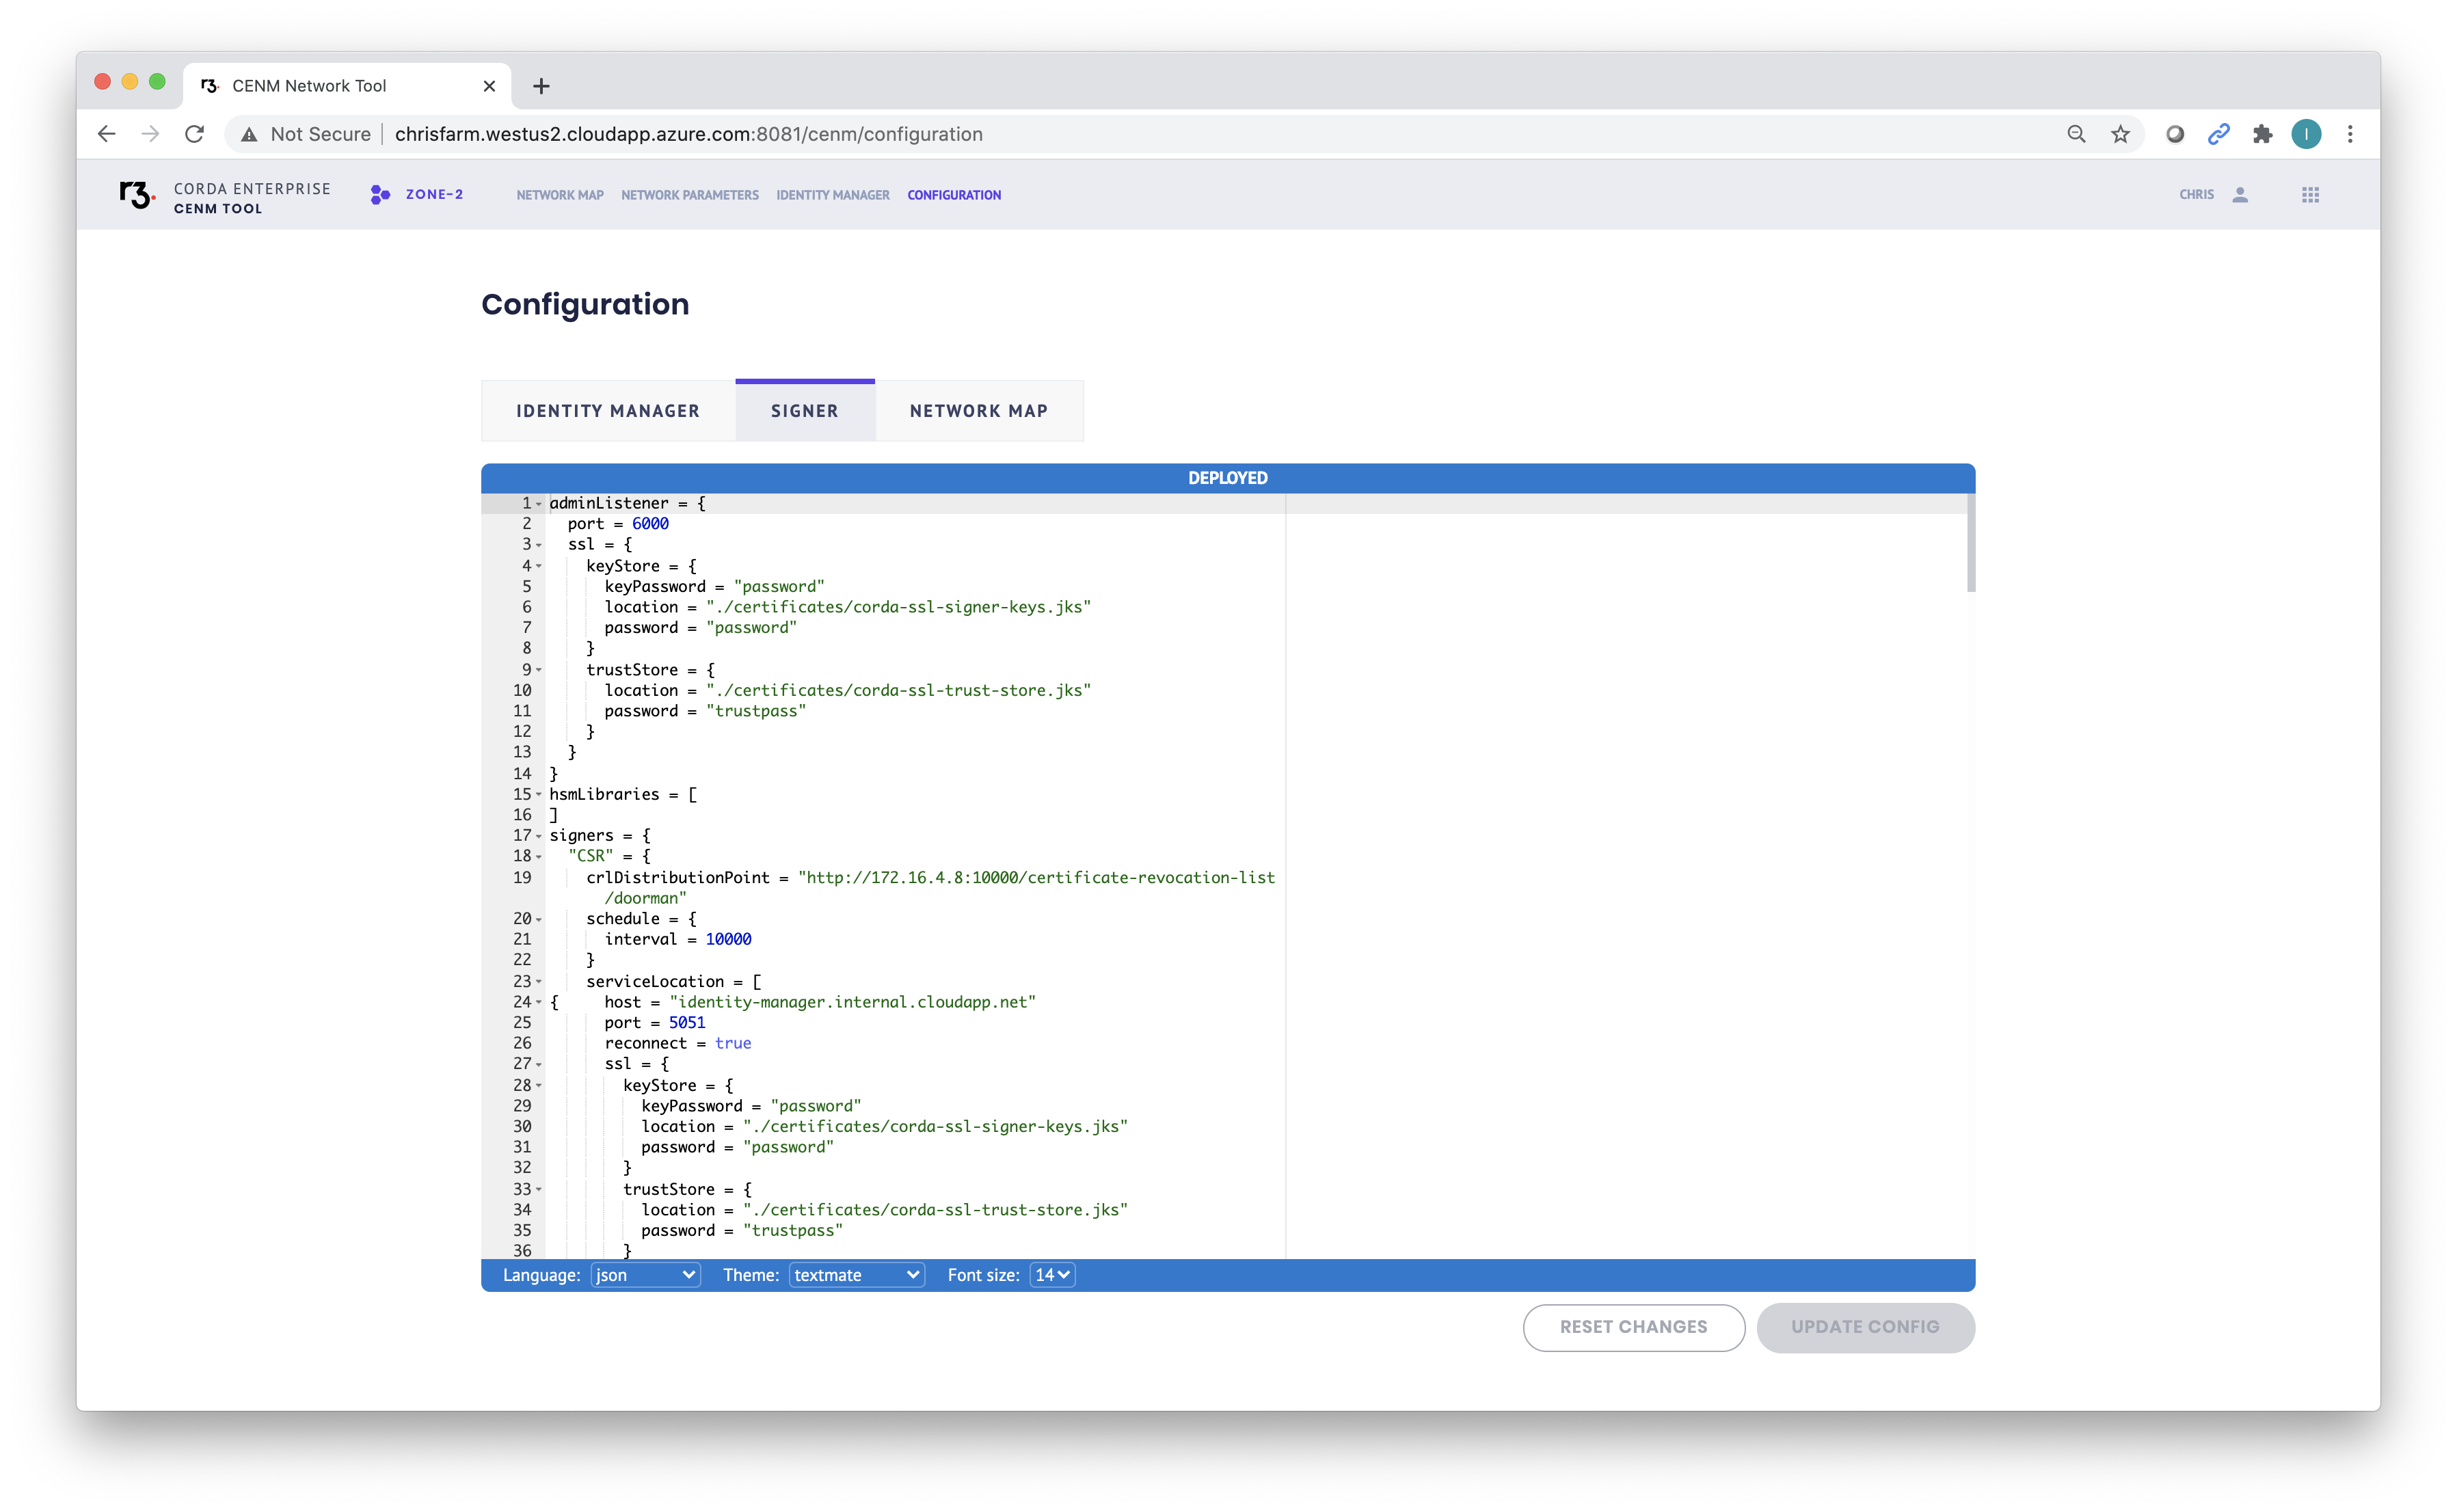
Signing Service configuration
To access and edit the configuration files of the Identity Manager Service, click CONFIGURATION in the top navigation area of the screen, and then the SIGNER tab:
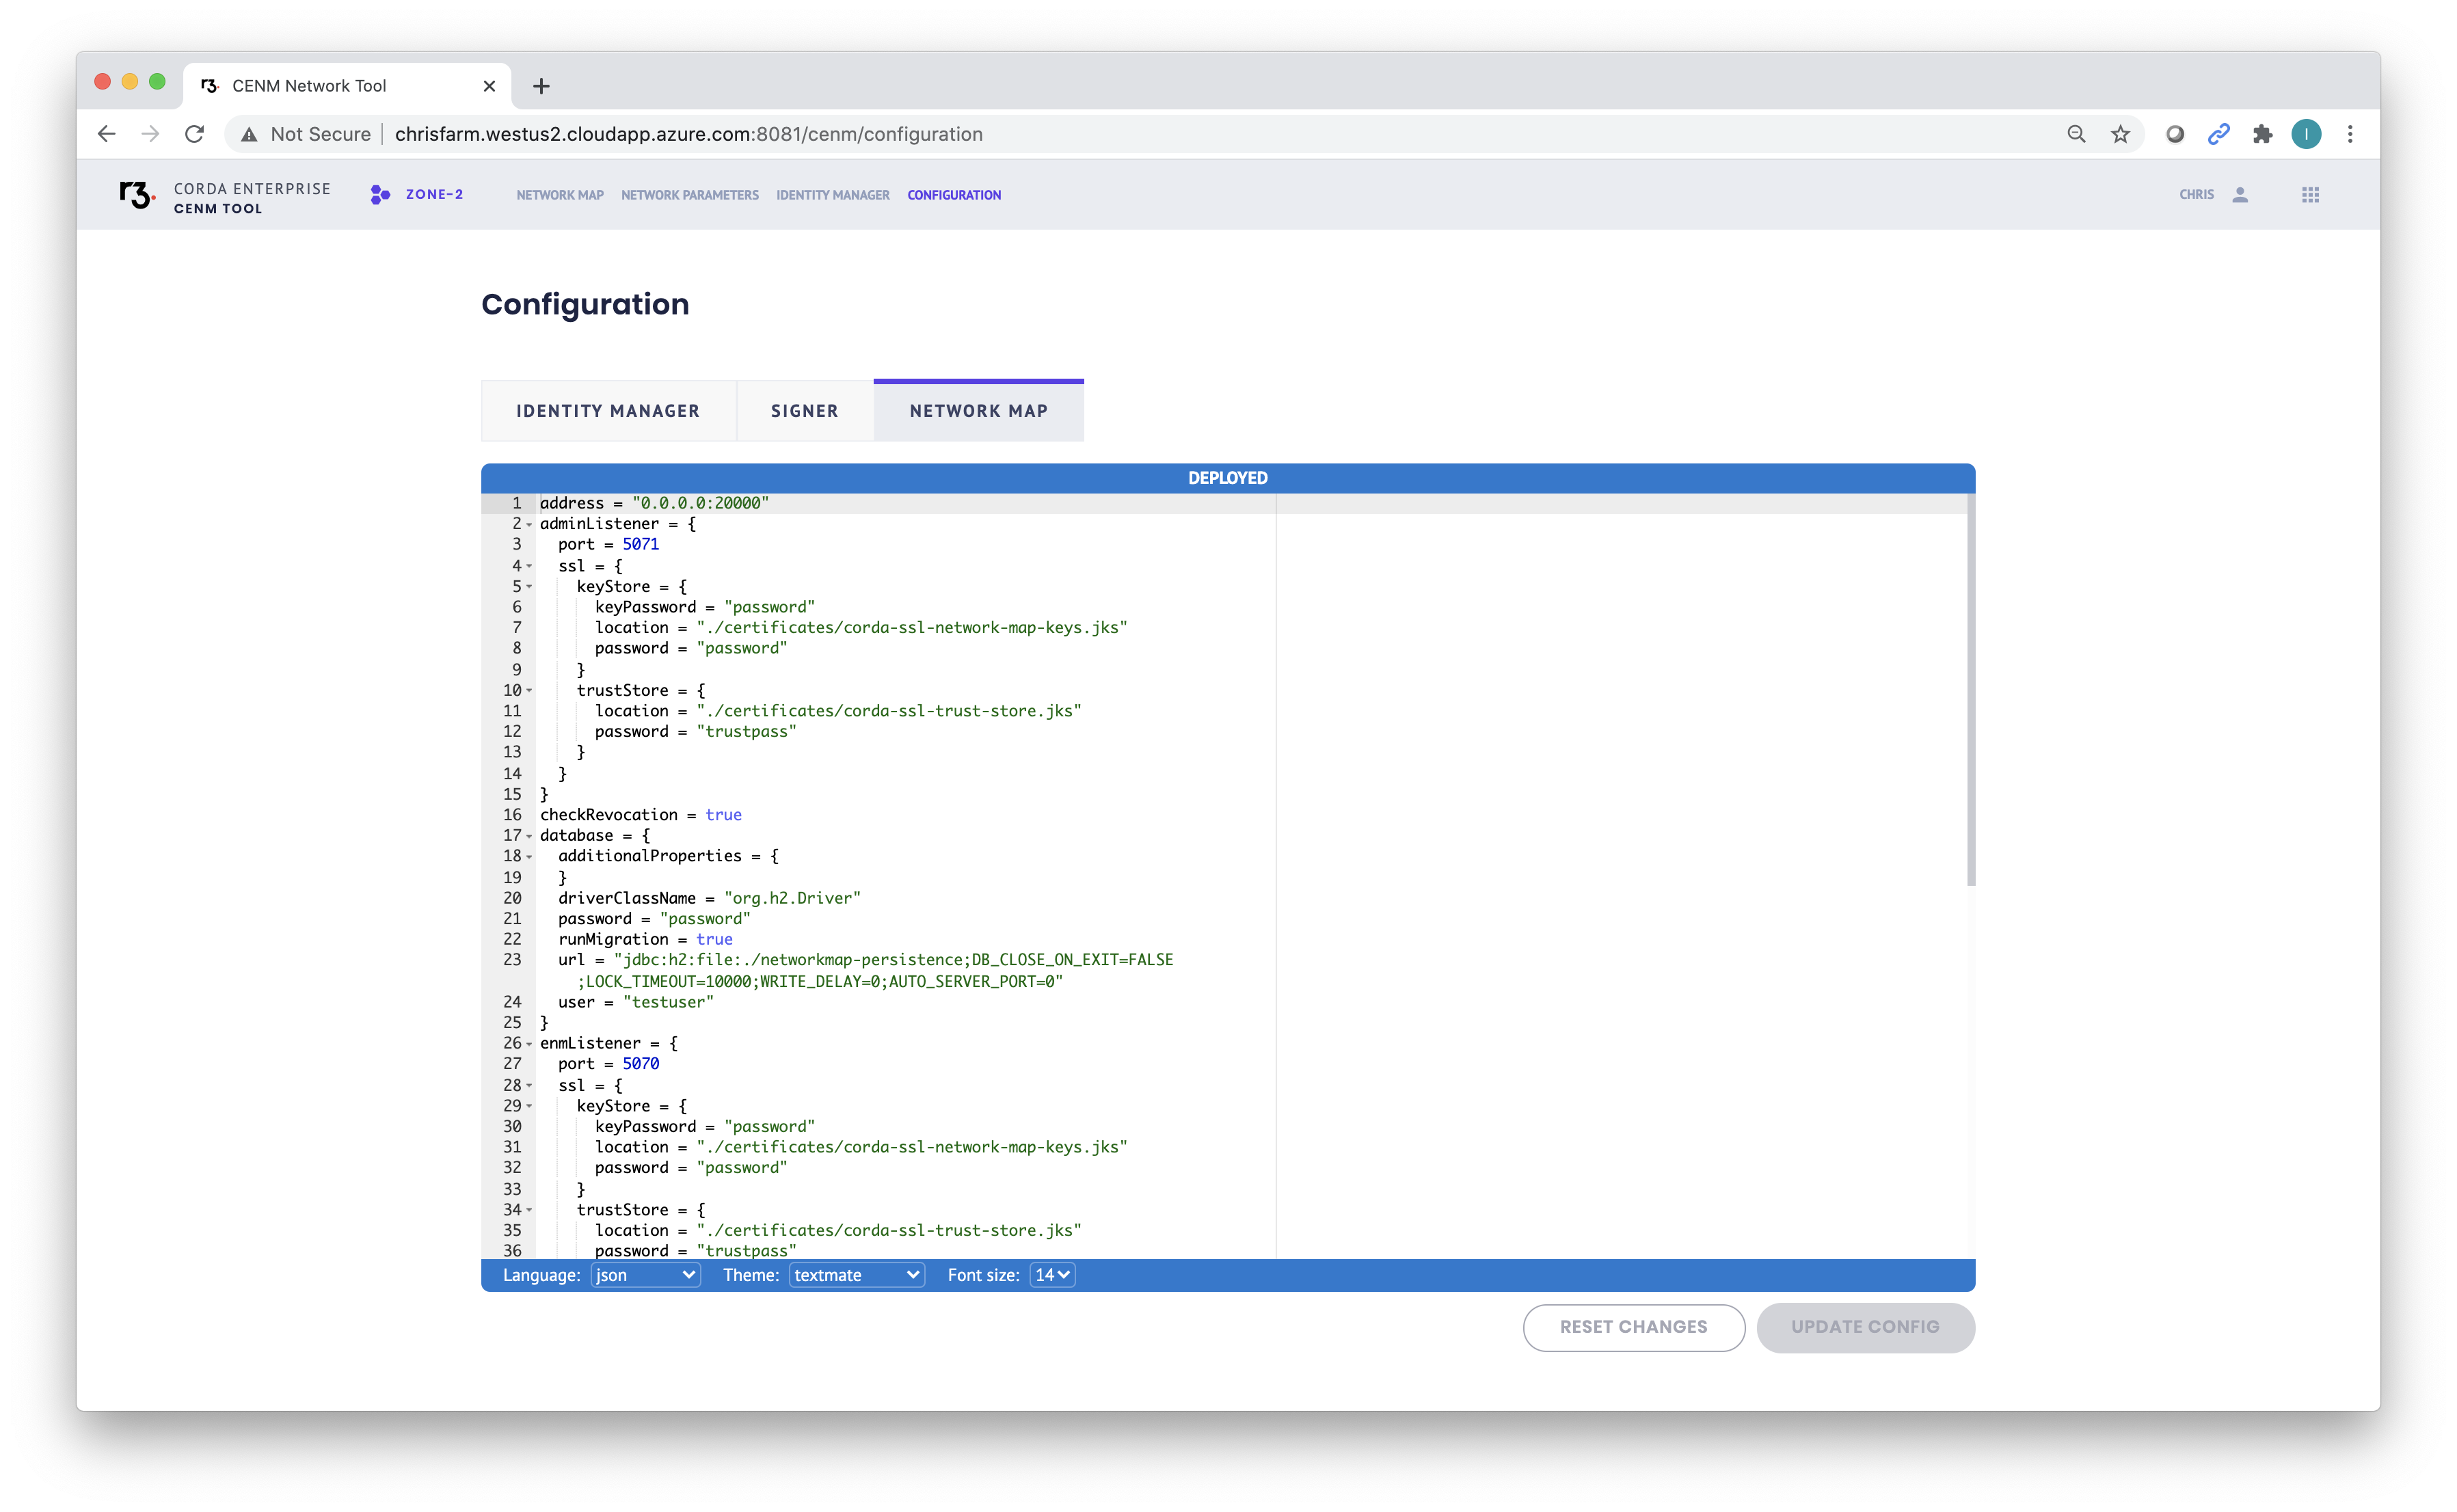
Network Map Service configuration
To access and edit the configuration files of the Identity Manager Service, click CONFIGURATION in the top navigation area of the screen, and then the NETWORK MAP tab:
Was this page helpful?
Thanks for your feedback!
Chat with us
Chat with us on our #docs channel on slack. You can also join a lot of other slack channels there and have access to 1-on-1 communication with members of the R3 team and the online community.
Propose documentation improvements directly
Help us to improve the docs by contributing directly. It's simple - just fork this repository and raise a PR of your own - R3's Technical Writers will review it and apply the relevant suggestions.
We're sorry this page wasn't helpful. Let us know how we can make it better!
Chat with us
Chat with us on our #docs channel on slack. You can also join a lot of other slack channels there and have access to 1-on-1 communication with members of the R3 team and the online community.
Create an issue
Create a new GitHub issue in this repository - submit technical feedback, draw attention to a potential documentation bug, or share ideas for improvement and general feedback.
Propose documentation improvements directly
Help us to improve the docs by contributing directly. It's simple - just fork this repository and raise a PR of your own - R3's Technical Writers will review it and apply the relevant suggestions.