CENM User Admin tool
CENM User Admin tool

The User Admin tool is a visual interface that allows you to manage the profiles of users, groups, and administrators who need access to your network services. You can use the tool to create roles with specific permissions and assign them to users. For example, you can give a user of the Identity Manager a role that permits them to request the revocation of a network certificate.
With the User Admin tool, you can:
- Add users. A user is anyone who requires access to perform network operations.
- Add administrators. An administrator can add and manage users with the tool. For security reasons, an administrator cannot perform any network operations. Only a user can perform this task.
- Manage user and administrator login details.
- Create and manage groups. A group is comprised of multiple users with shared roles and permissions.
- Create and manage roles. A role is a set of permissions that can be assigned to users and groups of users.
Who can use it
You can only use the User Admin tool if you are registered to use the tool as an Administrator. If you are the first person using the tool in your organisation, you need to request access from your network owner’s organization.
Access the CENM User Admin tool
You access the User Admin tool from the location of your FARM Service instance. Enter the full address of your FARM Service, including the port number, followed by /admin into a web browser.
For example:
http://10.230.41.12:8080/admin
First login
Your initialisation credentials for logging in for the first time are established using the --initial-user-name and --initial-user-password commands when managing the configuration of the Auth Service.
If you do not have these, you need to access them from the operator who configured your Auth Service.
- Login with the initialisation credentials.
- Create your own account as an Administrator.
- Login with your new credentials.
- Delete the initialisation account.
Change your password
When logging into the User Admin tool as an administrator for the first time, you must change your temporary password. You can repeat this process whenever you want.
To change your password:
Login to the User Admin tool. If this is your first use of the tool, or you have requested a new login, use the temporary password you have been given.
On the next screen, click on the user profile button in the top right-hand corner.
On the User Details screen, enter and confirm your new password in the Change user password fields.
Click Submit.
You have changed your password. You are automatically logged out of the User Admin tool, and can now log back in using your new password.
Add a new user or administrator
Users are able to access network services to perform relevant tasks. When you create a user, you can also assign them a role, and add them to a group.
Administrators can only perform tasks on the User Admin tool - an administrator in this tool cannot have any role as a user on your network operation services.
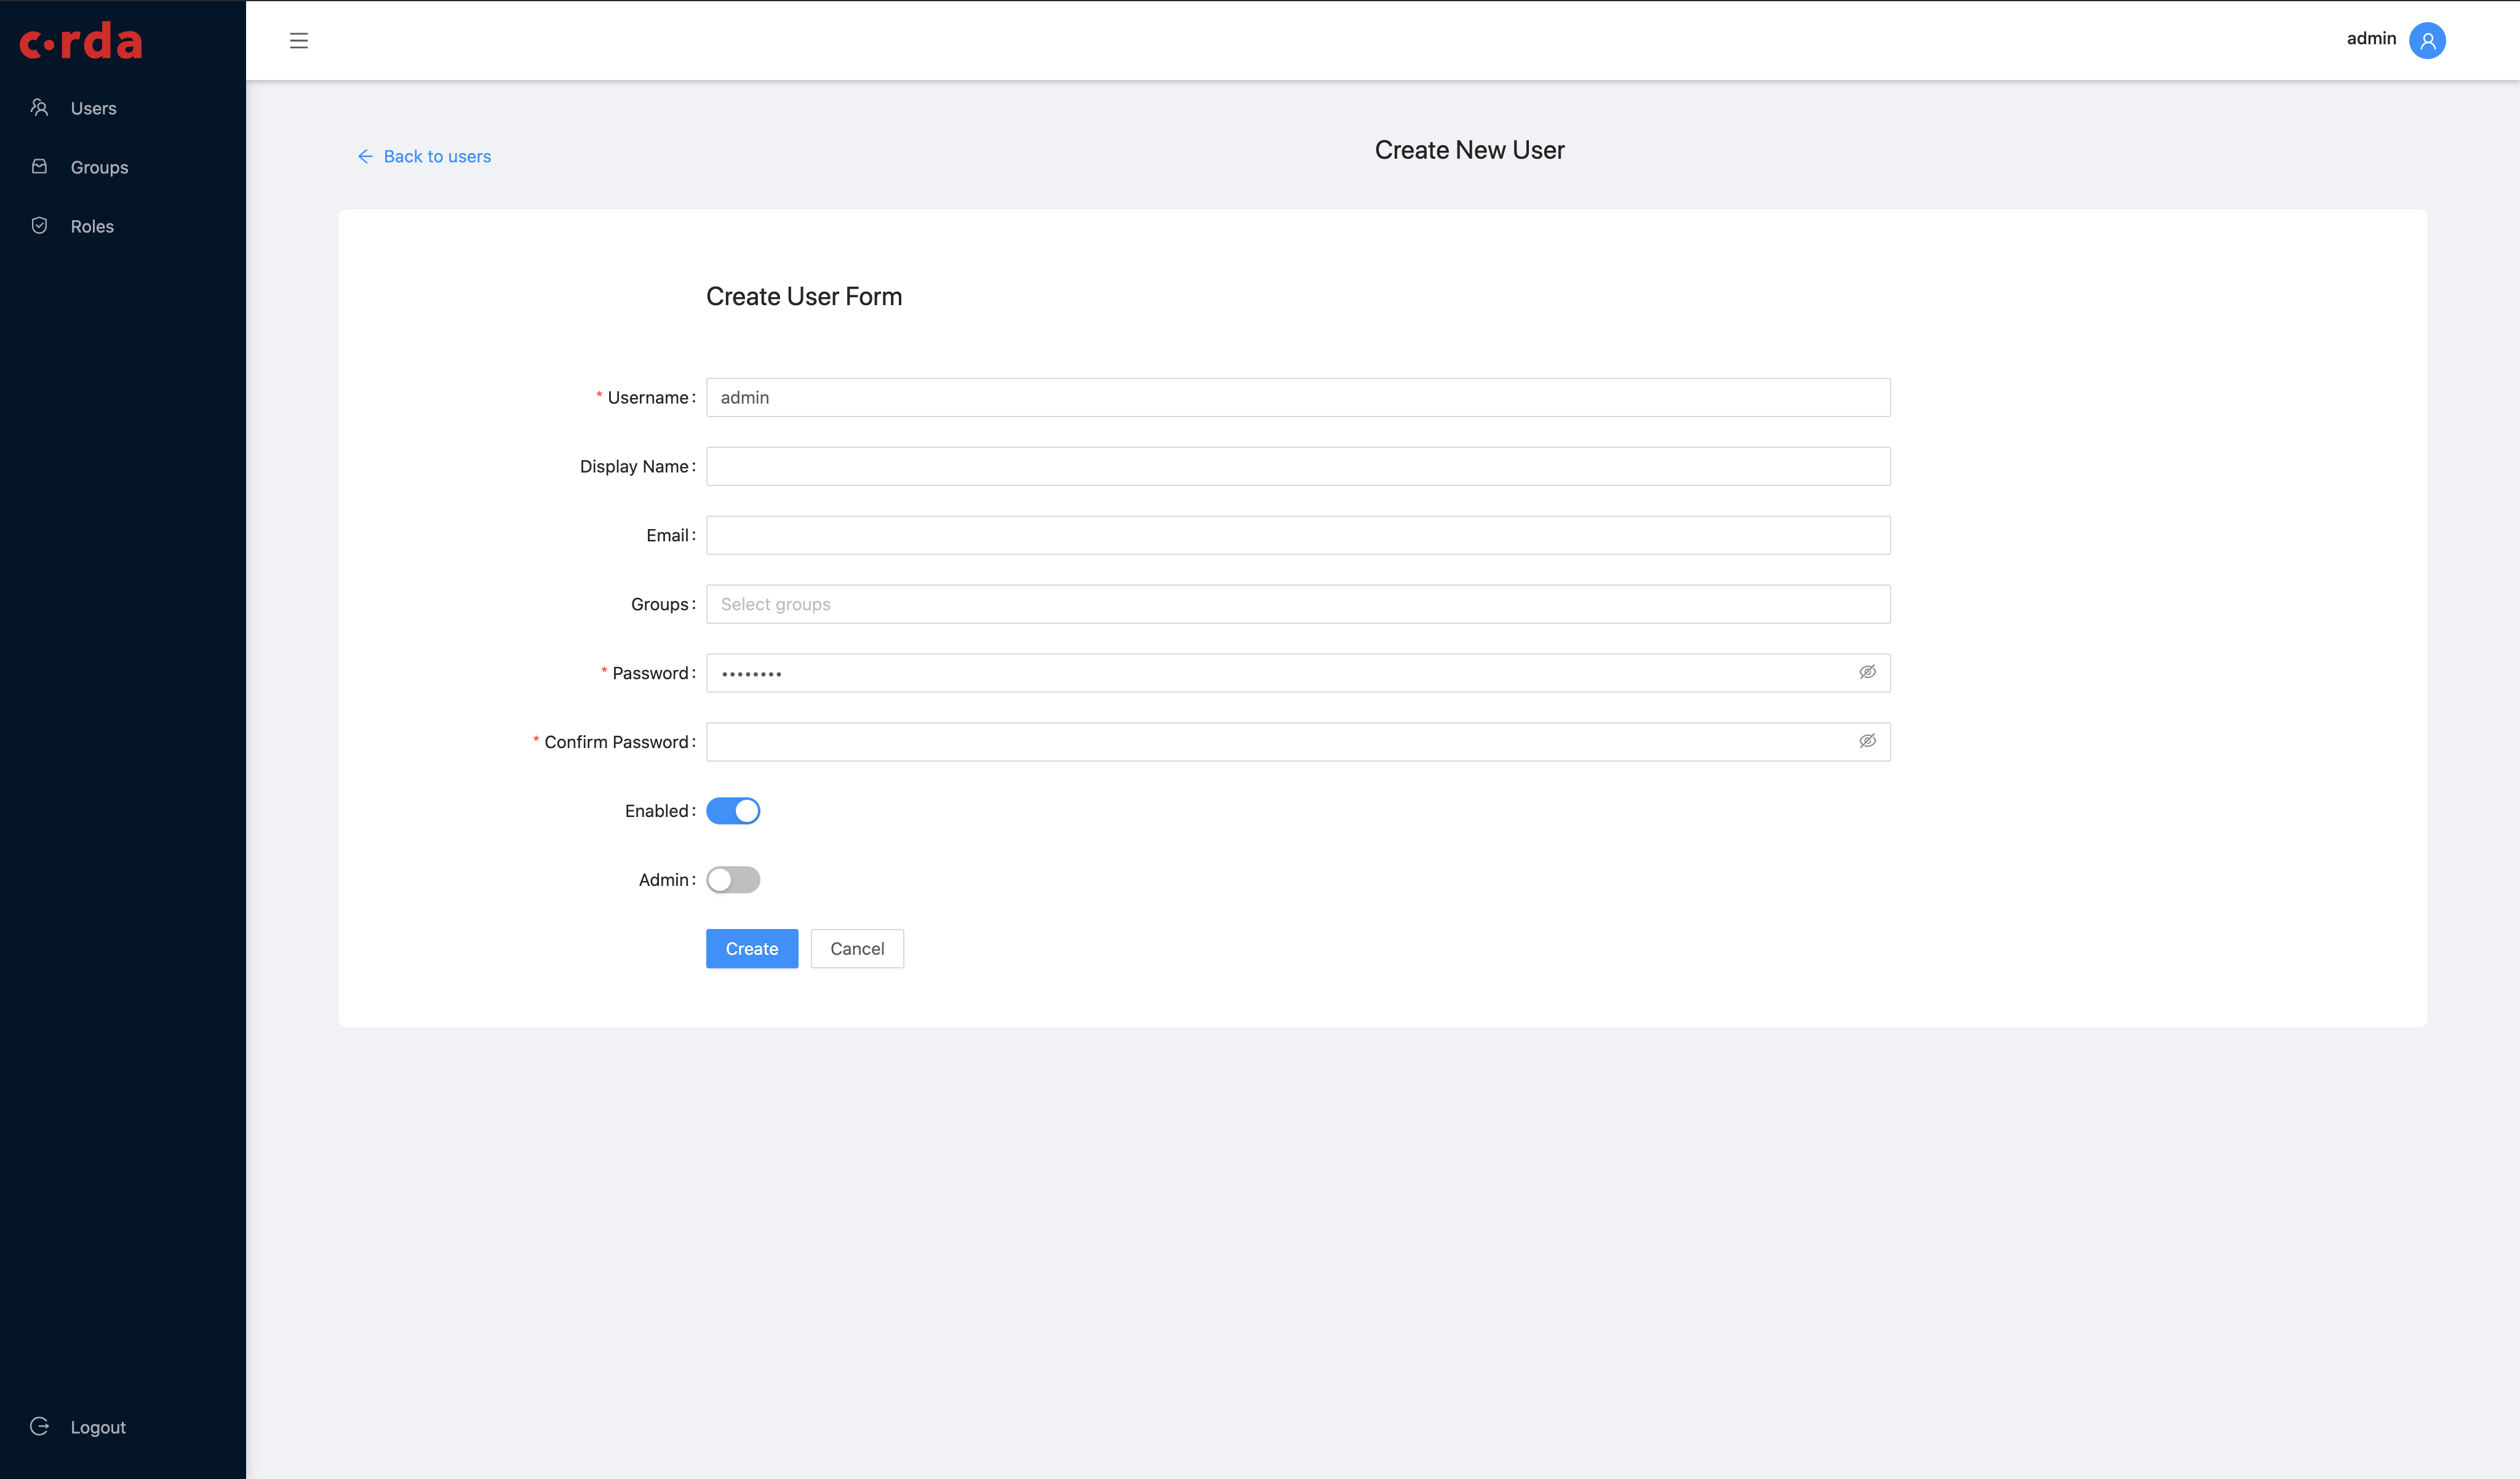
To add a new user or administrator:
From any screen, click Users on the left-hand menu. The Users screen is displayed. You can see all the users currently managed within the User Admin tool.
Click the Create icon in the bottom right-hand corner of the screen.
On the Create new user screen, enter the user’s username, display name, and email details in the fields provided.
In the Groups section, select any groups you wish this user to be added to when their account is activated.
In the Password field, choose a temporary password that the new user can change on their first use of the User Admin tool.
Select Enabled for the account to be active immediately. To activate the account later, leave this switched off.
To make this user an administrator, set the Admin switch to active.
Click Submit.
You have added a new User.
Next steps for a new user
New users must change the password you give them using the CENM CLI. You must give new users these instructions when you add them.
Manage a user
You can change a user’s roles, group membership and active status.
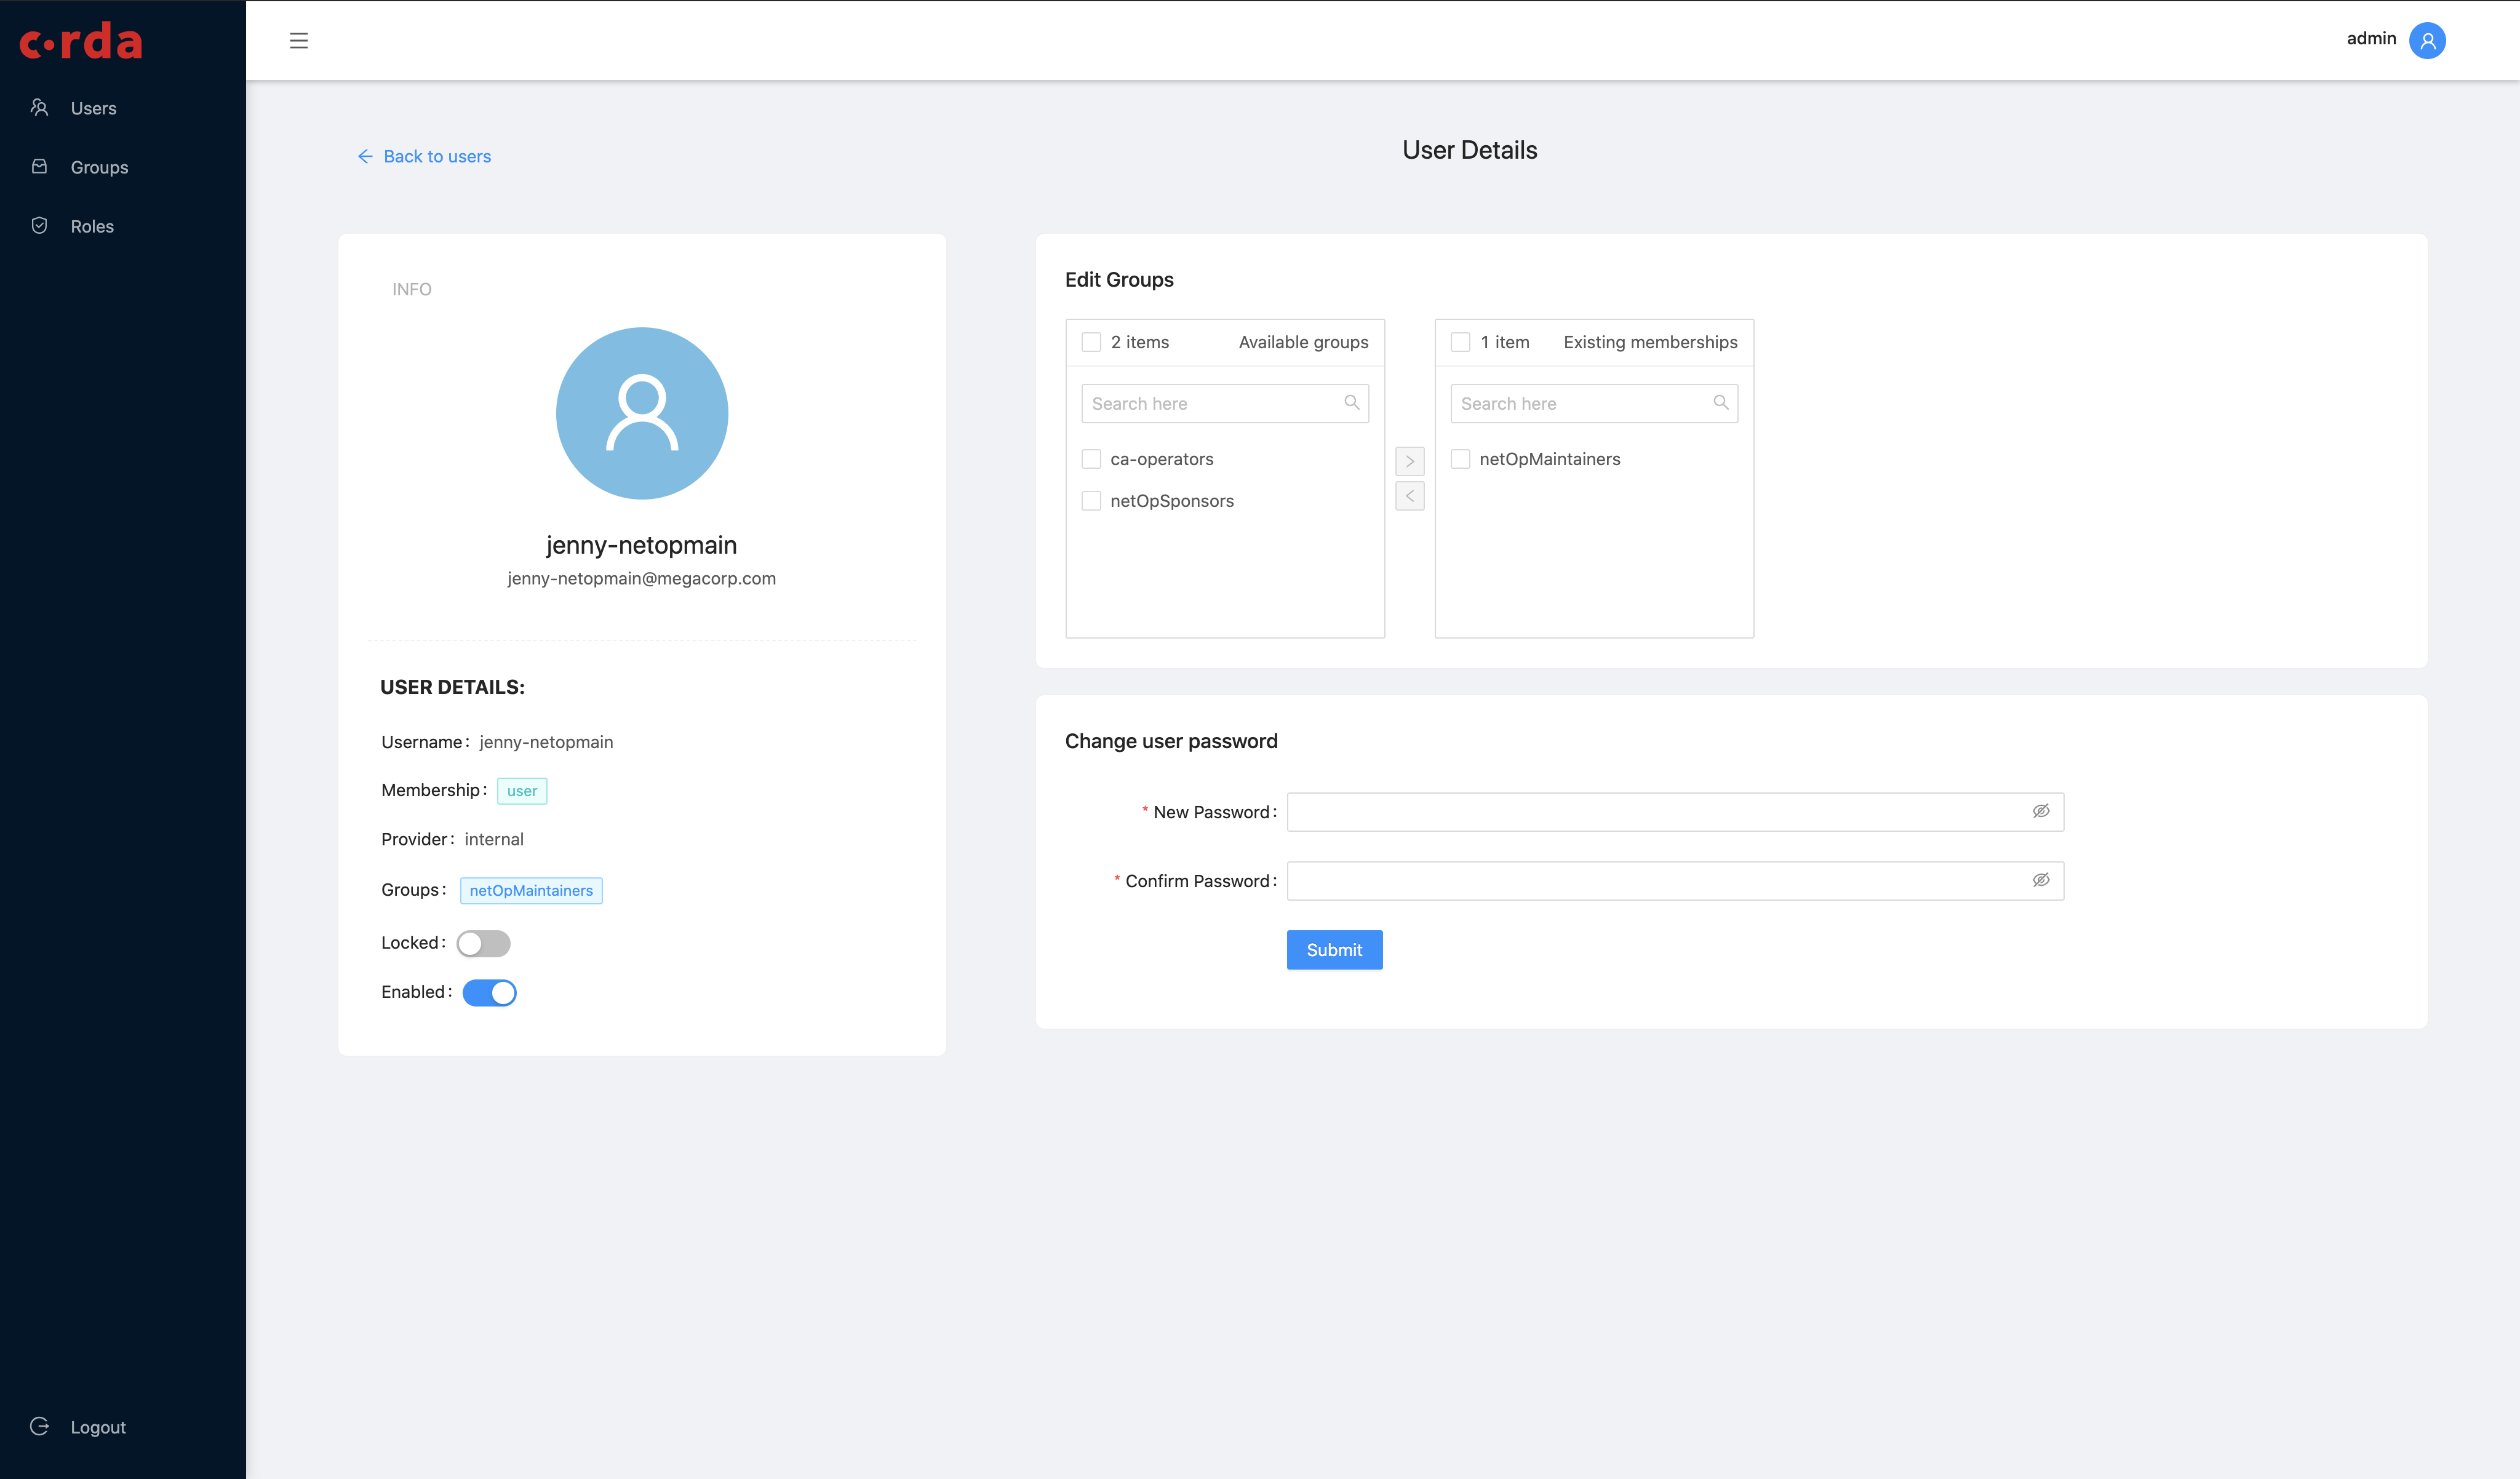
To amend a user’s active status, roles and group membership:
From any screen, click Users on the left-hand menu. The Users screen is displayed. You can see all the users currently managed within the User Admin tool.
Click on the Username of the user whose details you wish to amend.
On the User details screen:
- Deactivate or reactivate a user with the Active switch.
- Add the member to groups by selecting groups from the Available groups box and clicking the > chevron move them to the Existing memberships box. To remove the user from groups, select and move in the opposite direction.
All updates are saved automatically. Click Back to users in the top left-hand corner of the screen to return to the list of users.
You have managed a user’s groups and active status.
Create a new Group
You can create Groups to give multiple users common roles and permissions.
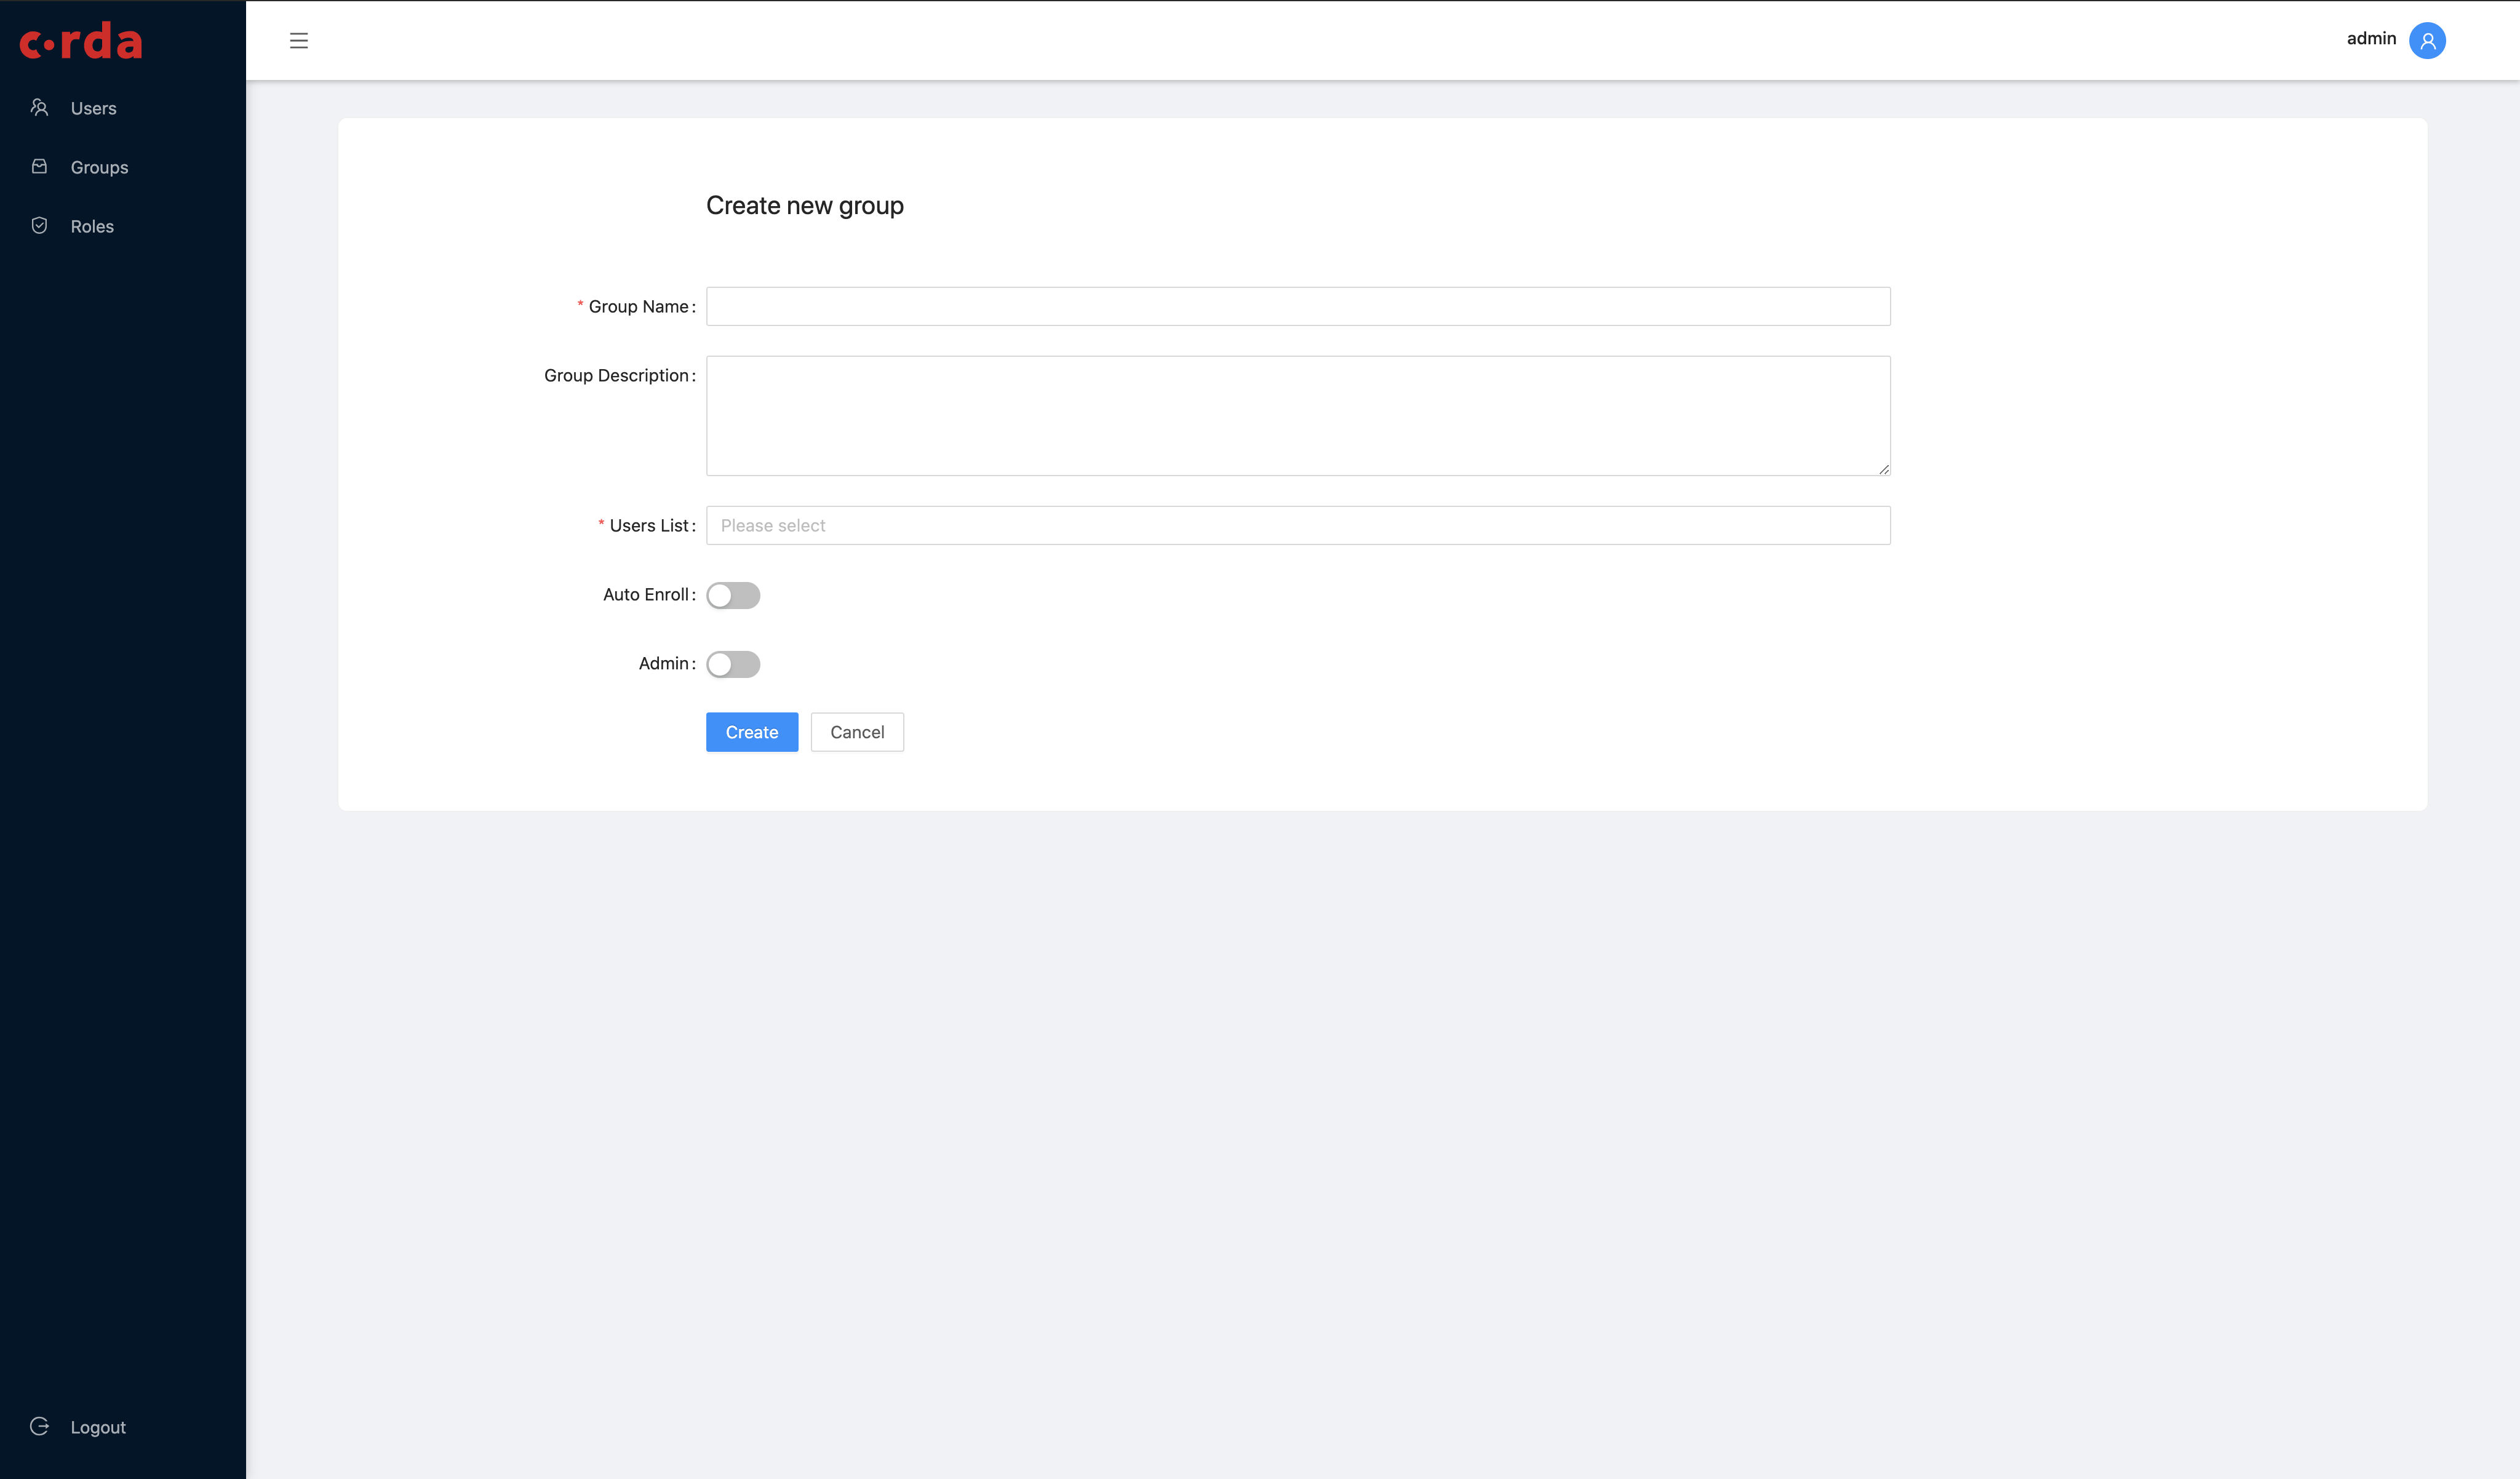
To create a Group:
From any screen, click Groups in the left-hand menu. The Groups screen is displayed. You can see your existing groups in a card formation.
Click the Create icon in the bottom right-hand corner of the screen.
In the Create new group screen, add a name in the Group name field.
Add an optional description in the Description field - this can be used by other administrators to quickly see the purpose of the group.
Use the Users list dropdown menu to select all the users you wish to be members of this group.
Select Admin to create a group of administrators for this tool. These users will no longer be able to perform any other CENM tasks outside of this tool.
Click Submit.
You have created a new group. You can access your newly created group from the Groups screen.
Manage a Group
You can add or remove members of a group, or delete an existing group any time. Deleting a group does not delete the users in the group.
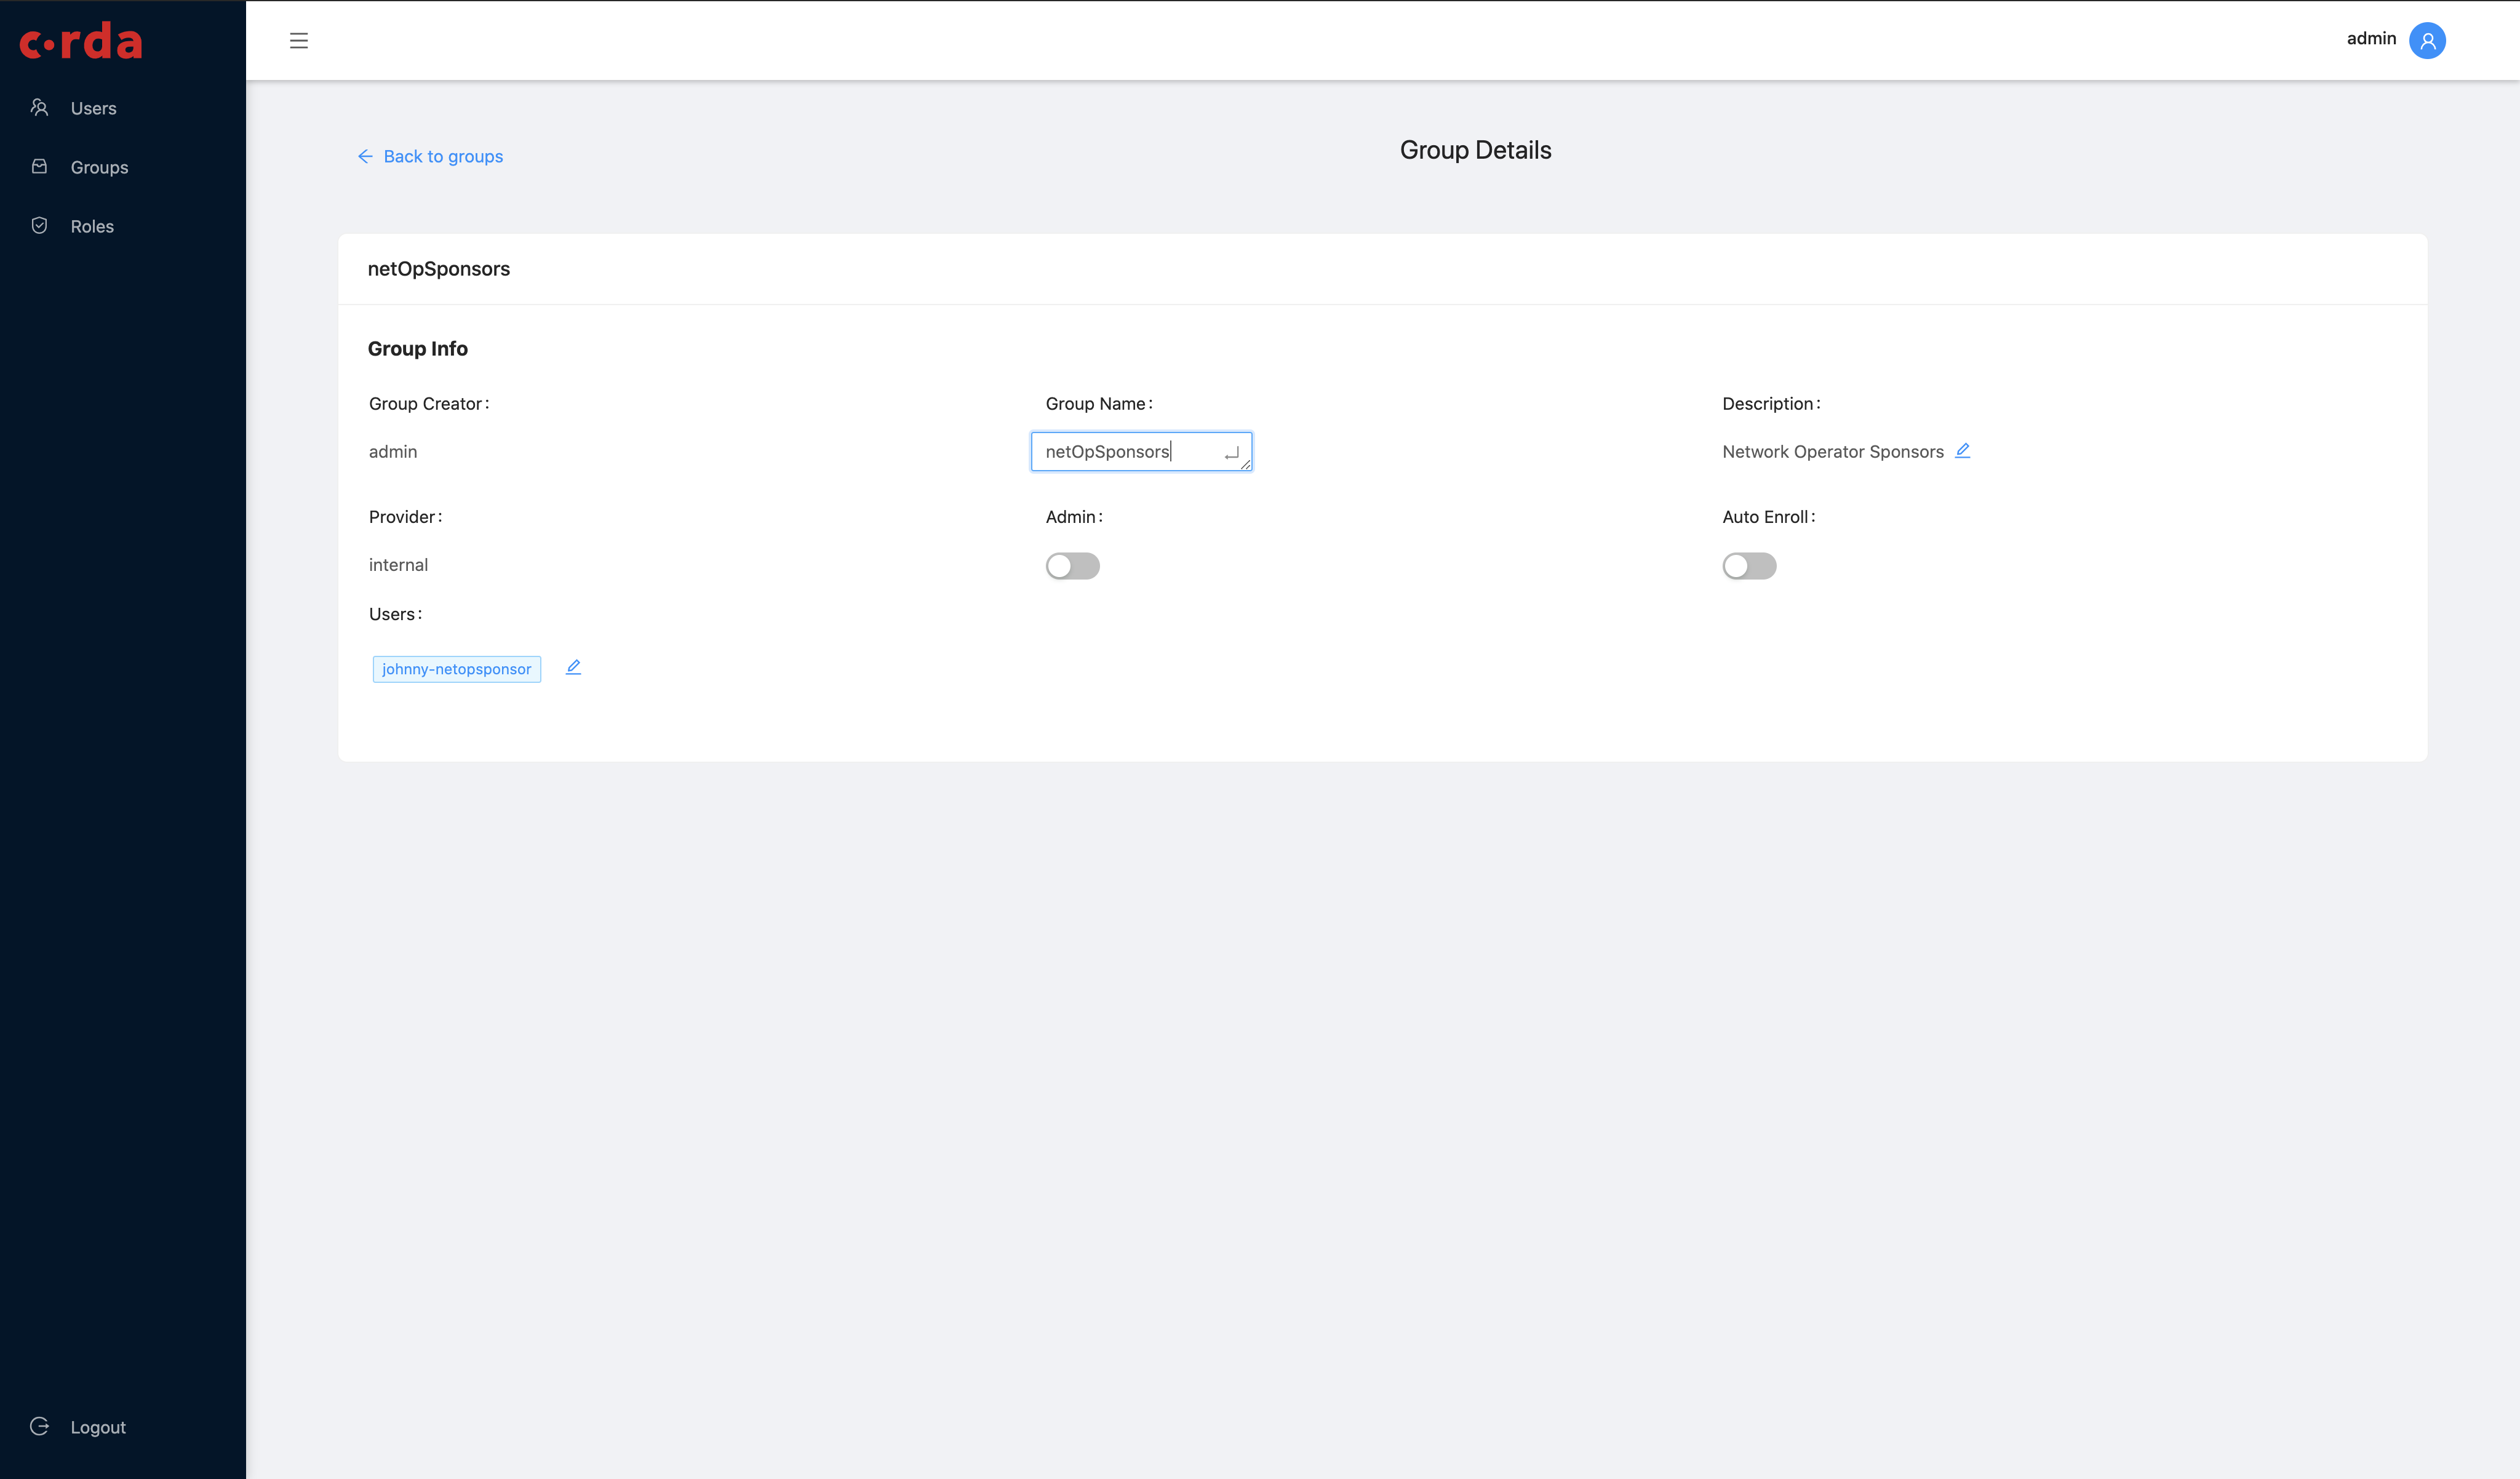 To make changes to a group:
From any screen, click Groups in the left-hand menu. The Groups screen is displayed. You can see your existing groups in a card formation.
To make changes to a group, click the cog-shaped settings icon.
On the Group details screen, click on any of the pencil-shaped edit icons to:
- Edit the name and description of the group.
- Add new members to the group.
- Remove members from the group.
Changes are saved automatically. When you are finished, click Back to groups.
You have made changes to your group. If you have removed a user from the group, they may lose permissions that they had been given as a group-member. You can check an individual user’s roles to confirm this.
To delete a Group:
From any screen, click Groups in the left-hand menu. The Groups screen is displayed. You can see your existing groups in a card formation.
Click the trash icon.
In the confirmation dialogue box, click Yes to confirm you want to delete the group.
You have deleted a group. The users in the group are still active. Any roles you assigned at group level are no longer applied to the users who were in the group.
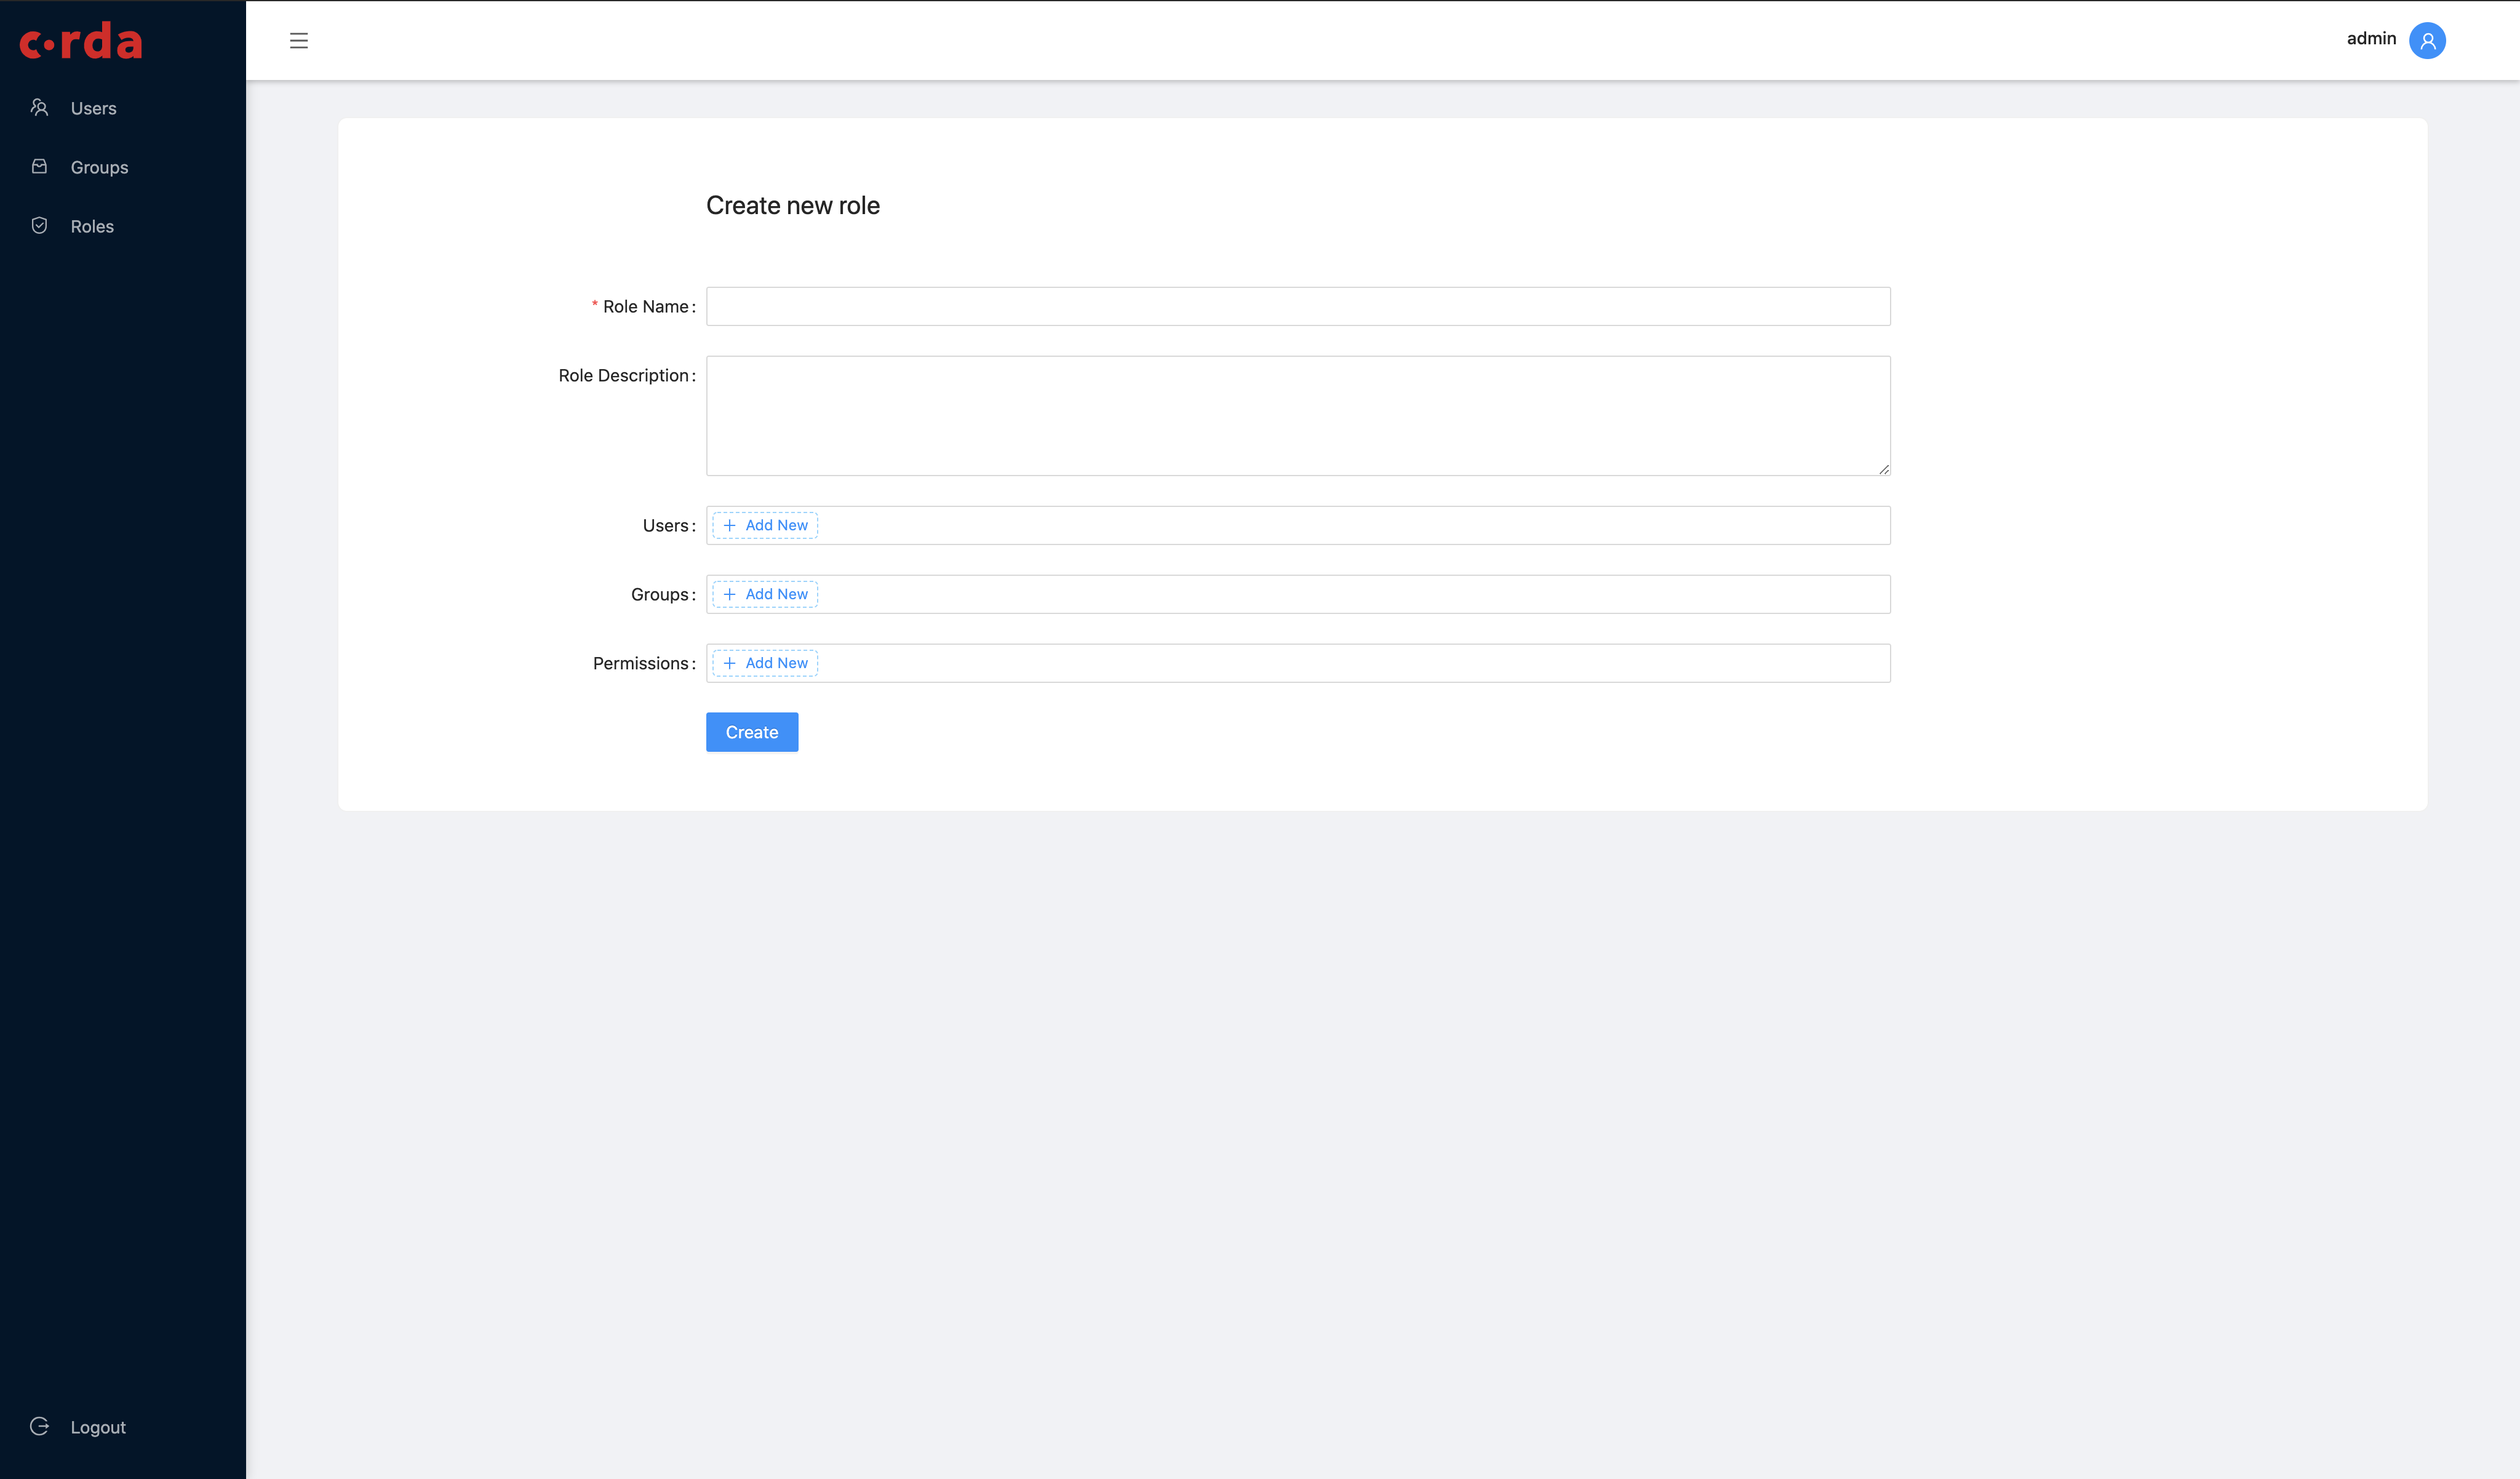
Create a new Role
Roles are made up of permissions that allow users to perform tasks in CENM. You can create roles by combining the required permissions, and then assigning the role to users and/or groups.
 To create a new role:
From any screen, click Roles in the left-hand menu. The Roles screen is displayed. You can see the existing roles in a card formation.
Click the Create icon in the bottom right-hand corner of the screen. The Create new role screen is displayed.
In the Role name field, enter the name for this role.
In the Role description field, enter a free text description with information about what the role allows users to do.
In the Users field, select the users you wish to assign the role to. If you want to assign the role to multiple users, you might prefer to to create a group and assign the role to the group.
In the Groups field, select the groups you wish to assign the role to.
- In the Add assignments dialog box, select the group you require from the Role assignee list.
- From the Assignment scope list, select the areas to which this role applies.
- Click Assign.
In the Permissions field, select the permissions granted to a user with this role.
Click Submit.
You have added a new role. All users and groups assigned this role are granted its permissions with immediate effect.
Manage a Role
You can assign a role to additional users and groups, remove roles from users and groups, add and remove permissions in a role, and delete roles at any time.
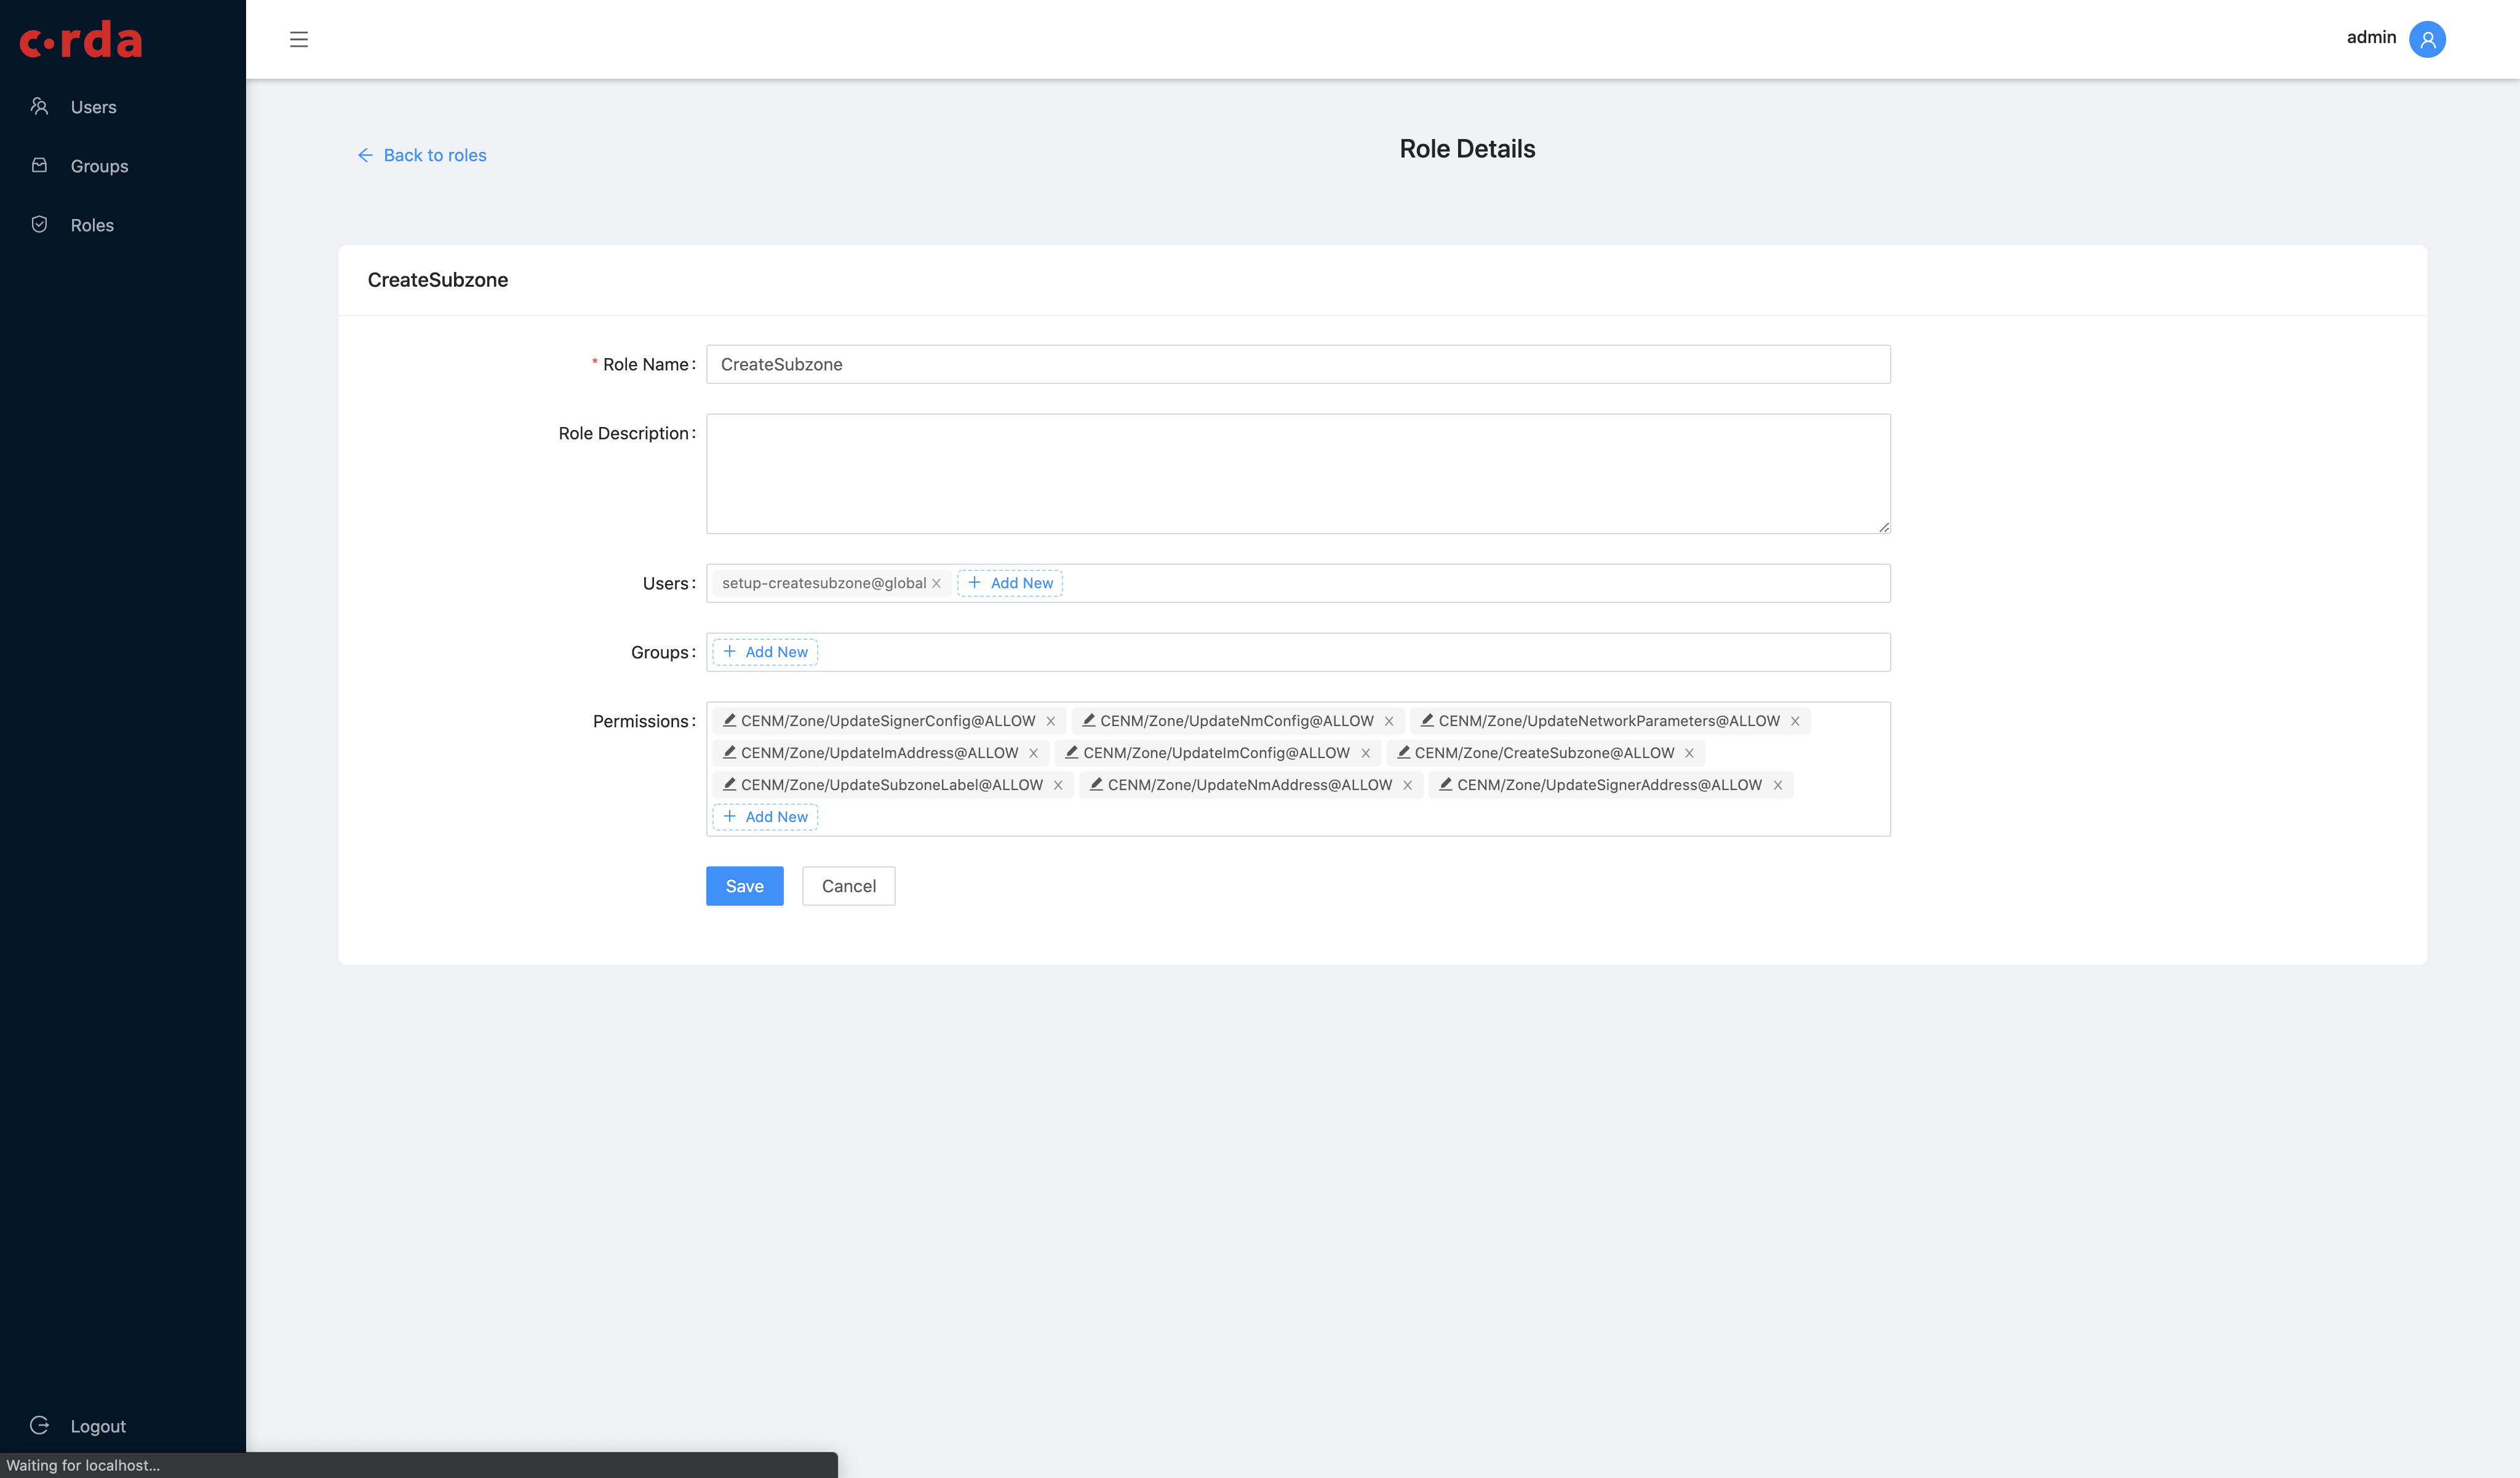 To amend the properties of a role:
From any screen, click Roles in the left-hand menu. The Roles screen is displayed. You can see the existing roles in a card formation.
Click the menu button in the right corner of the card for the role you wish to amend.
On the Role details screen, add or remove users, groups, or permissions as required using the Edit or Delete icons in each field.
Click Save.
You have amended the properties of a role. Your changes will take effect immediately. If you have removed this role from users or groups, they will no longer have permissions associated with that role. If they are logged into the system, they will be unable to perform tasks enabled by this role.
Was this page helpful?
Thanks for your feedback!
Chat with us
Chat with us on our #docs channel on slack. You can also join a lot of other slack channels there and have access to 1-on-1 communication with members of the R3 team and the online community.
Propose documentation improvements directly
Help us to improve the docs by contributing directly. It's simple - just fork this repository and raise a PR of your own - R3's Technical Writers will review it and apply the relevant suggestions.
We're sorry this page wasn't helpful. Let us know how we can make it better!
Chat with us
Chat with us on our #docs channel on slack. You can also join a lot of other slack channels there and have access to 1-on-1 communication with members of the R3 team and the online community.
Create an issue
Create a new GitHub issue in this repository - submit technical feedback, draw attention to a potential documentation bug, or share ideas for improvement and general feedback.
Propose documentation improvements directly
Help us to improve the docs by contributing directly. It's simple - just fork this repository and raise a PR of your own - R3's Technical Writers will review it and apply the relevant suggestions.